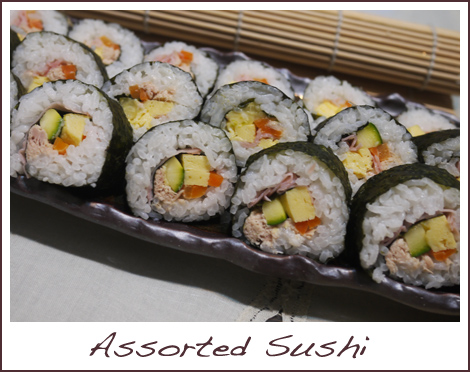
Sushi – a fun alternative to cooking


If you have never made sushi before, I highly recommend you try. Besides cooking the rice, and making your own tamago should you wish to include it, there really isn’t much more cooking needed. What’s more, it’s fun to make and you can be as creative as you wish. The best part? Sushi, for the larger part, is very healthy. There are many fusion types of sushi now that include some “not so healthy” ingredients that you may not find in a traditional Japanese restaurant. These fusion sushi incorporate popular western choices such as Mayonnaise and spicy sauce and sometimes do increase the number of calories, though not significantly. So, why is sushi so healthy?

Sushi can largely be divided into two types – maki and nigiri. Makis are the rolled up sushi while Nigiri are the ones with ingredients on top. Nori or seaweed, an integral part of both types of sushi, is highly nutritious as it contains a great source of minerals found in the ocean such as Iron, vitamin C, vitamin A, magnesium, selenium, choline, eicosapentanoic acid, inositol and other B vitamins. In addition, nori does not contain salt and sugar. Sounds like a super food eh? Rice vinegar, used to prepare sushi rice, helps to promote cell metabolism. It is known to help lower body fat percentage.

If you are convinced to try making sushi at home, here is my favourite sushi rice recipe and some handy tips.

Sushi Rice
Yields 2 cups of rice

2 cups sushi rice
2 1/2 cups water
4 tablespoons rice vinegar
3 tablespoons sugar
2 teaspoons salt
2 tablespoons mirin

Method:

  1. Rinse rice 3 times and drain in a colander till dry.
  2. Combine vinegar, sugar, salt and mirin together in a small pot over low heat till sugar dissolves. Allow this to cool.
  3. Cook rice in rice cooker. Allow rice to rest for 10 – 15 minutes are cooking.
  4. Pour rice out into a large dish (preferably glass or porcelain, not metal).
  5. Add cooled vinegar mixture to rice, mixing carefully with a spatula.
  6. Fan the rice while adding the vinegar mixture.
  7. Allow sushi rice to cool before using.

Tips on rolling sushi

  1. Use a sushi bamboo mat to help you roll sushi. These are easily available at supermarkets, and can also be found at Daiso.
  2. Wrap the bamboo mat with cling film before rolling the sushi. This is especially useful if you are making a uramaki (inverted rice roll)
  3. Place rice on the dull side of the nori.
  4. For one large sheet of nori, approximately 1 tennis ball size of sushi rice is sufficient.
  5. Wet hands before spreading sushi rice. Remember not to crush the rice!
  6. When cutting sushi, remember to wet the knife first.
For sushi recipes, you can visit sushiday or just be creative!

Cheesy tomato and tuna pasta for the little one

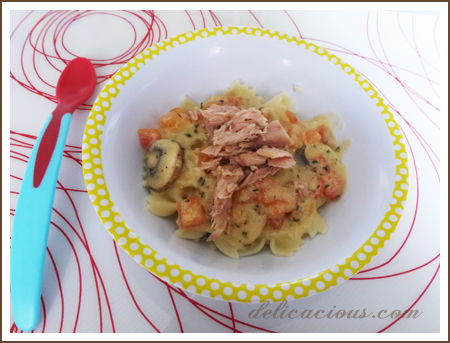
In a recent shopping trip to the supermarket, I discovered salt-free canned spring water tuna. I didn’t even know they sell that at NTUC finest! What a lovely discovery as that means that I can cook tuna pasta for my little one. I made extra pasta sauce and cooked some spaghetti so that the adults could have some too. The little one had hers with mini pasta bows. When she saw her bowl of pasta, her eyes lit up and she went, “WOW!” That was worth all the effort.

Cheesy Tomato and Tuna Pasta
Serves 4 adults

Ingredients:
1 small onion, chopped
40g unsalted butter
6 button mushrooms, sliced
1/4 tsp dried thyme
2 tbsp plain flour
300ml milk
100g cheddar cheese, grated
1 tomato, peeled and deseeded, chopped
1 can tuna in springwater, flaked
salt and black pepper to taste
sprinkling of parsley
pasta of your choice

Method:

  1. Saute onions in butter until translucent.
  2. Add sliced mushrooms and saute for 2-3 minutes.
  3. Mix in dried thyme.
  4. Add flour and stir till well mixed. Slowly add in milk and cook till thickened.
  5. Stir in tomatoes and cheese and heat through.
  6. Season with black pepper (and small amount of salt if cooking for children above 1)
  7. Pour over cooked pasta and top with flaked tuna.
  8. Sprinkle with parsley and serve.

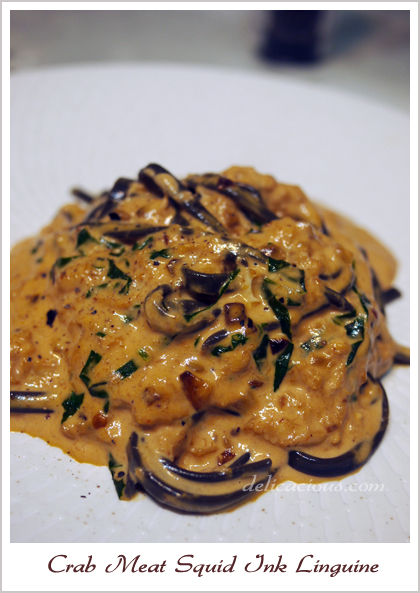
Crab Meat Squid Ink Linguine

I had attempted something similar awhile back, but didn’t have squid ink linguine then. After acquiring some lately, I decided to give it another shot, and document the recipe if it tastes good. Even though I would not attempt to compare it with my favourite crab meat squid ink pasta from Valentinos, I do think that my attempt to reproduce the very popular pasta dish was a rather good one. Perhaps the next time, I will try using crushed tomatoes instead, and see if that improves the flavour. For now, here’s version 1.

Crab Meat Squid Ink Linguine
Serves 2

Ingredients:
4 oz dried squid ink linguine
3 tbsp olive oil
3 garlic cloves, minced
3/4 tsp crushed red peppers
1/4 cup of basil leaves, sliced thinly
4 oz lump crabmeat
4 tbsp tomato paste (not ketchup)
1 1/2 cup of cream
salt and black pepper to taste

Method:

  1. Bring water to boil in a large pot and salt liberally. Add in pasta and cook until tender but firm. Drain thoroughly.
  2. Heat olive oil in a pan and add in minced garlic and crushed red peppers. Cook till garlic is golden.
  3. Add in the crab meat and the basil and stir fry for a minute or two.
  4. Add in the tomato paste and mix to combine.
  5. Lower the flame and add in the cream, stirring to combine until the tomato paste is well mixed with the cream.
  6. Allow the cream to come to a gentle boil, stirring continuously. Season with salt and pepper.
  7. Add in the cooked linguine and toss to combine.
  8. Serve on warmed plates.