Archives for November 2012

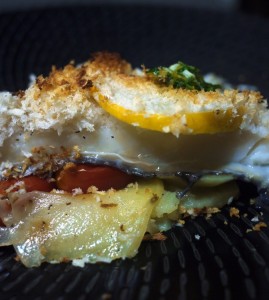
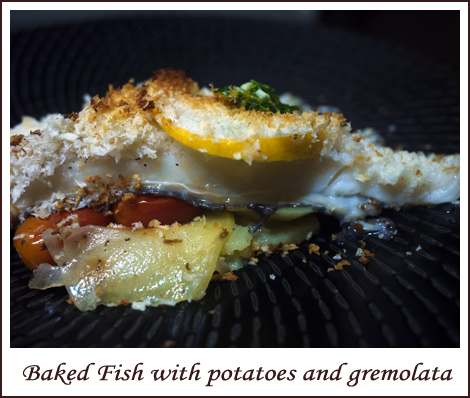
Baked fish with potatoes and gremolata

25th Nov was Cook For Family Day, an event that I had the privilege of organising following a Cook For Family initiative started off earlier by Daniel of Daniel Food Diary.

For Cook For Family Day, I decided to try out a recipe that I saw in an earlier issue of Delicious magazine that I borrowed from my sister-in-law. It is simple and fuss free, as with most one-pot oven meals. Toss everything in and walla! A tasty meal awaits you and your family. If you have a larger family, simply increase the amounts of the recipe below accordingly. Like some spice, add some red chilli slices during the final baking step!

My family and I enjoyed the fish and vegetables very much. The baked fish was moist and tender and the gremolata added alot of flavour. Do not omit it!
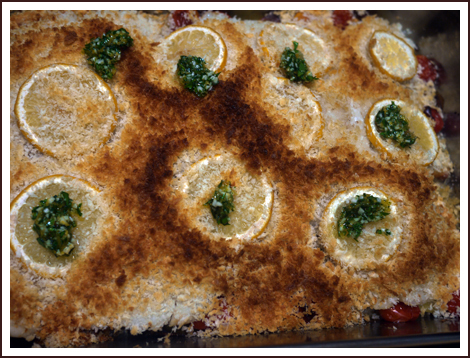
Try out this simple recipe when you have the time. It is definitely worth it.

Baked fish with potatoes and gremolata

Serves 4
Prep time 20 minutes
Cook time 45 minutes
Total time 1 hours, 5 minutes
Allergy Fish
Meal type Main Dish
Misc Child Friendly, Serve Hot
From magazine Delicious

Ingredients

Baked Fish

  • 500g Potato (peeled and thinly sliced)
  • 1 onion (thinly sliced)
  • 2 tablespoons olive oil
  • 20g unsalted butter
  • 250g Cherry Tomatoes
  • 100g breadcrumbs
  • 700g Halibut fillets (3 - 4 pieces, depending on size)
  • 1 lemon

Gremolata

  • 1/4 cup Extra virgin olive oil
  • 2 cloves Garlic (finely chopped)
  • 1 Lemon's zest (Grated)
  • 1 bunch English parsley (finely chopped)

Directions

Step 1
Preheat oven to 180°C.
Step 2
Spread potatoes and onions in a large roasting pan and drizzle with 1 tbsp of olive oil. Season with salt and ground pepper, then toss to coat.
Step 3
Spread it out to cover the base of the pan and dot with butter. Bake for 15 minutes.
Step 4
Add tomatoes, and return to the oven for 10 - 15 more minutes.
Step 5
Meanwhile, mix breadcrumbs with remaining 1 tbsp of olive oil and season with salt and ground pepper. Season the fish fillets with salt and pepper as well.
Step 6
Remove roasting pan from oven and place fish over potatoes. Cover with breadcrumbs and lemon slices and return to the oven for 12 - 15 more minutes.
Step 7
In a small bowl, combine extra virgin olive oil, garlic, parsley and lemon zest. Season to taste with salt and pepper.
Step 8
When fish is ready, remove from oven. Serve hot with gremolata.

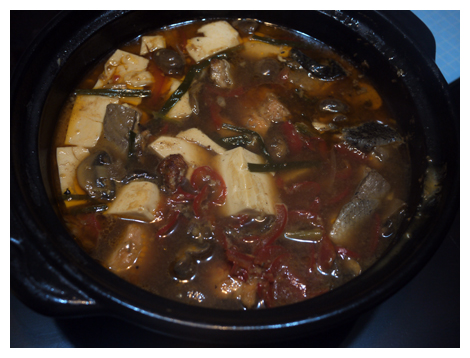
Salmon Tofu Miso Casserole

The flu bug is going around and both my husband and my toddler girl are down with flu. I had initially intended to cook salmon tofu balls but seeing that they were sick, I decided that something less “heaty” would be good.

I chanced upon a recipe on epicurious and did some modifications to get this yummylicious dish that even my rather fussy toddler liked it!

Salmon Tofu Miso Casserole

Serves 4
Prep time 20 minutes
Cook time 40 minutes
Total time 1 hour
Meal type Lunch, Main Dish
Misc Child Friendly, Serve Hot
Region Japanese
Delicious Salmon Tofu Miso Casserole, perfect for a cold evening's dinner.

Ingredients

  • 450g Boneless salmon fillet (Cut into cubes)
  • 1/4 teaspoon salt
  • 2 tablespoons oil
  • 150g Assorted japanese mushrooms (cleaned and dried)
  • 2 cloves garlic (chopped finely)
  • 1 Red capsicum (sliced)
  • 1 Block chinese tofu (Cut into cubes)
  • 2 1/2 tablespoons Miso paste ((I use a mix of red and white miso))
  • 2 cups Chicken stock
  • 1 tablespoon Mirin
  • 3 stalks Spring onion (cut into sections)

Directions

Step 1
Marinate salmon pieces with salt for 10 - 15 minutes.
Step 2
Heat 1 tbsp of oil in a casserole. Brown salmon pieces in oil and set aside.
Step 3
Add remaining oil and stir fry garlic, red capsicum and mushrooms in the casserole.
Step 4
Add in the tofu to combine and finally the salmon.
Step 5
Add in miso paste and stir to mix with ingredients.
Step 6
Pour in the chicken stock and mirin and bring to a boil.
Step 7
Simmer for 20 minutes and add the spring onions, and continue to simmer for 5 - 10 minutes more.
Step 8
Serve hot with rice.

First ever Cooking Class!

In a bid to share my love for cooking and baking with others, I conducted a cooking class with 9 friends a few weeks ago. It was a hands-on class held in the comfort of my house. I taught four dishes – mushroom soup, ratatouille, chicken cacciatora over mash and apple crumble.

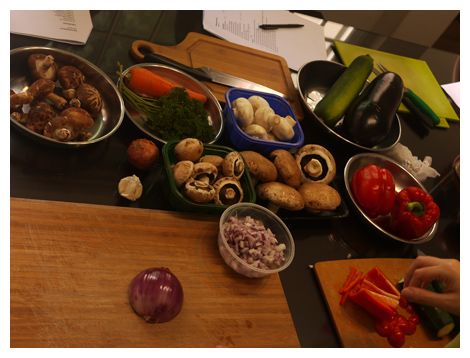
The first picture shows some of the ingredients we used to prepare the dishes. Participants were taught the trick of cutting capsicums and onions with ease!

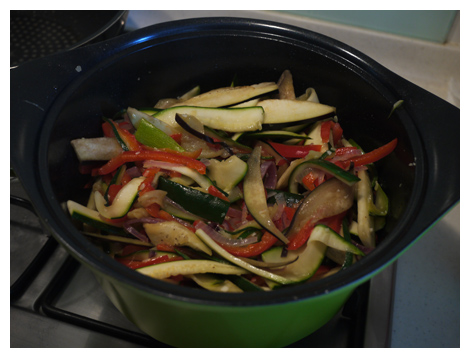
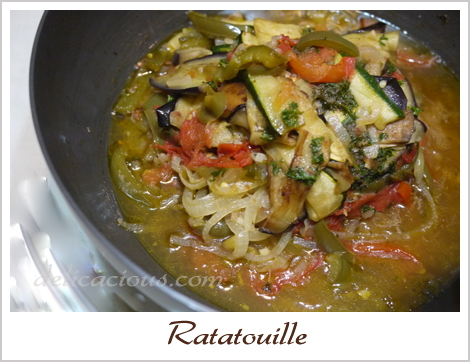
Here’s ratatouille cooking in a pot! It looks like alot of vegetables but they will soon give off their water and shrink to half the volume. What is ratatouille? It is a vegetarian dish that consists of a few main vegetables – onions, zucchini, red peppers and courgettes. Some add mushrooms as well. The most important part of the dish? Olive oil! You cannot do without it, so do not try to substitute with other vegetable oils!

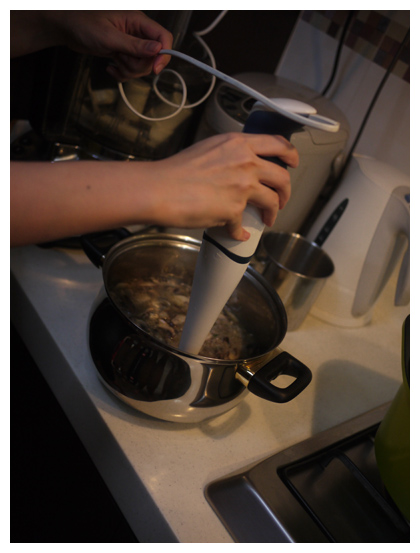
Many of the participants were intrigued by this equipment. It is an… Immersion Blender! A very useful tool in the kitchen I must say. No more the hassle of pouring mixtures out into a standing blender and having to clean up afterwards! You just need to clean up the bottom part of the immersion blender and you are done! Fast, efficient and clean. I love it and strongly recommend you considering one for your kitchen! I use it to puree my mushroom soups, or just about anything else that needs pureeing. I used it to puree my baby’s food when she was young too!

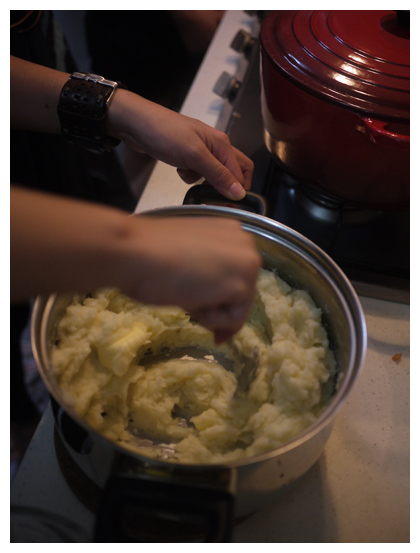
Here’s one of the partipants preparing the mash potatoes. The trick to fluffy mash potatoes is to ensure that your potatoes are quite dry before mashing them, adding hot milk/cream and to beat and beat until your hands ache!

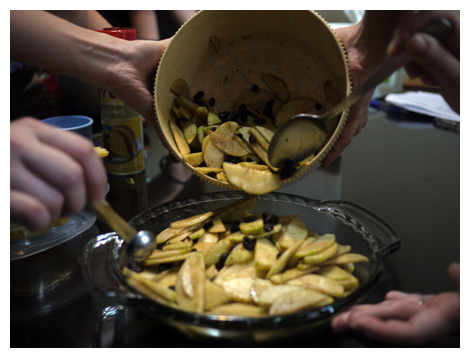
Dessert is always a joy to prepare, even before the mains are done! Here are the participants working together to prepare the apple crumble which was made with granny smith apples. If you prefer a less tart crumble, use Golden Delicious apples instead.

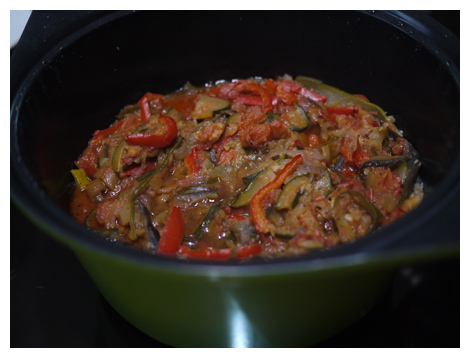
The completed ratatouille in the pot. See how the amount has shrunk once the vegetables release their liquids?

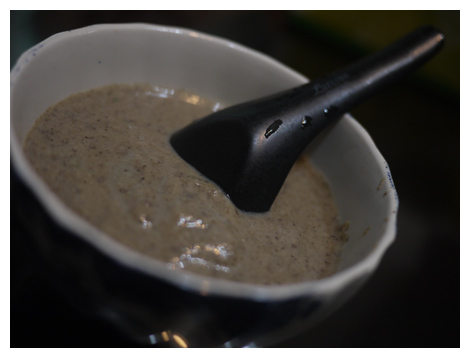
Mushroom soup! Some like it thick, some like it thin. Have it your way! The participants liked it thicker and so we added less milk. If you prefer it thin, add more milk/stock!

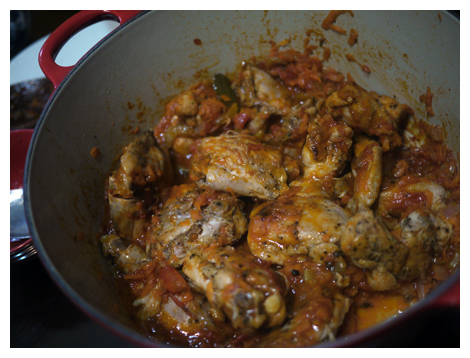
Chicken cacciatora in the pot! It looks a little messy here but I guarantee you it was yummylicious!

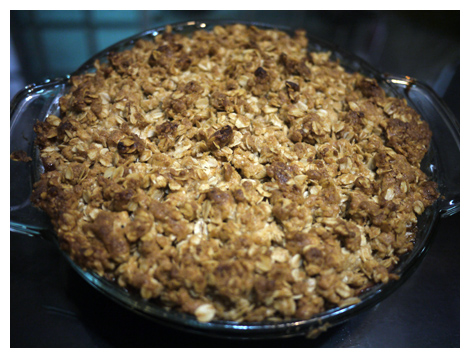
Completed apple crumble with a lovely golden oat crust. I love my apple crumble served with good quality vanilla ice-cream. Some like it plain. Your choice!

Everyone had fun! Do you like cooking too? Come join the CookForFamily initative at www.facebook.com/CookForFamily and join the Cooking event happening next Sunday! You can assess the Cook For Family Day event here!

Princess Cupcakes

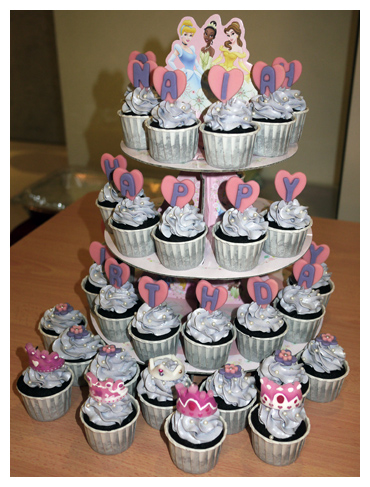
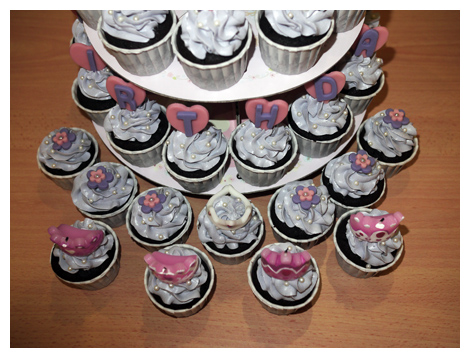
These pretty princess cupcakes were the request of a friend’s four year old daughter. The colours chosen for this theme was violet and pink – the little girl’s favourite. I decided to use purple as a base for the cupcakes and pink for the fondant hearts. Since the barbie princess stand (provided by my friend) was already fanciful, the other decorations were simple flowers ad a crown.

As always, I start off with the fondant decorations 2 – 3 days before the event to allow them sufficient time to dry out. The trick to get nice fondant letter cut-outs is to allow the fondant to dry a little after rolling it out before cutting it into shapes.

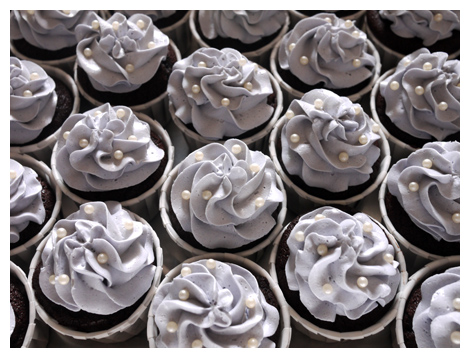
Cupcakes were freshly baked on the day of the party and frosted with violet italian meringue buttercream. I love IMB because it is a perfect blend of sweetness, richness and silky texture. Absolutely delicious. Little sugar pearls were added to accentuate the theme.

The result? A happy little girl and happy guests!

Angry Bird Cupcakes

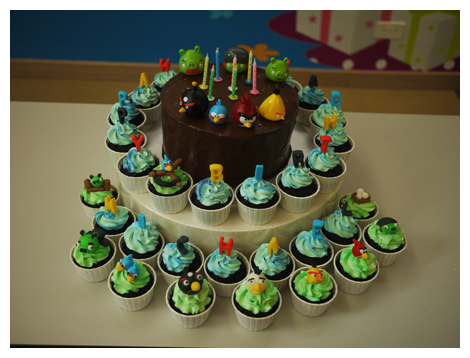
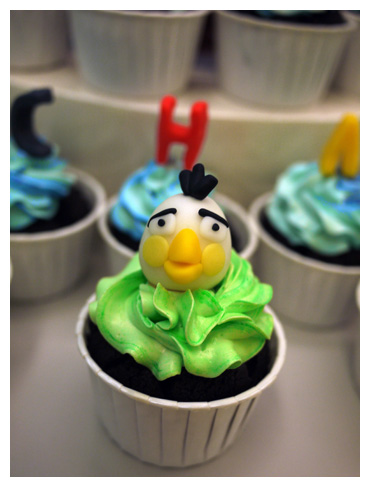
Sometime ago, I had the joy of making birthday cupcakes for a dear friend’s son, M. M loved angry birds and so his mom thought that it would be a nice theme to go with the cake. She decided to bake a chocolate salted caramel cake (centre piece) and decorate it with some angry bird plastic figurines. I figured, why not go all out? Hence, I decided to make angry bird cupcakes!

Step 1 – Make the figurines!

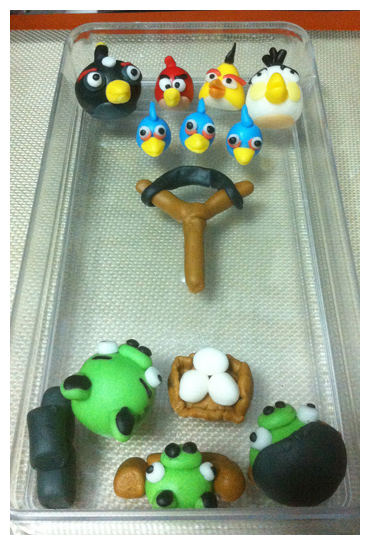
I made the figurines out of fondant and dried them over 2-3 days. In humid Singapore, you may have to use a fan/air-con to reduce humidity and to allow the fondant to dry totally. Otherwise, they may become “weepy” once you place them on the icing.

Aren’t our figurines cute? We (my husband and I) made pigs, eggs, bricks, and one of each kind of bird (except the blue birds who go in trios). Oh yes. And the catapult.

Step 2 – Bake the cakes and decorate them!

The base is a rich chocolate cupcake, rather dense and choc full of flavour. The icing is an italian meringue buttercream coloured blue. The gradient blue icing represents the sky!

The green icing here represents the grass on which the birds/pigs will be placed on.

Place frosted cupcakes in the fridge to allow the icing to set and harden.

Step 3 – Place figurines atop cupcake!

So….. do you feel inspired to try your hand at making angry bird cupcakes too?

Psst: We are still having a giveaway so remember to join our mailing list and like us on facebook!

Giveaway: Recipe Compilation!

Delicacious just turned three and to celebrate, Delicacious has launched its facebook page and also a recipe compilation. The recipe compilation contains 15 of my favourite tried and tested recipes (Ratatouille, Chicken Cacciatora, Hearty chicken stew, and desserts such as molten chocolate cake to name a few). The e-compilation is free for all email subscribers of Delicacious!

Steps to receive this recipe compilation:

  1. Visit our facebook page here and like the page.
  2. Share the recipe giveaway post with your friends on your timeline!
  3. Subscribe via email subscription on the top right side of the Delicacious to ensure that you don’t miss out any updates or new recipe posts!
This giveaway is valid till 9 Dec 2012  so hurry!

What’s your beef?

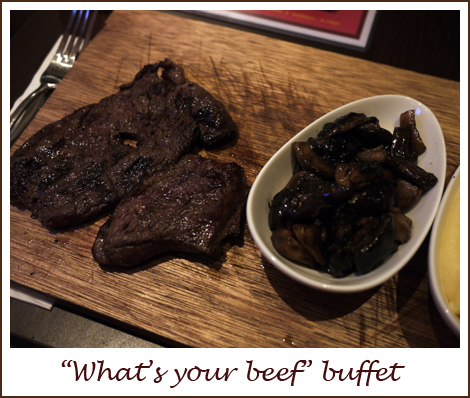
Thanks to a Groupon voucher, hubby and I had the opportunity to try out this beef buffet at a half of its actual cost. This beef ala-carte buffet serves up five different types of beef – Wagyu, Prime Rib, Ribeye, T-bone steak as well as stewed beef cheek. The steak is cooked to your preferred doneness and served up with three sauces and a small variety of side dishes. Sauces available are red wine sauce, mushroom sauce and creamy blue cheese sauce. Side dishes available are creamed spinach, mashed potatoes, sauteed mushrooms, Barossa salad as well as roasted tomatoes.

Hubby and I enjoyed the steaks – they were done nicely and to the degree of doneness (medium) we requested for. I’ve had bad experiences with places that overcook the steaks and it is nice to find a place that does not. I enjoyed the ribeye steak while hubby preferred the wagyu and T-bone. We both agreed that the beef cheek was stewed perfectly – tender and chock full of flavour.

All the sauces complemented the beef very well; there is something for everyone. For side dishes, I enjoyed the creamed spinach (though not the clump of baked cheese on top), the mash potatoes and the mushrooms. The other two side dishes were rather forgettable.

I would recommend this buffet for serious beef lovers with a large appetite.  I could hardly finish the second round of steak, though my hubby managed three rounds. If you are a small eater like me, this may not be worth your money especially at the full buffet price, $43.90++. Service wise, the branch at Holland Village has a huge room for improvement. Despite a reservation, I had to wait at the entrance of the restaurant for more than 10 minutes, carrying a baby, while waitresses walked up to the counter to collect things but totally ignored me!

Barossa
“What’s your beef” buffet
Wed and Sundays, 6 – 10pm
22 Lorong Mambong (Holland Village)
8 Raffles Avenue #01-11 (Esplanade)