Salmon Potato Cakes

salmon potato cakes I didn’t use to make salmon potato cakes. I like salmon oven-baked or pan-grilled, but my daughter changed that recently. You see, a couple months ago, my 2-year old daughter developed an adverse taste towards fish. Any kind of fish. So these fish cakes were my attempt to sneakily introduce fish into her meal with something that does not look too “fish-like”. Besides, they are really tasty and the adults loved them too. Salmon and potato – what’s not to like?

Verdict? She liked them. Success!! If you have a picky eater, try them. I make a larger batch and flash freeze them in a baking tray. Once frozen, I pack them in ziplock bags. Easy!
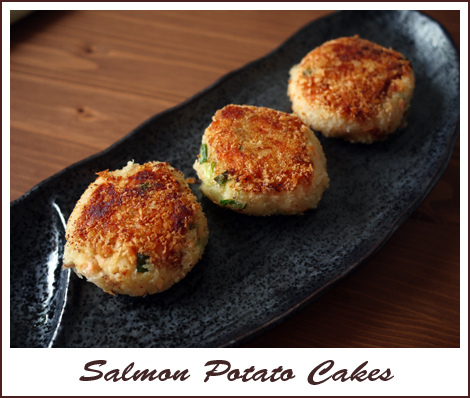
Salmon Potato Cakes

Serves 4
A tasty and flavourful salmon potato cake recipe.

Ingredients

  • 300g Salmon fillet (bones removed)
  • 1 teaspoon Olive oil
  • pinch sea salt
  • pinch ground black pepper
  • 4 Russet potatoes
  • 2 Eggs
  • 1 tablespoon Dijon Mustard
  • 3 stalks Scallions (thinly sliced)
  • 3/4 cups Japanese breadcrumbs
  • 1 tablespoon Butter
  • 1 tablespoon Olive Oil

Optional

  • 1/2 cup Green peas

Note

Salmon potato cakes can be frozen before the pan-frying step. Make a larger batch of these and serve them up for a quick dinner another day! Recipe is adapted from here.

Directions

Step 1
Season salmon with salt and pepper and brush with olive oil. Grill in a pan or in an oven until they are golden brown. Flake salmon into smaller pieces.
Step 2
Boil and mash potatoes. Add salmon, dijon mustard, scallions, beaten eggs and peas and combine. Season with more salt and pepper.
Step 3
Shape into patties and coat evenly with Japanese breadcrumbs.
Step 4
Preheat a skillet over medium heat and add olive oil and butter. Pan-fry salmon potato cakes until they are golden brown on both sides.

Sushi – a fun alternative to cooking


If you have never made sushi before, I highly recommend you try. Besides cooking the rice, and making your own tamago should you wish to include it, there really isn’t much more cooking needed. What’s more, it’s fun to make and you can be as creative as you wish. The best part? Sushi, for the larger part, is very healthy. There are many fusion types of sushi now that include some “not so healthy” ingredients that you may not find in a traditional Japanese restaurant. These fusion sushi incorporate popular western choices such as Mayonnaise and spicy sauce and sometimes do increase the number of calories, though not significantly. So, why is sushi so healthy?

Sushi can largely be divided into two types – maki and nigiri. Makis are the rolled up sushi while Nigiri are the ones with ingredients on top. Nori or seaweed, an integral part of both types of sushi, is highly nutritious as it contains a great source of minerals found in the ocean such as Iron, vitamin C, vitamin A, magnesium, selenium, choline, eicosapentanoic acid, inositol and other B vitamins. In addition, nori does not contain salt and sugar. Sounds like a super food eh? Rice vinegar, used to prepare sushi rice, helps to promote cell metabolism. It is known to help lower body fat percentage.

If you are convinced to try making sushi at home, here is my favourite sushi rice recipe and some handy tips.

Sushi Rice
Yields 2 cups of rice

2 cups sushi rice
2 1/2 cups water
4 tablespoons rice vinegar
3 tablespoons sugar
2 teaspoons salt
2 tablespoons mirin

Method:

  1. Rinse rice 3 times and drain in a colander till dry.
  2. Combine vinegar, sugar, salt and mirin together in a small pot over low heat till sugar dissolves. Allow this to cool.
  3. Cook rice in rice cooker. Allow rice to rest for 10 – 15 minutes are cooking.
  4. Pour rice out into a large dish (preferably glass or porcelain, not metal).
  5. Add cooled vinegar mixture to rice, mixing carefully with a spatula.
  6. Fan the rice while adding the vinegar mixture.
  7. Allow sushi rice to cool before using.

Tips on rolling sushi

  1. Use a sushi bamboo mat to help you roll sushi. These are easily available at supermarkets, and can also be found at Daiso.
  2. Wrap the bamboo mat with cling film before rolling the sushi. This is especially useful if you are making a uramaki (inverted rice roll)
  3. Place rice on the dull side of the nori.
  4. For one large sheet of nori, approximately 1 tennis ball size of sushi rice is sufficient.
  5. Wet hands before spreading sushi rice. Remember not to crush the rice!
  6. When cutting sushi, remember to wet the knife first.
For sushi recipes, you can visit sushiday or just be creative!

Whole wheat strawberry muffins

Muffins are easy to make because they do not require a mixer, just gentle folding in by hand. It is really quick to prepare, as long as you have all your ingredients on hand. While most muffin recipes use all purpose flour, I prefer to use whole wheat flour because it’s healthier, contains more nutrients and flavour. Here, I share one of my favourite muffin recipes. It is simple and the ingredients can easily be replaced to give you a variety of muffin flavours. Should you find the flavour of whole wheat flour too strong, feel free to replace half of it with all purpose flour. Whole wheat flour can be obtained from most good supermarkets such as Cold Storage or NTUC Finest. Try this easy and healthy recipe and you would never need to buy muffins again!

Strawberry Muffins
Makes 12-15 muffins

Ingredients
1 1/2 cup whole wheat flour
1/3 cup brown sugar
1 1/2 tsp baking powder
1/4 tsp baking soda
1/4 tsp salt
4 oz unsalted butter, melted and cooled
1 cup sour cream
1 egg
1 tsp vanilla extract
1 1/2 cup chopped strawberries

Method:

  1. Preheat oven to 205°C. Line a muffin tray with 12 – 15 muffin liners (depending on the size)
  2. In a large bowl, sift together flour, baking powder, baking soda, salt and sugar.
  3. In another bowl, combine melted butter, sour cream, egg and vanilla.
  4. Add butter mixture to dry ingredients and mix till just combined. Do not overmix!
  5. Gently fold in strawberries.
  6. Divide batter among muffin cups and bake in the middle of the oven for 20 minutes, or until a tester comes out clean.

Variations can be made by adding the following in place of strawberries

  • 1 1/2 cup of fresh blueberries
  • 1 1/2 cup of mashed banana
  • 1 1/2 cup of chopped apple + a dash of cinammon
  • 1 cup of chopped apple + 1/2 cup of almonds/pecans
  • 1 cup of dried cranberries + 1/2 cup of white chocolate chips

Cheesy tomato and tuna pasta for the little one

In a recent shopping trip to the supermarket, I discovered salt-free canned spring water tuna. I didn’t even know they sell that at NTUC finest! What a lovely discovery as that means that I can cook tuna pasta for my little one. I made extra pasta sauce and cooked some spaghetti so that the adults could have some too. The little one had hers with mini pasta bows. When she saw her bowl of pasta, her eyes lit up and she went, “WOW!” That was worth all the effort.

Cheesy Tomato and Tuna Pasta
Serves 4 adults

Ingredients:
1 small onion, chopped
40g unsalted butter
6 button mushrooms, sliced
1/4 tsp dried thyme
2 tbsp plain flour
300ml milk
100g cheddar cheese, grated
1 tomato, peeled and deseeded, chopped
1 can tuna in springwater, flaked
salt and black pepper to taste
sprinkling of parsley
pasta of your choice

Method:

  1. Saute onions in butter until translucent.
  2. Add sliced mushrooms and saute for 2-3 minutes.
  3. Mix in dried thyme.
  4. Add flour and stir till well mixed. Slowly add in milk and cook till thickened.
  5. Stir in tomatoes and cheese and heat through.
  6. Season with black pepper (and small amount of salt if cooking for children above 1)
  7. Pour over cooked pasta and top with flaked tuna.
  8. Sprinkle with parsley and serve.

Child’s Kedgeree

I made Kedgeree for the little one yesterday. Well, a mock kedgeree would be more accurate, seeing that I replaced curry powder with paprika. I would have loved to add a little tumeric but I realised that we had none at home. The little girl was enthusiastic about it, tumeric or not, and that’s what counts.

Child’s Kedgeree
Serves 1 hungry toddler

Ingredients:
A small piece of white fish (approximately 4-5 ounces)
1 bay leaf
A few peppercorns
Milk for poaching
1 tbsp unsalted butter
1/2 an onion, chopped
1/8 tsp paprika
1/8 tsp tumeric
1/4 cup green peas
1 hard boiled egg, chopped
1 cup cooked long grain white rice
1 small bunch of parsley, chopped
salt and pepper to taste

Method:

  1. In a small saucepan, poach the fish in milk with the bay leaf and peppercorns. Fish is ready once it flakes.
  2. Flake fish carefully and set aside.
  3. In a frying pan, melt butter and sauteed onions till soft and translucent.
  4. Add paprika and tumeric (if using)
  5. Add green peas, rice and hard boiled egg. Mix well till heated through.
  6. Lastly stir in flaked fish and parsley.
  7. Serve warm.

Oatmeal Pancakes

After a year long hiatus from this food blog, I’m back!

The hiatus was largely due to the birth of my daughter, who just turned one recently. The demands of coping with a baby plus juggling a full-time job made me put off updating this blog, and alas, I realised recently that it has been a year! Time really flies. I decided that I will try to keep this blog alive with new updates of my food. Readers will probably see more “child-friendly” recipes, no prizes for guessing why. 🙂


So back to my post on oatmeal pancakes. My daughter dislikes oatmeal, even after I dress it up with bananas and raisins. I discovered recently though, that she gladly eats up these oatmeal pancakes! A joyous discovery indeed, as it means that I can use up my large container of oatmeal. The addition of buttermilk and oatmeal makes the pancakes fluffy and soft, definitely suitable for children. Feel free to dress the pancakes up with bananas or blueberries, whatever you fancy. I serve mine with butter and a small dab of maple syrup.

Oatmeal Pancakes
Makes 6 – 8 pancakes

Ingredients:
3/4 ground oats
1 1/2 cups buttermilk or buttermilk substitute*
3/4 cup all purpose flour
1 1/2 tsp baking powder
3/4 tsp baking soda
1/2 tsp cinnamon
1 egg, beaten
2 tbsp unsalted butter, melted
1 tbsp brown sugar

Method:

  1. Combine oats with 3/4 cup of buttermilk. Allow to stand for 5 minutes.
  2. Sift together flour, baking powder, baking soda and cinnamon in a large bowl.
  3. In a separate bowl, whisk together egg, sugar, oats in buttermilk and remaining buttermilk.
  4. Add wet ingredients to dry ingredients and stir to combine. Do not over-stir.
  5. Heat a lightly greased frying pan or griddle. Cook pancakes in batches, adding approximately 1/3 cup of batter each time.
  6. Cook each pancake till bubbles appear on the surface, approximately 1 min. Flip pancake and cook the other side for another minute or so.
  7. Serve warm with butter and maple syrup.

* I add 1 tbsp of vinegar to measuring cup and top it up to 1 cup with milk. Let it stand for 10 minutes, stir well and there you have it, buttermilk substitute! You can use lemon juice instead of vinegar if you prefer.