Bacon, Cheese and Scallions Muffins

bacon cheese and scallions muffins

I’ve been baking alot of muffins lately. Maybe twice to thrice a week. I wake up in the morning, quickly put together the muffins, plop them into the oven and by the time I’m done with my shower, the muffins are also done. Piping hot breakfast for the family. The big plus? Muffins *usually* do not require the use of a mixer. I don’t even bother sifting the flour typically. Just throw all the dry ingredients in the mixing bowl and whisk them together for about 15 seconds. Done.

There a couple of sweet muffin recipes on this blog, but since my dear hubby expressed (a couple of months back) that he very much prefers savoury breakfasts, I’ve been attempting to increase the savoury quotient in our breakfasts. Cheese muffins are great. Add bacon and it’s a combination made in heaven. Scallions cut the edge off the saltiness of the cheese and the bacon. Perfect.

Bacon, Cheese and Scallions Muffins
 
Serves: 12 muffins
Ingredients
  • 2 cups plain flour
  • 2½ tsp baking powder
  • ½ tsp salt
  • ¼ tsp black pepper
  • 1 cup shredded cheese (I used cheddar)
  • ½ cup chopped scallions
  • 1 cup milk
  • 2 eggs
  • 2 tbsp olive oil
  • 4 slices back bacon, baked till crisp and cut into small squares
Instructions
  1. Preheat oven to 175°C or 160°C fan mode.
  2. Line a 12 hole muffin pan with liners.
  3. In a large bowl, whisk together flour, baking powder, salt and pepper.
  4. Add in scallions and cheese and mix to combine.
  5. Whisk together milk, eggs and olive oil in a separate bowl.
  6. Pour wet ingredients into the flour mixture and using a spatula, roughly combine the mixture.
  7. Fold in the bacon. Do not overmix!
  8. Divide among 12 muffin holes.
  9. Top with some more shredded cheese (optional)
  10. Bake on the centre rack for 20-25 minutes, or until tops are golden brown and a tester comes out clean.

Notes
Adapted from http://abeautifulbite.com/ham-scallion-and-cheddar-muffins/

Quick and easy scones

Quick and easy scones

I woke up yesterday morning thinking about scones for breakfast. Earlier the previous day, I had bought a new bottle of chocolate rice crispies spread that I wanted to try and bread was just too… mainstream. Anyhow, decision for scones was made at 8am and piping hot scones were delivered to the table at 8.30am! These scones bake up tall and are so light and fluffy that you won’t be able to stop at one. I did try some with my new chocolate spread but quickly decided that jam and scones still taste the best. Alas, I did not have any clotted cream with me but butter and jam still tasted mighty good!

Are you craving for some scones too? These scones are sooo easy to whip up, especially because the recipe calls for ingredients that you probably already have at home. That’s right. No whipping cream required and no mixer needed too! Try the recipe and let me know how you like your scones.

Quick and Easy Scones
 
Prep time
Cook time
Total time
 
Tall and fluffy scones that can be whipped up in a jiffy!
Serves: 8 large scones
Ingredients
  • 175ml milk
  • 2 tsp lemon juice
  • 335g plain flour
  • ¼ tsp salt
  • 4½ tsp baking powder
  • 85g butter
  • 40g sugar
  • 1 tsp vanilla extract
  • 1 beaten egg
Instructions
  1. Preheat oven to 220°C. Centre an oven rack and place a baking sheet on it.
  2. Warm milk by heating it in a microwave for 20 sec or by sitting it in a basin of warm water. Add in lemon juice and set aside.
  3. In a large bowl, sift together flour, salt and baking powder. Whisk to combine.
  4. Grate 85g of cold butter into the flour mixture. Toss to combine. (Alternatively, cut butter into cubes and rub it into the flour mixture.)
  5. Stir in sugar.
  6. Add vanilla extract to the curdled milk mixture. Stir to combine.
  7. Make a well in the flour mixture and add the milk in.
  8. Using a spatula, roughly combine the mixture before tipping it out on a working surface. (I use a silicon sheet so that it's less messy.)
  9. Scatter some flour on top of the dough. Using floured hands, fold the dough a couple of times so that it's slightly smooth. There will still be some lumps and it's ok. Do not over work the dough.
  10. Pat it roughly into a 3 cm thick disc - don't roll it out using a rolling pin.
  11. Use a 5cm round cutter to cut out the scones. Gather the remaining dough, pat it out again and cut out the remaining scones.
  12. Remove the hot baking sheet from the oven. Place a silicon baking mat on it (or baking paper if you like) and arrange the cut out scones on the mat. Glaze with beaten egg and return to the oven for 10 min.
  13. Remove the scones from the oven and allow them to cool slightly. Serve warm with butter and jam. Enjoy!
  14. Note: If freezing scones, allow scones to cool totally, place them on a tray/plate and freeze for a few hours before storing in a ziplock bag. When needed, defrost and reheat at 160°C for a few minutes.
Notes
Recipe adapted from http://www.bbcgoodfood.com/recipes/4622/classic-scones-with-jam-and-clotted-cream

Salted Caramel Pecan Sticky Buns

salted caramel pecan sticky buns

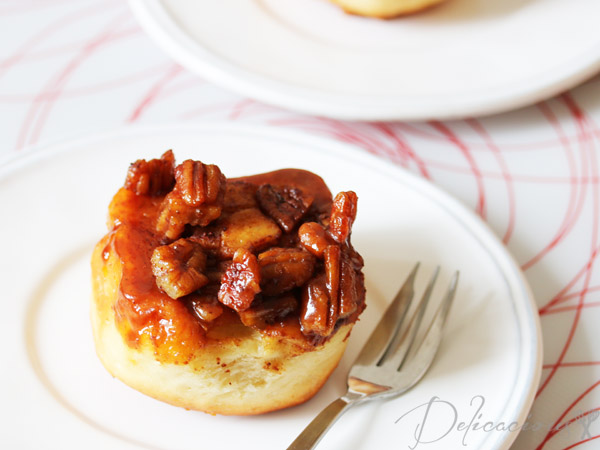
In my humble opinion, salted caramel is one of the baking world’s best discovery. I cannot remember when I first tasted it but it was definitely love at first taste. The best part is that it can be used in sooo many desserts! I made a batch of salted caramel using the recipe from Brown Eye Baker and used a portion of it to make salted caramel buttercream to frost some cupcakes. The cupcakes were for my baby’s first month celebrations. Those were delicious and I would love to blog about them except that I gave them all away without taking a picture. Silly me. So now I would need to find another excuse to bake up another batch of salted caramel cupcakes so that I can eat blog about them.Continue Reading

Breakfast Series – Easy Honey Whole Wheat Rolls

Easy Honey Whole Wheat Rolls

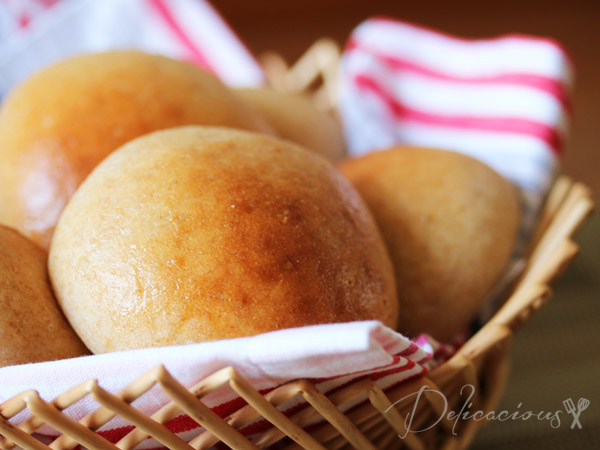
The last post was supposed to be the last of the breakfast series posts, but I decided that I had one last favourite to share. These lovely honey whole wheat rolls. I love them because they are healthy, fluffy and simply delicious. My little one loves them! I’ve made them plain, and have also successfully incorporated raisins and chocolate chips in the dough to make raisin rolls and chocolate chip rolls. The best part? These rolls freeze very well. I freeze the extras and pop them into the toaster oven on busy days to get fresh hot rolls.

Do you want to find out how to make these breakfast rolls? I’ve shared the recipe at The Best Blog Recipes so hop on over now!

Breakfast series – Red Bean Anpan Buns

Red Bean Anpan Bun

In what may be the last of the breakfast series posts (for now), I’m happy to introduce you to my latest favourite bake – Red Bean Anpan Buns. I’ve made these in pretty flower shapes, and also as plain round buns. Either way, they are delicious and the smell of freshly baked anpan buns wafting from the oven will definitely make you want to eat these up, almost straight out of the oven. I had to practice self-control and reserve them for breakfast the next day! The bread dough can be prepared using a breadmaker with a dough setting function (the easier way) or using a standing mixer with a dough hook.

The buns will taste best with homemade anko (sweet red bean paste made with azuki red beans). If you don’t have the time to make your own, you can replace with store bought red bean paste. For a simple method on preparing the red bean paste, please refer to my post here.

Red Bean Anpan Bun

Breakfast series - Red Bean Anpan Buns
 
Serves: 9
Ingredients
Dough
  • ½ cup + 1 tbsp milk
  • 1 egg
  • 2⅓ cup bread flour
  • 2 tbsp caster sugar
  • ½ tsp salt
  • 0.5 oz butter, softened
  • 1 tsp active dry yeast
Filling and topping
  • 9 oz of red bean paste, divided into 9 balls
  • 1 tbsp melted butter/vegetable oil
  • black sesame seeds
Instructions
Using a breadmaker
  1. Add ingredients into the breadmaker pan following instructions on your breadmaker for dough setting.
  2. When dough is ready, remove dough from pan and divide it into 9 equal sized balls.
  3. Allow the dough balls to rest covered for 15 minutes.
  4. Gently flatten dough balls and place the red bean filling in the centre. Carefully fold dough over to enclose the red bean paste. Shape into a ball and lightly flatten it. Using your finger, make a slight indentation in the centre of each flattened ball.
  5. Use a pair of kitchen scissors to cut 5 deep cuts around the flattened ball to make a floral shape (optional).
  6. Preheat oven to 190°C.
  7. Set aside on a non-stick baking sheet, covered, for about 15 minutes.
  8. When the buns have almost doubled in size, bake them in the centre rack of the preheated oven for 15 minutes.
  9. Once buns are golden brown, remove them from the oven and brush them with melted butter. This gives the buns a nice shiny golden colour. Sprinkle sesame seeds on top.
  10. Cool buns on a wire rack.
Using a standing mixer with dough hook
  1. Mix milk, egg, flour, salt and sugar together in the bowl of a standing mixer.
  2. Add the soften butter and knead for 8 - 10 minutes using a dough hook. The dough is ready when it is smooth and elastic.
  3. Transfer dough to a clean bowl. Cover with plastic wrap and allow to rise in a warm place till it doubles in size.
  4. Divide dough into 9 pieces.
  5. Follow the rest of the instructions from the breadmaker portion on shaping the dough.


Breakfast Series – Wholewheat Blueberry Cheesecake Muffins

blueberry cheesecake muffins

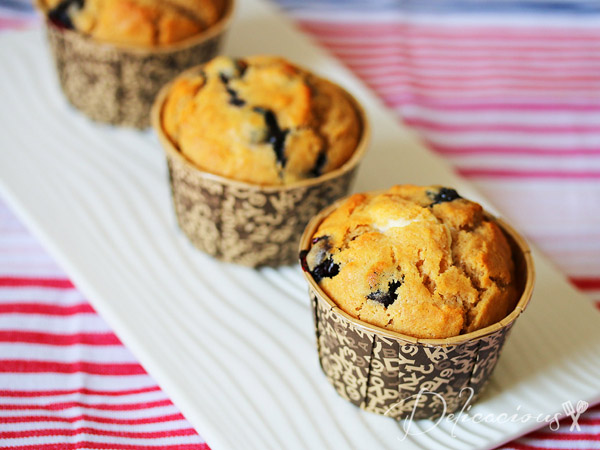
If you are a frequent visitor to Delicacious, you would have noticed that there are several muffin recipes. In fact, there are several variations of muffin recipes just for blueberry or berry muffins. One of my favourite thus far are these Whole Wheat Honey Berry Muffins. These Blueberry Cheesecake Muffins however, are making it fast to the top of the favourites list. The inspiration hit when I had some cream cheese left over from baking a cheesecake and the little one asked for blueberry muffins. How about a muffin with some cream cheese in the centre? Sounds good doesn’t it? I wanted a whole wheat muffin, and so I opted to use half whole wheat and half plain flour in this recipe. You can however, substitute the plain flour for whole wheat flour if you prefer.

I have since made these muffins at least three times and each time, my little one loved it. I have substituted strawberries in place of blueberries and the muffins have turned out great too! It’s a very versatile recipe. Do try it!

Breakfast Series - Wholewheat Blueberry Cheesecake Muffins
 
Serves: 12
Ingredients
  • 1¼ cup whole wheat flour
  • 1 cup plain flour (you may substitute with whole wheat flour)
  • ¼ tsp salt
  • 4 tsp baking powder
  • 2 eggs, lightly beaten
  • 3½ oz unsalted butter, melted and cooled
  • ¼ cup honey
  • 1 cup milk
  • 5 oz blueberries
  • 2 oz cream cheese, cut into 12 pieces
Instructions
  1. Preheat oven to 200°C and centre an oven rack. Place 12 paper muffin cases on a baking tray.
  2. In a large mixing bowl, whisk together flours, salt and baking powder. Set aside.
  3. In a large measuring cup, whisk together butter, honey, eggs and milk.
  4. Pour wet ingredients into the flour mixture and using a whisk, stir gently to combine. Do not overmix.
  5. Fold in blueberries.
  6. Half fill each muffin case with the mixture. Place a piece of cream cheese in the centre. Evenly distribute the rest of the muffin mixture among the 12 cases.
  7. Bake for 15 - 20 minutes, or until muffins are golden brown.

This post is shared at these blogs.

Breakfast Series – Potato pancakes with scrambled eggs and cheese

potato pancakes

Here’s a continuation of the breakfast series on Delicacious! This time, I’m sharing a recipe for savoury potato pancakes, topped with creamy scrambled eggs and a knob of cream cheese. Yummy! In the past, my family enjoys going out for weekend breakfast or brunch. We usually choose a location near to a park or playground so that my little one can run around too. Lately though, the rising costs of food prices and the dropping of food standards at some of our preferred haunts have resulted in us preparing weekend breakfasts at home. Not a bad thing, I must say.

These savoury potato pancakes were popular both with the hubby and my little one. They are crisp on the outside and soft on the inside. The scrambled eggs and cream cheese enhanced the flavours of the pancake. You can be creative and add smoked salmon or crisp bacon atop the scrambled eggs too!

I shared the recipe for this delicious breakfast at The Best Blog Recipes. Hop over and check it out!