Mini Cheese Bread

Mini Cheese Bread

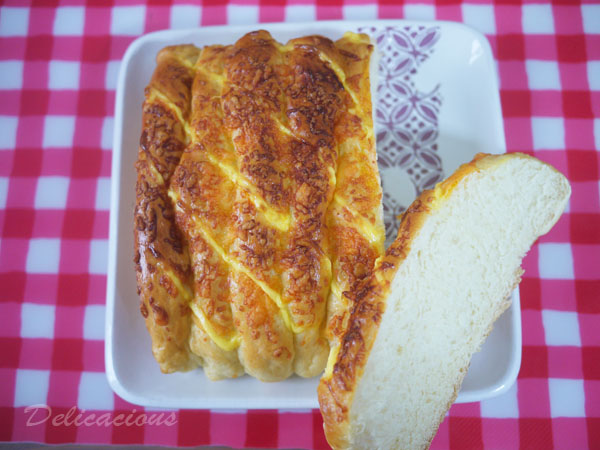
As a fussy mom who’s very particular about the food that my children eat, I prepare most of their breakfasts at home. It’s not often easy though, since my 4 year old and 1 year old have rather different tastes when it comes to food! Thankfully, they both enjoy this cheese bread, the older one especially. She recently succumbed to a nasty virus and had many days of high fever. This was one of her first requests, together with mushroom soup. She loves dipping the bread in mushroom soup. Kind of like soft croutons maybe?

I first saw this recipe online, and thereafter experimented with a few variations, including adding sour cream to the dough! This variation is what works best for me, taste and texture wise. Try it! I’m sure it would be a hit both with young and old!

Mini Cheese Bread
 
Ingredients
  • 80 ml milk
  • 1 egg
  • 30g granulated sugar
  • ¼ tsp salt
  • 200 g bread flour
  • 30g grated parmesan cheese
  • 30g unsalted butter, cut into cubes
  • ½ tsp instant yeast
Instructions
  1. Place the first six ingredients into your bread machine, according to your machine's instructions.
  2. Add the cold butter cubes at the side of the pan.
  3. Make a well at the top of the flour mixture and add the instant yeast. (Make sure the yeast does not touch the salt)
  4. Set the bread machine to the dough function.
  5. When the dough is ready, remove it from the pan, press it down slightly into a disc and allow it to rest on a clean surface for 5-10 minutes.
  6. Using a rolling pin, roll the dough out into a square that's about 1 cm thick.
  7. Cut into cubes approximately 2cm by 2cm.
  8. Arrange the cubes on a baking tray lined with baking paper or a silicon mat and spray some water on top of the cubes.
  9. Cover loosely with cling wrap and allow it to rise till it doubles in size, about 30-45 minutes.
  10. minutes before baking, preheat the oven to 170°C and centre an oven rack.
  11. Bake for 10-12 minutes, or until the tops are golden brown.
  12. Cool slightly on a cooling rack. Enjoy!
Notes
Recipe adapted from http://my123favourites.blogspot.sg/2013/10/mini-cheese-bread.html

Breakfast Series – Easy Honey Whole Wheat Rolls

Easy Honey Whole Wheat Rolls

The last post was supposed to be the last of the breakfast series posts, but I decided that I had one last favourite to share. These lovely honey whole wheat rolls. I love them because they are healthy, fluffy and simply delicious. My little one loves them! I’ve made them plain, and have also successfully incorporated raisins and chocolate chips in the dough to make raisin rolls and chocolate chip rolls. The best part? These rolls freeze very well. I freeze the extras and pop them into the toaster oven on busy days to get fresh hot rolls.

Do you want to find out how to make these breakfast rolls? I’ve shared the recipe at The Best Blog Recipes so hop on over now!

Old Fashioned Cheese Bread and my Bread-making Journey

Old Fashioned Cheese Bread

I received a photo, followed by a voice message while at work today. The voice message was my daughter asking me to make her the bread in the photo – some raisin roll. A second message soon followed with “instructions” from her on how I should make the bread. “Mama, you need to put some flour, then put some blueberries, then put some oil and more flour. Then I can eat it for breakfast.” I think she thought the raisins in the bread were blueberries. Her bread won’t rise for sure – no yeast. 🙂

My bread-making journey has many twists and turns. If you were to ask me to bake bread two years ago, I probably would have cringed. Now, it’s something I do every other day. It wasn’t always easy. The first time I tried to make bread, I used a wooden spoon. I may have overmixed/undermixed or punched the dough too hard because the bread turned out rock hard. And I had aching arms.

Continue Reading

Steamed Red Bean Buns (Tau Sar Pau)

red bean buns1

Two weeks ago, my mother went for a class to learn how to make steamed red bean buns. A few days later, she tried to replicate the recipe with not-so-successful results. The bread of the buns tasted weird, and the red bean filling was grainy. Needless to say, she was rather discouraged even though we tried to render support by eating a few of the buns.

red bean buns 2

So on Saturday, in preparation for Mother’s Day, I decided to make my version of steamed red bean buns. I combed through many variations of making red bean paste and pau dough, and came up with my own variation. It was a success! True, it was much work making the red bean paste from scratch and it required some forward planning, something that is not my forte. But the results were rewarding – especially when the red bean paste actually tastes like red bean, and not some sweetened mush that you buy in a packet.

red bean buns 3

My husband participated in the making of the buns too! His favourite activity? Making animal faces. He became very popular with my daughter after she saw this little piggy. His effort disappeared in a couple of minutes though, as my daughter declared that she was going to eat the piggy soon after she saw it.

So you’ve decided that you want to embark on the journey of making your very own steamed buns? Here are some photo tips.

red bean paste steps

  1. When straining the red bean paste into the bowl, immerse the sieve into the red bean water. This will help remove the skins. After straining the paste twice, you should get a water red bean paste mixture.
  2. When squeezing out excess water, be careful not to squeeze out too much water. The paste should not be crumbly, and you should be able to form indentations with a spoon or finger.
  3. When mixing the red bean paste with sugar, the paste will become more fluid and glossy. Mix until you obtain the thickness of paste that you desire.
  4. The completed red bean paste should look like this.
  5. Guide to making steamed buns
  1. Ensure that your yeast is active. It should foam like shown in the picture.
  2. After kneading in the mixer (or by hand), the dough should be smooth and should not be sticky. Shape it into a ball and allow it to rest.
  3. It should triple in volume.
  4. Knead the dough gently and divide the dough into 14 equal pieces (my pieces are not very equal). This dough handles very easily.
  5. Enclose the red bean paste filling by forming little pleats and pinching the dough towards the centre. This forms the base.
  6. Ensure that your buns are spaced at least 2 – 2.5 inches apart as they will expand when they steam.

So now you are ready to try to make your own steamed buns!

Steamed Red Bean Buns (Tau Sar Pau)
 
A recipe on making steamed red bean buns (tau sar pau) from scratch! Make your own red bean paste (tau sar) and sweeten it according to your taste.
Recipe type: Bread
Cuisine: Chinese
Serves: 14
Ingredients
Red Bean Paste (Tau Sar)
  • 1 cup of red beans
  • ¾ to 1 cup of sugar
Dough
  • 3 tbsp sugar
  • ⅞ cup warm water
  • 11/2 tsp dried yeast
  • 3 cups Hong Kong flour
  • 11/2 tsp baking powder
  • 1 tbsp shortening
Instructions
Red Bean Paste
  1. Soak red beans in water overnight. The water should cover the red beans.
  2. Pour away the water used to soak the red beans.
  3. In a large pot, add the soaked red beans. Add water to the pot - it should be about 1 inch above the red beans.
  4. Bring to a boil over a medium flame and turn off the flame. Allow it to stand for about 10 minutes. Pour away the hot water.
  5. Fill the pot once again with water till about 1 inch above the red beans.
  6. Bring to a boil and then turn the flame down.
  7. Simmer for about 1 hour, or until red beans are soft.
  8. Sieve the red beans and water into a large bowl.
  9. Using a metal spoon, mash the red beans in the sieve, leaving only the red bean skins behind. Repeat till all the red beans are mashed and skins removed. Wash the sieve.
  10. Sieve the red bean paste and water through the sieve to remove any bits.
  11. Using a cheesecloth bag, squeeze out excess water from the red bean paste and water mixture.
  12. Put the paste into a metal pot over medium heat. Add sugar (according to your taste) to the paste and stir in a back and forth motion till the sugar dissolves. The paste will become more fluid.
  13. Continue to stir in a back and forth motion until you reach the desired thickness for your paste.
  14. Optional: If you'd like your paste to be more glossy, you can fry your red bean paste in 1-2 tbsp of vegetable oil after the last step.
  15. Allow red bean paste to cool to room temperature. Keep in fridge until required.
  16. Shape red bean paste into 1 oz balls and set aside till dough is ready.
Dough
  1. In a bowl, dissolve sugar in warm water.
  2. Sprinkle yeast on the surface of the water and allow it to foam (about 10 minutes).
  3. Meanwhile, sift flour and baking powder into the bowl of a standing mixer prepared with a dough hook.
  4. Add shortening.
  5. When the yeast mixture foams, add it to the flour mixture in the mixer bowl.
  6. Knead the dough using the mixer for about 5-7 minutes, until it is smooth and does not stick. (If using hands, this step takes about 10-12 minutes).
  7. Remove dough from the mixer bowl and shape it into a ball.
  8. Place in a large clean bowl and cover with cling wrap.
  9. Allow it to rise in a warm place till it triples in volume.
  10. Remove from the bowl and knead it slightly to remove some air.
  11. Divide the dough into two portions and roll each portion into a log.
  12. Divide each log into 7 equal pieces.
  13. Shape each piece with your palm till it is a 10-12cm in diameter circle.
  14. Add a ball of red bean paste to the centre. Enclose the red bean paste by forming neat pleats and folding towards the centre. Place the folded side on a piece of small baking paper.
  15. Repeat till all the dough and paste has been used up.
  16. Let the buns stand for about 15 minutes before arranging them in a bamboo steamer. The buns should be about 2 inches apart as they will expand.
  17. Steam for 10 minutes.
  18. Serve hot or cool to room temperature and freeze.

Raisin Challah Loaf

This simple raisin bread is made from the challah dough recipe that can be found here. The result is a soft and fragrant sweet breakfast or teatime bread. I especially enjoy it when it’s lightly toasted, with a little extra butter spread on top. The bread may look complex but I assure you that this dough is really quite easy to handle and shape.

Raisin Challah Loaf
Makes 1 Loaf
Adapted from Artisan Bread in Five Minutes a Day

Ingredients:
1 pound of challah dough (recipe found here)
1/3 cup raisins
Butter for greasing cookie sheet
Egg wash (1 egg mixed with 1 tbsp water)
White sesame seeds

Method:

  1. Grease a cookie sheet.
  2. Dust the surface of the refrigerated dough with flour and cut off a 1 pound piece.
  3. Dust with more flour and quickly shape it into a ball by stretching the surface of the dough around to the bottom on all four sides.
  4. Using a rolling pin and just a little flour, roll out the dough to the thickness of 1/2 inch.
  5. Sprinkle with raisins and roll into a log, starting from the longer end.
  6. Roll the dough between your hands and stretch it to form a single long thin rope with a tapered end.
  7. Starting with the thick end of the rope, form a coil on the prepared cookie sheet. Tuck the tapered end under the loaf.
  8. Allow to rest for 1 hour 20 minutes (40 minutes if you are using fresh dough).
  9. Ten minutes before baking, preheat oven to 350ºF.
  10. Brush the loaf with egg wash and sprinkle with sesame seeds.
  11. Place near the centre of the oven and bake for 25 minutes.
  12. Allow to cool before slicing or eating.

Simple Challah Loaf

Challah is the bread served traditionally in Jewish cultures. It is very fragrant thanks to the addition of butter and eggs, and is also mildly sweet from the added honey. Challah is versatile enough to be substituted in most recipes requiring brioche dough and it contains half the amount of eggs so why not try baking some?

The recipe below is adapted from one of my favourite bread books – Artisan Bread in Five Minutes a Day. I think the brilliant part about their recipes is that one does not need to knead the dough nor punch it down after it rises. Also, a larger batch of dough can be made and stored in the fridge, ready to use whenever you want. How convenient!

Challah Dough
Makes about 4 pounds of dough

Ingredients:

1 3/4 cups lukewarm water (105ºF to 115ºF)
1 1/2 tbsp granulated yeast
1 1/2 tbsp salt
4 large eggs, beaten
1/2 cup honey
1/2 cup unsalted butter, melted
7 cups of unbleached all-purpose flour

Method for mixing dough:

  1. Mix yeast and warm water in the bowl of a standing mixer and leave it for 5 minutes.
  2. Once yeast starts to foam, add in salt, beaten eggs, honey and butter and mix well.
  3. Mix in the flour without kneading using a dough hook.
  4. Transfer dough to a container with a non air-tight lid and leave in a warm place to rise for approximately 1 hour 30 minutes to 2 hours.
  5. Dough can be used immediately or stored in the refrigerator for 5 days. After 5 days, freeze the remaining dough.

Method for making challah loaf:

  1. Dust the surface of the refrigerated dough with flour and cut off a 1-pound piece.
  2. Dust the surface of the piece of dough with more flour and quickly shape it into a ball by stretching the four sides of the dough.
  3. Elongate it to an oval and drop in into a greased loaf pan.
  4. Allow it to rest and rise for 1 hour 20 minutes (for refrigerated dough) or 40 minutes (for fresh dough)
  5. 10 minutes before baking, preheat oven to 350ºF.
  6. Brush the top of the loaf with egg wash made from one egg and one tablespoon of cream.
  7. Place the bread on a rack in the centre of the oven and bake for 35 to 40 minutes, until the top is a nice golden brown.
  8. Allow to cool before slicing.

Christmas Kugelhopf

I really wanted to try to bake one of the popular Christmas breads this year. After flipping through a few recipe books, I initially settled on the one from Joy of Cooking. Something went wrong however, during the mixing process. The dough just didn’t seem to come together sufficiently for me to shape it (or knead the raisins) into it. It just felt wrong. Not wanting to waste any more time or raisins, I decided to dump that batter and try again with another recipe. This time, it worked perfectly. The result? A lovely sweet bread filled with raisins and a wonderful reminder of Christmas. The icing sugar on the top of the bread is optional but it looks so Christmasy so why not?

I didn’t have a kugelhopf pan but figured this star bundt would work as well. Nordic Ware makes such great bundt pans. They only need slight greasing and they hardly ever stick. Not to mention they ensure that your cakes/breads bake evenly. And no, I’m not paid to do a promotion for them here. It’s just that good things are worth sharing.

Kugelhopf
Fills a 11-12 cup bundt pan
Recipe adapted from Gourmet, 2002

Ingredients:
1 1/2 tsp instant yeast
2 tbsp warm water (105–115°F)
1 cup whole milk
7 tbsp unsalted butter, cut into tablespoon pieces and softened
6 tbsp granulated sugar
3 3/4 cups all-purpose flour
1 tsp salt
2 large eggs
1 cup golden raisins
1 cup dark raisins
4 tbsp rum
1 teaspoon finely grated fresh lemon zest
1/2 oz almond slivers (for decoration)
1 tablespoon confectioners sugar (for dusting)

Method:

  1. Cover 1 cup dark raisins with just enough water in a small saucepan and bring to a boil. Drain raisins and place them in a small bowl. Add 4 tbsp of rum and let them sit for at least 4 hours or overnight.
  2. Stir together yeast and water in a small bowl and let stand until foamy, 5 to 10 minutes.
  3. Heat milk with 6 tablespoons butter and granulated sugar over low heat, stirring, until mixture is warm (105 to 115°F), butter is melted, and sugar is dissolved.
  4. Sift together flour and salt into bowl of standing mixer. Make a well in flour and add yeast mixture. Add warm milk in a slow stream, mixing at low speed with paddle attachment. Increase speed to medium and beat in eggs 1 at a time, then beat in golden raisins, dark raisins with remaining rum and zest. Continue to beat until dough is smooth and elastic, about 5 minutes.
  5. Butter kugelhopf mold or bundt pan with remaining tablespoon butter. Put 3-4 almond slivers in each depression in bottom of mold (the almonds are only decorative; you can skip them altogether if your mold has no depressions), then scrape spoonfuls of dough evenly into mold (dough will be very elastic). Cover top of mold with oiled plastic wrap and a kitchen towel and let dough rise in a warm place until it fills pan, about 2 hours.
  6. Preheat oven to 400°F.
  7. Remove towel from kugelhopf and gently peel off plastic wrap. Bake kugelhopf in middle of oven 15 minutes, then loosely cover mold with foil and continue to bake until golden and a tester inserted in center comes out clean, 20 to 25 minutes more. Cool in pan 2 minutes, then invert cake onto a rack to cool completely, about 1 hour. Dust with confectioners sugar.