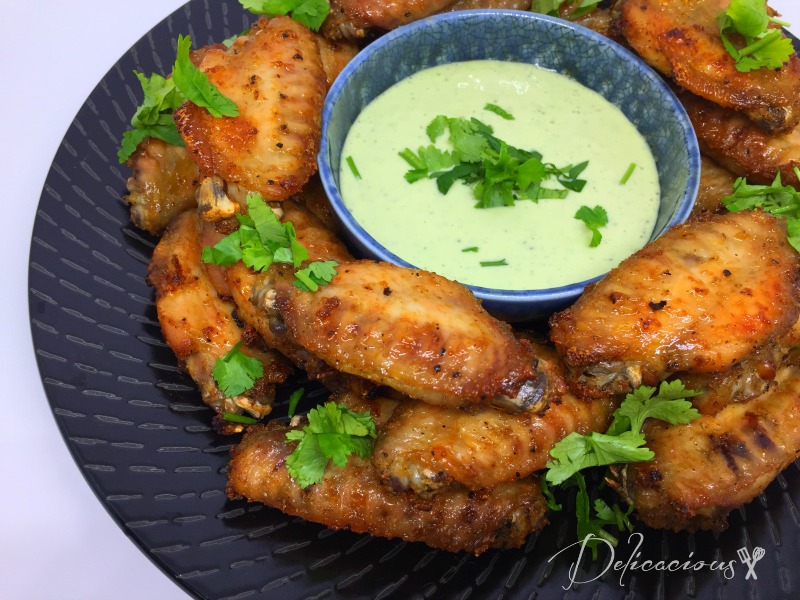
Oven-baked Crispy Lemon Wings (Whole30/Paleo friendly)

crispy lemon wings

About two weeks ago, hubby and I started on the Whole30 diet. Basically, we eat real food for 30 days, and eliminate SUGAR, dairy, legumes, grains and alcohol, as well as MSG, Careenagans and Sulphites. What do we eat then? Well, things like these mouthwatering oven-baked crispy lemon wings! The wings are excellent on their own, but when paired with homemade ranch dressing, everything goes up by a notch! They are so good, that I’ve come out of my blogging hiatus to blog about this recipe!

I used a mish mash of techniques for this recipe. Before whole30, I used to bake oven crispy wings by mixing wings with a mix of salt and baking powder, drying them in the fridge, then baking them at a very low temperature in the oven to dry the wings up further before cranking the temperature up. Since baking powder is not whole30 compliant, I can’t use this method. However, I figured that drying the wings at low temperature in the oven would still aid in bringing out the crispiness of the wings. So the basic method is this: Marinate the chicken with a dry rub, keep it in the fridge for a couple of hours. Bake the wings at low temperature before cranking it up. Remove from oven, coat with a lemon “butter” marinade and bake them for a quick 5-10 minutes. Convinced that you should bake some up for dinner? Here’s the recipe!

Oven-baked Crispy Lemon Wings (Whole30/Paleo friendly)
 
Author:
Cuisine: Paleo
Ingredients
Chicken marinade
  • 2 tbsp olive oil
  • 1 kg chicken mid-wings
  • 2½ tsp sea salt
  • ½ tsp black pepper
  • 1½ tsp garlic powder
  • 2 tsp onion powder
  • zest of 1 lemon
Lemon "butter"
  • 80ml of ghee (1/3 cup)
  • 60 ml olive oil (1/4 cup)
  • 3 garlic cloves, minced
  • juice of 1 lemon
Instructions
  1. Mix wings with olive oil.
  2. Combine salt, pepper, garlic powder, onion powder and lemon zest together.
  3. Mix the dry rub with coated wings and place them in a sealed ziplock bag. Refrigerate for 4-8 hours.
  4. Preheat oven to 120C. Place wings on a greased rack (with another tray below it) and bake for 30 minutes.
  5. Turn up the oven temperature to 230C. Bake for another 30 minutes.
  6. Meanwhile, in a small saucepan, combine ghee and olive oil over medium heat.
  7. Once the ghee has melted, add in the garlic and stir for a minute or so.
  8. Pour in lemon juice, stir to combine and remove from heat.
  9. When wings are done, remove from the oven and brush generously with the lemon "butter". Return to the oven for 5 minutes. Flip wings over and brush with more lemon "butter" and bake for another 5 minutes. Serve with homemade ranch dressing.
Notes
Ranch dressing recipe can be found on the Whole30 site:
https://whole30.com/2014/08/mayo-ghee-sauces/
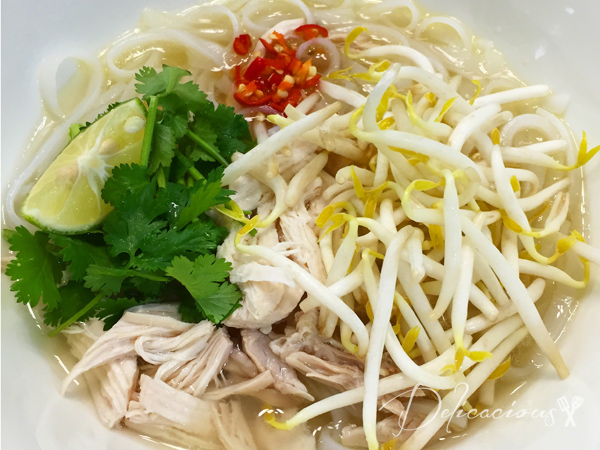


Instant Pot Pho Ga (Vietnamese Chicken Pho)

Pho Ga

Hubby and I just returned from Hanoi, Vietnam about a week ago. It was the first time since the kids were born that we had the opportunity to take a solo trip and we thoroughly enjoyed it. One of our highlights was the cooking lessons from Apron Up. I promised them that I’d blog about them so look out for the next blog post on that happening, sometime this week hopefully. Anyway, one of the dishes that we learnt was Pho Bo, or Beef Pho. Both Pho Bo and Pho Ga are popular Vietnamese breakfast dishes, and both involved simmering the soup broth for long hours. Long hours? That seems like a dish to try to re-make with the Instant Pot! And that was just what I tried to do this past weekend – making Pho Ga, or Chicken Pho, with the Instant Pot. I applied some of the techniques that I learnt from making Pho Bo in the making of Pho Ga.

Before I share the recipe, here are some quick tips:

  • This recipe requires the use of either a grill or oven to broil and char the onion and the ginger. I’d suppose it’s possible to omit this step and just attempt to brown the onion and the ginger with the rest of the herbs but the depth of flavour of the broth would be compromised.
  • It is absolutely essential to parboil the chicken bones to remove the scum. This step is the key to yielding a clear broth.

Here’s the simple recipe. Enjoy!

Instant Pot Pho Ga (Vietnamese Chicken Pho)
 
Author:
Cuisine: Vietnamese
Serves: Serves 4
Ingredients
  • 1 whole chicken
  • 1 large red onion, cut in quarters
  • 3-inch piece of ginger
  • 2 star anise
  • 5 cloves
  • 2 tbsp coriander seeds
  • 2 litres of water
  • 1 bunch of coriander/cilantro stems, tied with cooking string (about 6 would suffice)
  • 2 tbsp fish sauce
  • 2 tbsp sugar
  • salt and pepper to taste
  • Pho noodles, rehydrated
  • 1 lime, quartered
  • Beans sprouts, washed and tails removed
  • Coriander leaves
  • Birds eye chilli
Instructions
  1. Remove the chicken breast from the chicken and set aside. Cut the remaining chicken up by separating the thighs, feet, wings and neck.
  2. Broil the onion sections and ginger in the oven till slightly charred. Turn the sections frequently to ensure even browning. The ginger and onion should become slightly soft.
  3. Allow the onion and ginger to cool down slightly before removing the charred portions. Set aside.
  4. Place the chicken parts (except the breast meat) into a large bowl. Pour enough boiling water into the bowl to cover the chicken parts. Allow it to sit for about 5 minutes. Rinse the scum off the chicken parts and set aside.
  5. Set the Instant Pot to saute mode.
  6. Add the star anise, cloves and coriander seeds to the pot and toast the spices till fragrant (5 minutes). Add the spices into a spice bag.
  7. Fill the pot with 2 litres of water.
  8. Add in the spice bag, ginger, onion, coriander stems and chicken parts (except the breast).
  9. Set the Instant Pot to High Pressure, and set the timer for 25 minutes.
  10. When the timer beeps, allow it to release pressure naturally for about 10 minutes, before carefully de-pressurising the pot.
  11. Open the pot and remove the scum, if any, from the surface of the broth. Remove the chicken legs. Shred the meat off the chicken legs and return the bones to the pot.
  12. Add in the chicken breasts, fish sauce and sugar. Set the IP to High Pressure for another 10 minutes.
  13. Rehydrate the pho noodles according to instructions.
  14. When the pot beeps, allow it to release pressure naturally for about 7-10 minutes before carefully depressurising the pot.
  15. Add in salt and pepper to taste. (I added in 1 - 2 tsp of salt)
  16. Remove the chicken breasts and shred the meat. Remove all the other ingredients from the pot.
Assembling the pho bowls
  1. Add some pho noodles to a bowl.
  2. Top the noodles with some bean sprouts.
  3. Ladle the clear broth over the noodles.
  4. Top with shredded chicken meat, cilantro leaves, lime and birds eye chilli, if desired.
  5. Serve hot.


Salted egg custard buns (Liu Sha Bao)

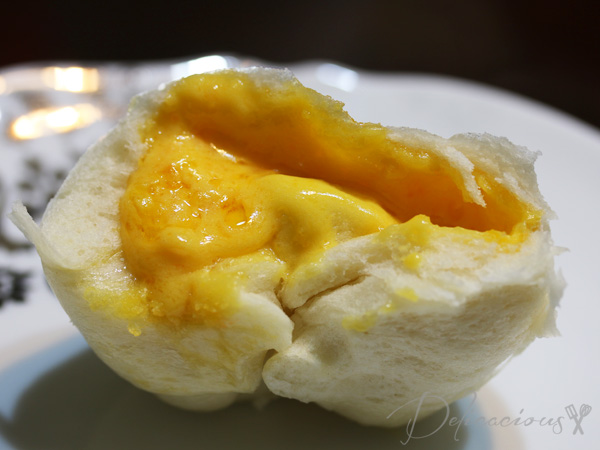
liu sha bao

The person who created salted egg custard buns or Liu Sha Bao is a genius. Pure genius. Sweet yet savory fluid custard. Definitely one of my favourite dim sum items, and of those foods where I think that the calories are worth spending on. I had never quite thought of trying to make Liu Sha Bao at home as it did seem rather complicated. How does one wrap fluid custard in dough? Well, it so happened that I had a couple of extra salted eggs sitting around (extras from mooncake making) and so I decided to experiment. I read up a couple of recipes from books and the internet and settled on a combination of a few recipes plus some gut feel.

The best tip I found was from Bake for Happy Kids. She recommended keeping the custard filling in the fridge overnight (several hours will suffice actually) so that it hardens and that would make it easier to wrap it in dough. Why didn’t I think of that? For the dough, I used an oil based dough (read: no shortening). It’s a little more chewy than the shortening based dough, but it contrasts pretty well against the fluid custard. However, I realised that oil based dough doesn’t keep as well the next day – when the buns are reheated the next day, they become slightly tougher. If the buns are consumed the day they are made, I would recommend using the oil based dough. Otherwise, for a softer bun, you can use the dough in this recipe. It uses shortening, but I’ve just found out that Crisco shortening does not contain trans-fats! Now I can use shortening without guilt.

Ready to try your hand at making some LSB? Here’s the recipe!

Salted egg custard buns (Liu Sha Bao)
 
Author:
Ingredients
Salted Egg Custard
  • 5 salted egg yolks, steamed
  • 60g unsalted butter, room temperature
  • 40g icing sugar
  • 30g custard powder
  • 45g milk powder
  • 5g corn flour
  • 30ml fresh milk
Dough
  • 300g hongkong flour
  • ½ tsp active yeast
  • ½ tsp baking powder
  • 20g sugar
  • 15ml vegetable oil
  • 140-150ml warm water
Instructions
Salted yolk custard filling
  1. Mash steamed salted yolks with a fork into fine bits.
  2. Using a wooden spoon, cream butter and icing sugar till light and creamy.
  3. Add in the rest of the ingredients, including the salted egg and mix till smooth.
  4. Cover with cling wrap and refrigerate till firm.
Dough
  1. In the bowl of a standing mixer fitted with a dough hook, mix all the dry ingredients together.
  2. Mix oil with water and with the mixer on at low, add in the water mixture in a slow stream.
  3. Knead for about 5 minutes, or until dough is smooth and elastic.
  4. Shape dough into a ball and place inside an oiled bowl. Cover with cling wrap and allow dough to rise for about an hour, or until double its original size.
  5. Remove dough from bowl and shape dough into a log. Divide into 12 equal pieces.
  6. Divide custard filling into 12 balls (I use a metal spoon for this).
  7. Flatten each piece of dough into a disc, place the filling inside and seal dough around the filling. Place bun, sealed side down, on a small piece of waxed baking paper. Alternatively, you can place the bun in small foil liners.
  8. Allow buns to rest for 15 minutes.
  9. Steam over medium heat for 8-10 minutes. Enjoy hot.
  10. If storing, cool them down to room temperature before storing them in the refrigerator. Re-steam before consuming.
Notes
Adapted from Bake for Happy Kids and Chef Chan Dim Sum book


Steamed pandan coconut cakes (Kuih Puteri Ayu)

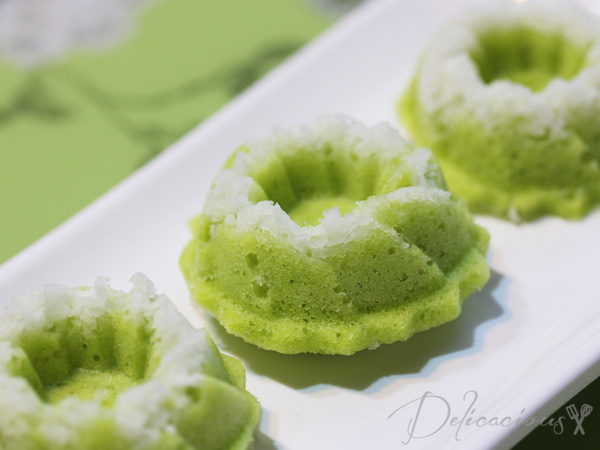
Steamed pandan coconut cake

The flavour combination of pandan and coconut never fails. Just think of kaya, pandan cake, and so many other kuih kuih that uses this combination. It’s almost always perfect. I found these moulds at Phoon Huat recently, and decided to try my hand at making some of these small dainty steamed cakes. Surprisingly, they are really easy to make! My little one prefers the cake without the coconut, but I like the sweet and slightly salty touch that the shredded coconut adds. If you have the time, use freshly squeezed coconut milk and grated coconut for that extra fragrant touch.

Steamed pandan coconut cakes (Kuih Putri Ayu)
 
Serves: 20-22 pcs
Ingredients
  • 120 ml coconut milk
  • 10 pandan leaves, cut into small pieces
  • 2 eggs
  • 80g granulated sugar
  • 150g plain flour
  • 1½ tsp baking powder
  • ¼ tsp salt
  • 50g shredded coconut
  • pinch of salt
  • 1 tsp corn flour
Instructions
  1. Grease cake moulds with a small amount of oil.
  2. Blend pandan leaves with coconut milk. Sieve to obtain pandan milk. Measure out 120ml and set aside.
  3. In the bowl of a standing mixer (or with a hand mixer), whisk eggs with sugar till thick and foamy.
  4. In a separate bowl, whisk together flour, baking powder and salt. Set aside.
  5. Add 120ml of pandan coconut milk to the egg/sugar mixture and mix on low speed.
  6. Add in flour in two to three portions and mix on low speed till combined. Do not overmix or the batter will deflate.
  7. Mix shredded coconut, salt and corn flour together.
  8. Add a small portion to each mould and press to flatten. (I simply place another mould over it to compress the coconut).
  9. Fill the moulds with batter till it is almost full.
  10. Steam over high heat for 15 minutes.
  11. Remove and cool slightly on a cooling rack before serving.


Walnut Mooncakes (Improved)

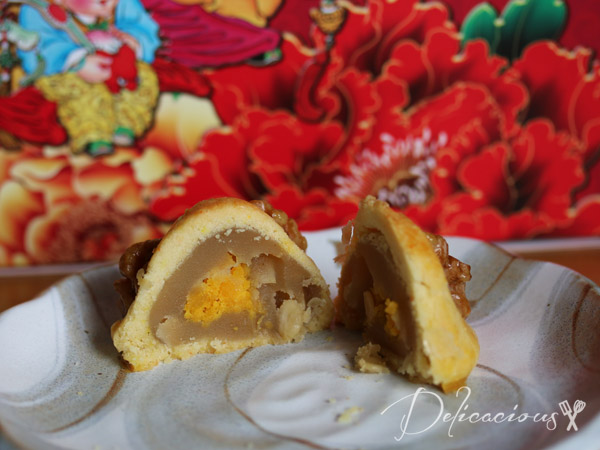
Walnut mooncakes

Walnut mooncakes are one of our family’s favourites and I bake them every year. This year, I modified my usual recipe as I found it a little too crumbly. The pastry of the previous recipe doesn’t quite hold up when it’s cut. Besides some slight tweaks to the amount of butter and flour, I’ve also replaced baking soda with baking powder as baking powder yields a more neutral tasting product (since there aren’t any acidic ingredients). I’m very satisfied with the results and my hubby, little one and mum loves it.

Walnut mooncakes

I’ve added melon seeds and salted egg yolks (my favouite) to the mooncake but you can choose to omit these if you like. As for the amount of walnuts to use, it really depends on your preference. I like walnuts so I use large fresh walnuts. Make sure that the walnuts you use are raw ones and not salted/toasted ones though.

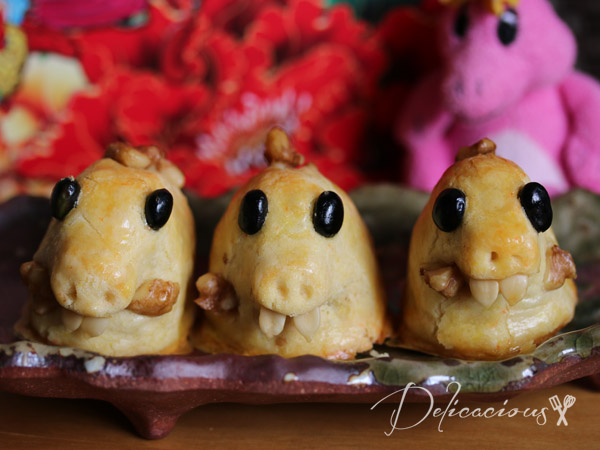
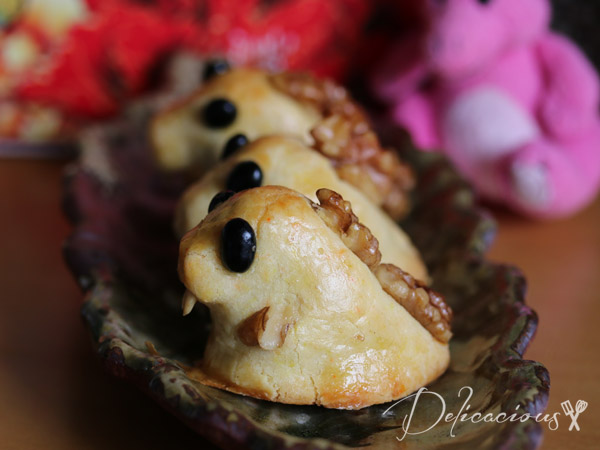
walnut dinosaur mooncakes

My hubby decided to join in the fun and made these dinosaur walnut mooncakes. I think he calls them dino-wal-saurus. I think they are totally adorable, though they are very time-consuming to make. He used black beans for the eyes, melon seeds for their teeth and walnuts for their scales. Check out their side profile below. He thinks that there’s a market for these lovely dino-wal-saurus and all dino loving boys would love to have one. I would love to hear your thoughts on his creation!

walnut dinosaur mooncakes

5.0 from 1 reviews
Walnut Mooncakes (Improved)
 
Serves: 30 - 32
Ingredients
Pastry
  • 350g Plain flour
  • 30g Custard Powder
  • 1 tsp baking powder
  • ¼ tsp salt
  • 50g Icing sugar
  • 250g unsalted butter
  • 1 egg
  • 1 tsp Vanilla Essence
Filling
  • 30g toasted melon seeds
  • 750g White Lotus Paste
  • 6-7 salted egg yolks (each cut into 6 pieces)
Before baking
  • 1 Egg yolk + 1 tbsp water (for glazing)
  • Walnut for decoration
Instructions
  1. In a large bowl, sift flour, custard powder, salt and baking powder together. Whisk ingredients together and set aside.
  2. In the bowl of a standing mixer set to medium high speed, cream sugar and butter together until slightly pale and fluffy.
  3. Gradually add in egg and vanilla and beat on medium high speed till fluffy and light.
  4. Fold in flour mixture in two parts. Refrigerate dough overnight.
  5. Bake salted egg yolks for 5 minutes at 160ºC. Set aside to cool. Cut each yolk into 6 pieces.
  6. Mix melon seeds with lotus paste. Divide fillings into about 25g each.
  7. Wrap a piece of salted egg yolk in each ball of filling.
  8. Take out dough from fridge and divide into portions of 20g each.
  9. Wrap fillings into dough and decorate with walnut.
  10. Apply egg wash on mooncakes and bake at 160ºC for 10 mins.
  11. Remove from oven and allow mooncakes to rest for 10 mins. Re-apply egg wash and return to oven and bake for another 20 mins or till golden.


Claypot Chicken Rice

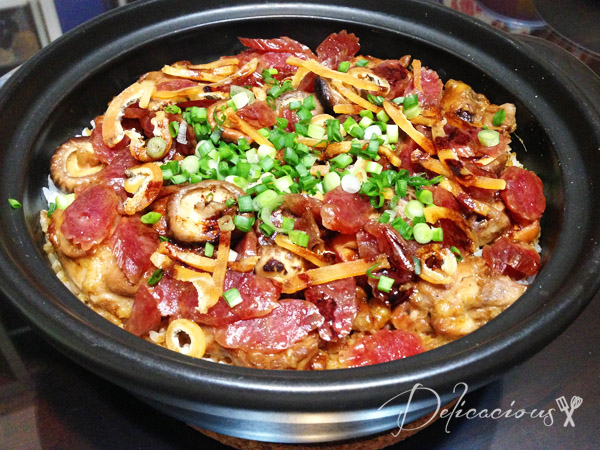
claypot chicken rice | Delicacious

Dinner at home is typically 三菜一汤 (three dishes and one soup) on weekdays but lately, with the addition of an infant, we have been trying to simplify dinner. One dish meals seem to be the way to go and this claypot chicken rice is one of our favourite Chinese one dish meals. It uses simple ingredients, is fast to prepare (start to finish is just slightly more than an hour) and is definitely satisfying. Of course, it can’t beat claypot rice that is cooked over charcoal fire but this definitely comes close. My hubby loves scraping up the slightly charred crispy rice bits at the bottom of the claypot!

Here are some tips for preparing claypot chicken rice. Firstly, cooking times with a claypot would vary with the size of claypot and the fire used. I’ve given guidelines that work for my claypot in my recipe but you may wish to adjust the timing after you’ve tried the recipe for the first time. For the claypot, I’ve used a Tanyu flat bottom claypot, but you can use any seasoned claypot. Noobcook has some good advice on preparing a claypot for its first use here. I’ve adjusted the liquid amount for this recipe so that the rice is moist but not soggy. If you prefer the rice to be drier, you may wish to reduce the liquid amount further. Lastly, whenever possible, use a low sodium chicken stock. If using chicken stock cubes/packaged chicken stock, it would be advisable to use half water and half stock as the stock is usually rather salty.

And now for the recipe…Continue Reading

Pandan Snow Skin Mooncakes

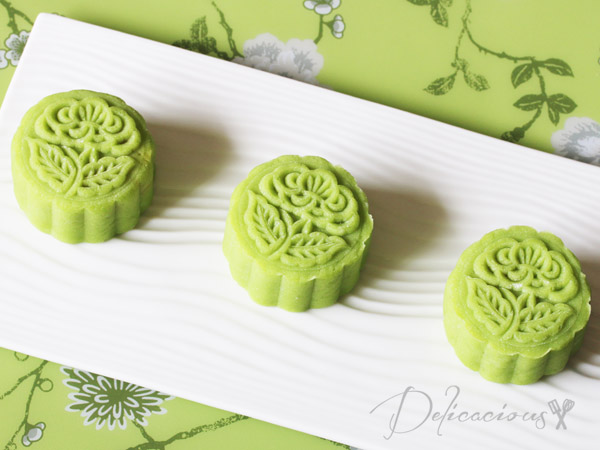
Pandan snow skin mooncakes

Mid-autumn festival is approaching and I’m back on the blog after a 2 months hiatus. I gave birth to my 2nd baby girl two months ago (she’s such a cutie) and have had my hands rather full. Now that she is slightly older, hopefully I’d have more time to blog (fingers very crossed). But I digress. Let’s go back to mooncakes.

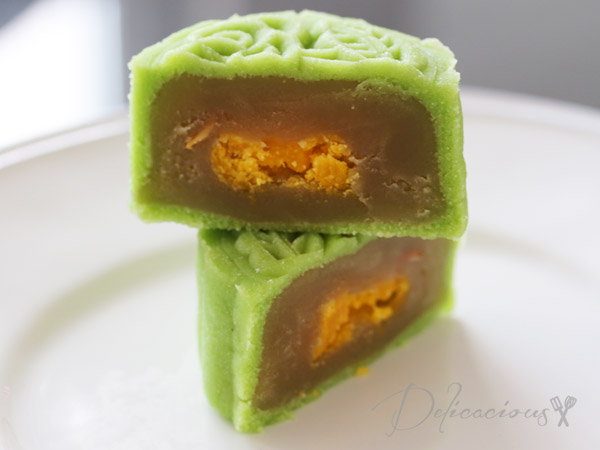
I have fond memories of mini pandan snow skin mooncakes that my mom would buy from this old fashioned bakery near Alexandra during Mid-autumn festival. I was probably in my teens then and to me, those were really delicious snow skin mooncakes. They were freshly made, had a strong pandan flavour and the snow skin was very soft. Unfortunately, the bakery closed down a couple of years later and I couldn’t find similar mooncakes. So a couple of years ago, I decided to start making my own. One of the more popular mooncakes I’ve made are these Red Wine Berry Snow Skin Mooncakes.

Pandan Snow Skin Mooncakes

Continue Reading