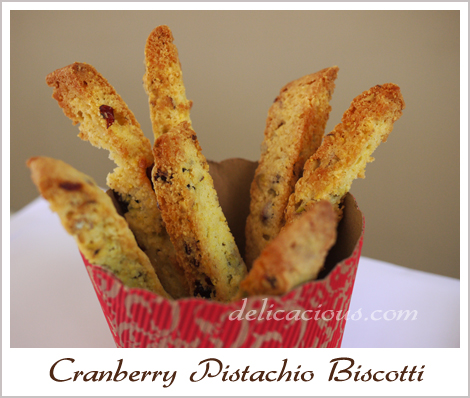
Pistachio and Cranberry Biscotti

Cranberry and pistachio are two common ingredients. I suspect this is more to do with their colours than their flavours. Meaning to do something Christmasy, I decided to make cranberry pistachio biscotti by modifying a basic recipe from Dorie Greenspan’s book – Baking, from my home to yours. This recipe is interesting in that it incorporated cornmeal which added a surprising fragrance and crunch to the biscotti.

So did the cranberry and pistachio combination work? Definitely. The biscotti received raving reviews from all who tried it. I even had requests for orders for it for Chinese New Year! I had to explain that it was a Christmas flavour, but on second thought, I guess it is a wonderful biscotti to have all year round.

Cranberry and Pistachio Biscotti

Ingredients:
1 1/2 cup all-purpose flour
1 1/2 tsp baking powder
1/4 tsp salt
1/2 cup yellow cornmeal
4 oz unsalted butter, at room temperature
1 cup sugar
2 large eggs
1  tsp vanilla extract
1/2 cup lightly toasted chopped pistachio nuts
1/2 cup dried cranberries

Method:

  1. Place a rack in the center of the oven and preheat the oven to 350ºF. Line a baking sheet with parchment.
  2. Whisk flour, baking powder and salt together. Add the cornmeal and whisk again.
  3. Using a stand mixer, beat butter and sugar together at medium speed for 3 minutes, until very smooth.
  4. Add eggs and continue to beat, scraping down the sides of the bowl as needed, for another 2 minutes or so, until the mixture is light and creamy.
  5. Beat in the vanilla extract.
  6. Reduce the mixer speed to low and add in the dry ingredients mixture, mixing only until they are just incorporated.
  7. Scrape down the sides of the bowl, add in the chopped pistachios and cranberries and mix just to blend.
  8. Scrape half the dough onto one side of the baking sheet. Using your fingers and a rubber spatula, work the dough into a log about 12 inches long and 1 1/2 inches wide.
  9. Form another log on the other side of the baking sheet.
  10. Bake for 20 minutes, or until the logs are lightly golden but still soft and springy to the touch.
  11. Transfer the baking sheets to a rack and cool the logs on the baking sheet for 30 minutes.
  12. Carefully transfer the logs onto a cutting board and with a serrated knife, trim the ends and cut the logs into 3/4 inch thick slices. Return the slices to the baking sheet, this time standing up.
  13. Bake the biscotti for another 15 minutes, until they are golden brown and firm.
  14. Transfer them to racks and cool to room temperature.

These will keep well at room temperature if stored in an air-tight container.
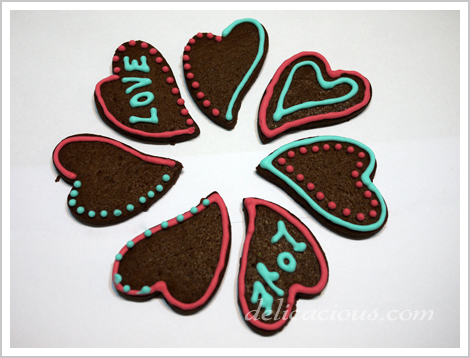
Christmas gingerbread – hearts and crosses

The true meaning of Christmas is found in Christ and so even though it is not Easter, I thought crosses would be befitting for Christmas too.

Christmas is definitely a season of love – where family and friends get together to spread festive joy and cheer. May we not forget the true meaning of Christmas – love was why He sent His son.

I know it is not Valentine’s Day, but I had red and white icing left over from Santas, so why not? Have a very blessed Christmas.

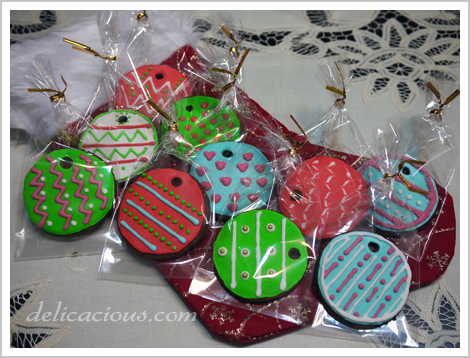
Christmas gingerbread – santas, hollies, ornaments and presents

Like I said in an earlier post, Christmas is a season where people start baking crazily. I didn’t quite go crazy baking –  it’s just that my gingerbread recipe yields A LOT of gingerbread. So one gets tired of snowflakes and has to think of alternatives. Gingerbread man (and woman) and Christmas trees would be great, if only I had the cutters. That’s right. I only discovered that I did not own any gingerbread or Christmas tree cutters after I’ve made the gingerbread dough. Another reason why one should categorise his/her cutters.

Anyway, I discovered the versatility of the simple circle cutter. A circle cutter and a large piping tip makes good Christmas ornaments. So here are the decorated Christmas ornaments, in a variety of Christmasy colours, individually packed as gifts.

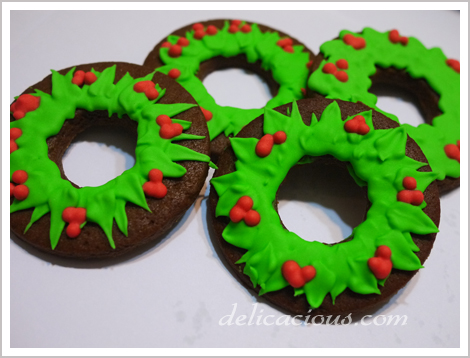
Another use of the mighty circle cutters – Christmas hollies! I tried to pipe these with the leaf tip but perhaps the icing was not quite stiff enough, the vein patterns were not as pronounced. Nevertheless, I think they look cute.

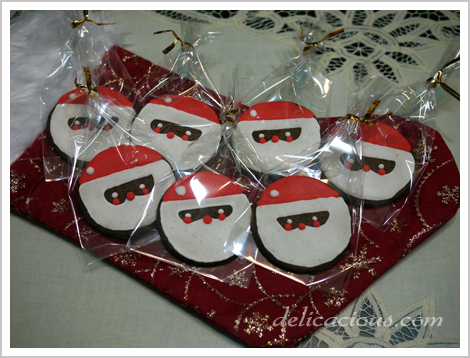
Yet another use for the circle cutters – Santa faces! I got this idea from one of my baking books – Cookie Craft. I think they look absolutely adorable. The children will definitely like them. I was a little lazy to dot the eyes with black dye but if you so fancy, do go ahead.

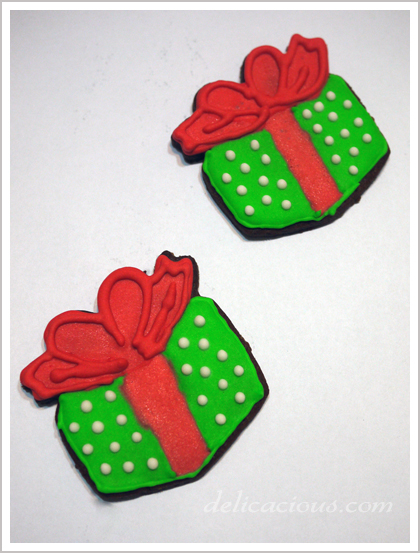
These are the least of my favourites, but since I had a present cookie cutter, I decided to use them afterall.

Christmas gingerbread – snowflake series

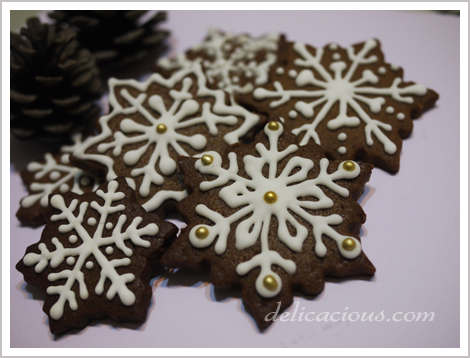
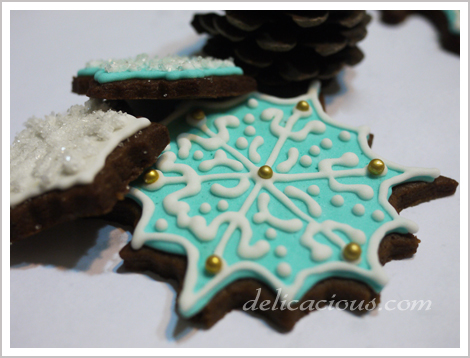
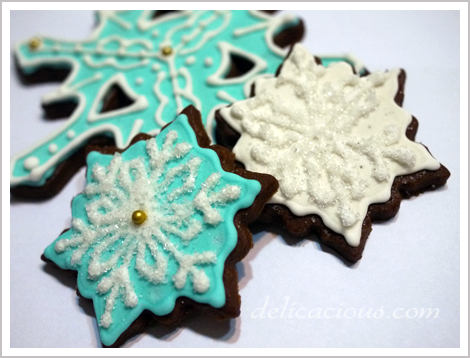
And so it’s that time of the year again, where everyone starts baking crazily. Gingerbread is usually on the baking list, and so are iced cookies. So gingerbread iced cookies it will be. I did a series of snowflakes of different sizes, mostly small ones though simply because they are cuter and easier to manage. I like this particular gingerbread recipe because the cookies don’t rise much, leaving a nice flat surface for decorations. Gingerbread softens very quickly, especially with a layer of icing on top. Big ones become very fragile. The above is the plain design – white lemon icing on gingerbread. I like the effect of the gold dragees on the white icing. Perhaps silver would have been better, but they are always out of stock, Christmas or not.

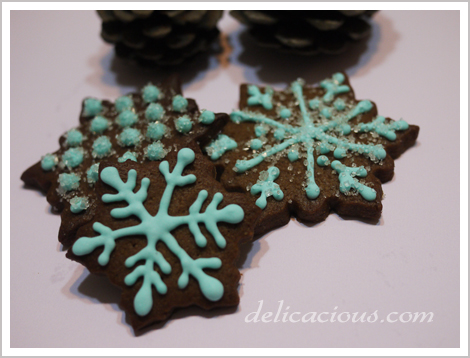
These ones are made using light turquoise lemon icing. My snowflakes are all either white or light turquoise. Somehow any other colour looks a little weird on snowflakes. Pink snowflakes anyone?

I really like these. These are flooded with icing, left to dry before the details are piped on and coarse sugar is sprinkled on the wet details. I couldn’t get hold of sanding sugar but coarse sugar works perfectly well too. Somehow these give an icy snowy feel. Aren’t they pretty?

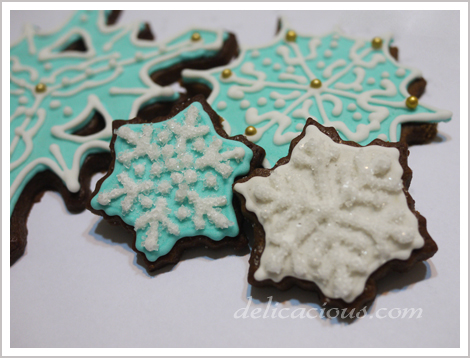
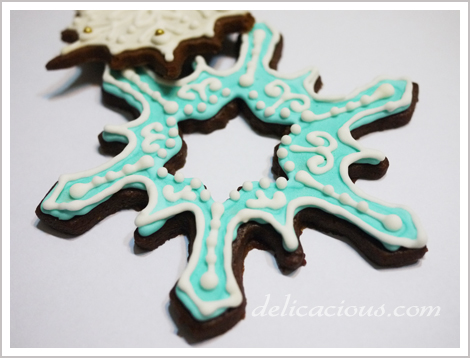
I tried a white on turquoise combination too. I think the colour combination works pretty well! A very different feel from the white on white.

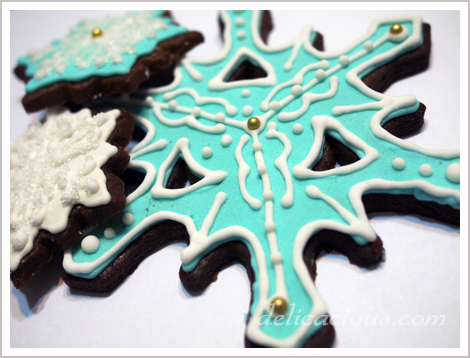
And here is the big snowflake. I only made three of these because I couldn’t bear the thought of having to decorate so many big ones. And, like I mentioned they are awfully fragile. The next time, I will make the large snowflakes with regular sugar cookie dough. Those are less fragile.

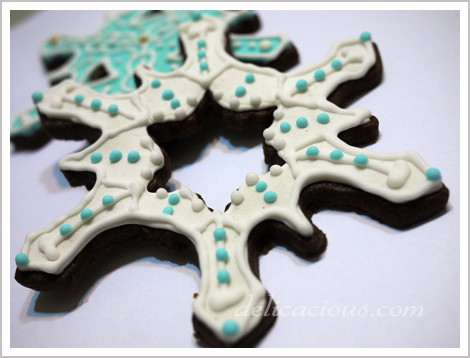
These are the other two large snowflakes that I made. I think the white on turquoise combination still looks better. Turquoise on white looks a little funny.

So did you make any snowflake cookies this year too?

Maple Pecan Tart

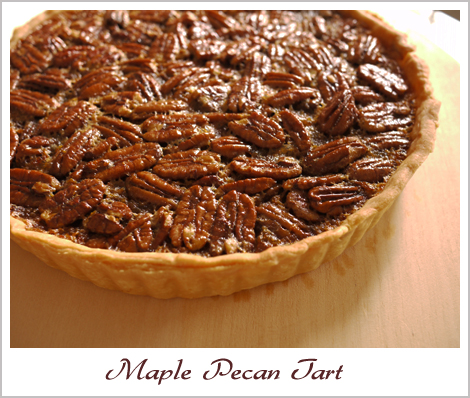
Pecan candy, pecan fudge, pecan rolls, honeyed pecans… somehow pecans always seem to be associated with Thanksgiving or Christmas, though I not quite know why. I tried searching around for information on it, but could not seem to find any. Nonetheless, in the spirit of Christmas, I decided to bake a maple pecan tart for the pizza gathering I wrote about in an earlier post. If you had read that post, you’d know that the attempt to make the dough for the tart went quite wrong, with it being blended into a paste form accidentally, when it was supposed to have bits of butter in it to ensure flakiness. I am happy to report that the tart crust recipe was pretty forgiving. Even though it was not as flaky as it should have been, it was still fairly crumbly. An untrained tongue probably would not have known that something went wrong.

When I looked through the recipe before baking the tart, I was pretty sure I was going to end up with an overly sweet tart, looking at the amount of maple syrup and sugar the recipe calls for. Nonetheless, those amounts were needed for the right balance between the sugars and the eggs to enable the filling to set. I was pretty glad when the tart did not turn out quite as sweet as I expected, thanks to the addition of the orange zest. It’s a pity I could not get hold of any kumquats, which was what the original recipe called for.

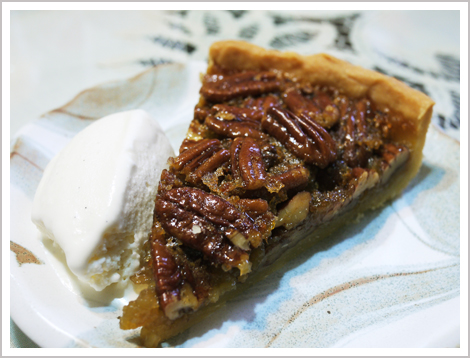
I served the tart with homemade vanilla bean ice-cream, the recipe of which I will post up soon. The vanilla bean ice-cream complemented the pecan tart perfectly. In fact, I think it’s more winning a combination than the suggested whipped cream accompaniment.

Maple Pecan Tart
Makes 1 9-inch tart
Recipe adapted from Tartine

Ingredients:
Fully baked and cooled flaky tart shell (see below)
3/4 cup sugar
1/2 maple syrup
1/2 cup light corn syrup
2 tbsp bourbon whiskey
1/2 tsp salt
2 oz unsalted butter
1 tsp vanilla extract
3 large eggs, lightly beaten
2 cups of pecan halves
zest of 1 orange
vanilla bean ice-cream for serving

Method:

  1. In a saucepan, combine the sugar, maple syrup, corn syrup, bourbon and salt. Place over medium heat, bring to a boil and continue to boil for a minute.
  2. Take the pan off the heat and whisk in the butter as it melts.
  3. Let the mixture cool to room temperature.
  4. Preheat the oven to 350ºF while the mixture cools.
  5. Add the vanilla extract and beaten eggs to the cooled mixture and stir till combined.
  6. Stir in the pecans and orange zest and pour the mixture into the tart shell.
  7. Bake until the filling is just set, about 50 minutes. If the top is browning too quickly, tent it with a piece of foil.
  8. Let it cool on a wire rack before cutting.
  9. Serve at room temperature (or warm if you prefer), with a scoop of vanilla bean ice-cream.

Flaky Tart Shell
Makes 1 9-inch tart shell

Ingredients:
1/2 tsp salt
1/3 cup of very cold water
1 1/2 cups + 2 tbsp of plain flour
5 1/4 oz very cold unsalted butter, cut into 1 inch cubes

Method:

  1. Add salt to the water and stir to dissolve. Keep in the refrigerator until very cold.
  2. Place the flour in the bowl of a food processor. Add the cold butter cubes to the flour and pulse briefly until mixture forms large crumbs.
  3. Add the water and salt mixture and pulse for several seconds until the dough begins to come together. Do not over pulse!
  4. Shape the dough into a disc 1 inch thick and wrap tightly in plastic. Chill overnight.
  5. Roll chilled dough to 1/8 inch thick. Lightly dust work surface with flour to prevent dough from sticking.
  6. Cut out a circle about 2 inches larger than the pan, and carefully transfer it to the tart pan.
  7. Cut away the remaining dough or crimp the edge.
  8. Chill the shell for at 30 minutes to an hour.
  9. Preheat the oven to 375ºF.
  10. Line the shells with parchment paper and fill with pie weights or a mixture of grains and beans.
  11. Bake for 25 minutes on a middle rack.
  12. Remove parchment and pie weights and continue to bake for another 5 to 10 minutes, until the shell is golden brown.
  13. Let the shells cool completely on wire racks before filling.

Tis the season for the fruitcake…

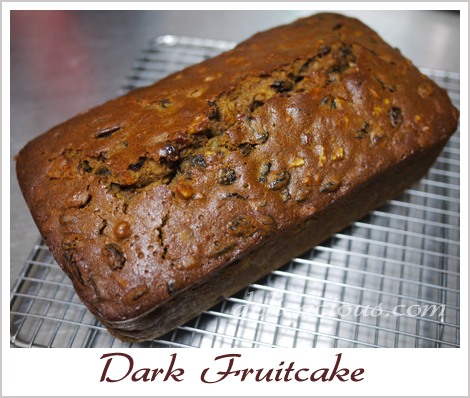
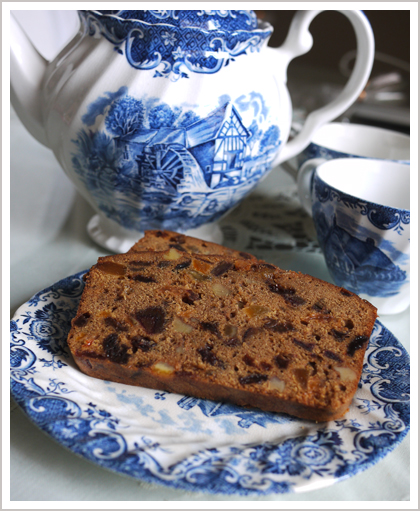
My mother surprised me a couple of weeks back by requesting that I bake her a fruitcake this year. She does not have a very sweet tooth, and hardly ever requests for any baked goods and so this was indeed surprising. I didn’t even think she liked fruitcakes! Anyway, it was too late to start soaking fruits in brandy then, so I decided to make one that didn’t involve any soaking of fruits. The cake however, should be stored for a couple of weeks before eating. As I type this, my loaf of fruitcake is sitting in the refrigerator, nicely wrapped in plastic and foil. I know that fruitcakes are supposed to be able to keep at room temperature for a month or more, but seeing how my kitchen seems to be a war zone for ants lately, I am not taking any chances.

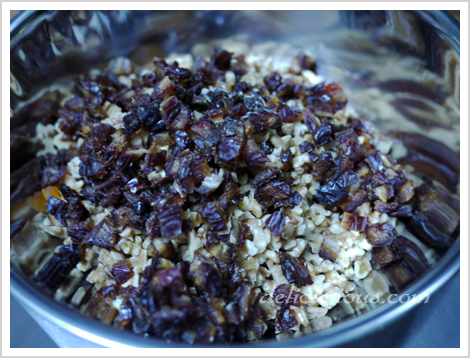
The amount of fruit and nuts used for this recipe is rather phenomenal. All that fruit and nuts in the photograph above yielded two 9 X 5 inch loaves. The fruitcake turned out nicely after baking with the aroma of brandy wafting through the oven doors. We finally cut the cake up a month later and boy was it lovely. Best enjoyed with a fragrant cup of English tea.

Dark Fruitcake
(yields two 9 X 5 inches loaves)
Recipe adapted from Joy of Cooking

Ingredients:
3 cups plain flour
1 tsp baking powder
1/2 tsp baking soda
1/4 tsp salt
1 tsp ground cinnamon
1 tsp ground nutmeg
1 tsp ground all spice
4 oz unsalted butter, at room temperature
2 cups packed dark brown sugar
6 large eggs
1/2 cup molasses
Grated zest and juice of 1 orange
Grated zest and juice of 1 lemon
1/2 cup brandy
2 1/2 cups diced mixed fruits
2 cups coarsely chopped walnuts
1 1/2 cups chopped dates
1 1/2 cups dried golden raisins
1 cup chopped dried apricots

Method:

  1. Preheat the oven to 300ºF. Grease two 9 X 5 inch loaf pans and line the bottom and sides with parchment paper.
  2. In a large bowl, sift together flour, baking powder, baking soda, salt and all the ground spices.
  3. Using a standing mixer, beat butter till creamy. Add in dark brown sugar and beat till creamy and lightened in colour and texture, 3 to 5 minutes.
  4. Beat in one egg at a time, scraping the sides of the bowl as necessary.
  5. Beat in molasses, lemon and orange zest and juice.
  6. On low speed, add in the flour mixture in 3 parts, alternating in 2 parts with the brandy.
  7. Finally, stir in the mixed dried fruits using a spatula.
  8. Scrape the batter into the two pans and spread evenly.
  9. Bake until a toothpick inserted in the centre comes out clean, about 1 1/2 hours. If the cake gets too dark on top, tent it loosely with foil for the last 30 – 45 minutes.
  10. Let cool in the pan on a rack for 1 hour.
  11. Invert the cake and remove the liner and let it cool the right side up on a rack.
  12. When totally cool, wrap cake with plastic wrap followed by foil.
  13. Cake are recommended to be stored for 3 – 4 weeks before serving.

Christmas Kugelhopf

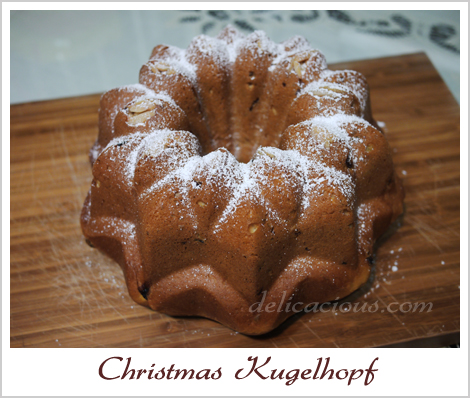
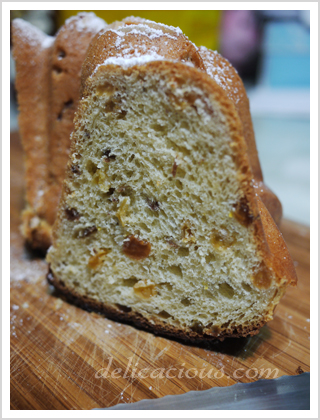
I really wanted to try to bake one of the popular Christmas breads this year. After flipping through a few recipe books, I initially settled on the one from Joy of Cooking. Something went wrong however, during the mixing process. The dough just didn’t seem to come together sufficiently for me to shape it (or knead the raisins) into it. It just felt wrong. Not wanting to waste any more time or raisins, I decided to dump that batter and try again with another recipe. This time, it worked perfectly. The result? A lovely sweet bread filled with raisins and a wonderful reminder of Christmas. The icing sugar on the top of the bread is optional but it looks so Christmasy so why not?

I didn’t have a kugelhopf pan but figured this star bundt would work as well. Nordic Ware makes such great bundt pans. They only need slight greasing and they hardly ever stick. Not to mention they ensure that your cakes/breads bake evenly. And no, I’m not paid to do a promotion for them here. It’s just that good things are worth sharing.

Kugelhopf
Fills a 11-12 cup bundt pan
Recipe adapted from Gourmet, 2002

Ingredients:
1 1/2 tsp instant yeast
2 tbsp warm water (105–115°F)
1 cup whole milk
7 tbsp unsalted butter, cut into tablespoon pieces and softened
6 tbsp granulated sugar
3 3/4 cups all-purpose flour
1 tsp salt
2 large eggs
1 cup golden raisins
1 cup dark raisins
4 tbsp rum
1 teaspoon finely grated fresh lemon zest
1/2 oz almond slivers (for decoration)
1 tablespoon confectioners sugar (for dusting)

Method:

  1. Cover 1 cup dark raisins with just enough water in a small saucepan and bring to a boil. Drain raisins and place them in a small bowl. Add 4 tbsp of rum and let them sit for at least 4 hours or overnight.
  2. Stir together yeast and water in a small bowl and let stand until foamy, 5 to 10 minutes.
  3. Heat milk with 6 tablespoons butter and granulated sugar over low heat, stirring, until mixture is warm (105 to 115°F), butter is melted, and sugar is dissolved.
  4. Sift together flour and salt into bowl of standing mixer. Make a well in flour and add yeast mixture. Add warm milk in a slow stream, mixing at low speed with paddle attachment. Increase speed to medium and beat in eggs 1 at a time, then beat in golden raisins, dark raisins with remaining rum and zest. Continue to beat until dough is smooth and elastic, about 5 minutes.
  5. Butter kugelhopf mold or bundt pan with remaining tablespoon butter. Put 3-4 almond slivers in each depression in bottom of mold (the almonds are only decorative; you can skip them altogether if your mold has no depressions), then scrape spoonfuls of dough evenly into mold (dough will be very elastic). Cover top of mold with oiled plastic wrap and a kitchen towel and let dough rise in a warm place until it fills pan, about 2 hours.
  6. Preheat oven to 400°F.
  7. Remove towel from kugelhopf and gently peel off plastic wrap. Bake kugelhopf in middle of oven 15 minutes, then loosely cover mold with foil and continue to bake until golden and a tester inserted in center comes out clean, 20 to 25 minutes more. Cool in pan 2 minutes, then invert cake onto a rack to cool completely, about 1 hour. Dust with confectioners sugar.