Archives for March 2013

Homemade Granola

Homemade Granola 
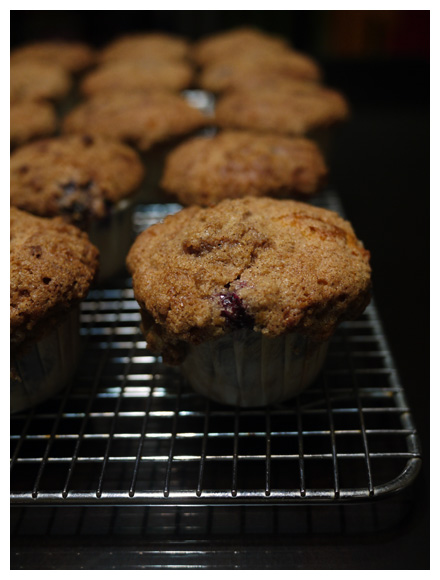
The idea of making granola came the day after I accidentally bought a second pack of rolled oats, thinking that my box of rolled oats had expired. My helper reminded me that those were rather new too, and so being stuck with two packs of rolled oats, I knew I better be using them rather quickly.

So yesterday, it being the first day of the school holidays and I having to entertain my easily-bored two year old toddler, I decided to involve her in making granola. She had great fun scooping and pouring the rolled oats with this very cute whale measuring cup that I bought earlier from ToTT, stirring the mixture and sticking in her grubby little fingers every once so often. Sensory play for her perhaps?

Perhaps the only troublesome thing about making granola is having to check the oven quite frequently to stir up the mixture so that the granola bakes evenly. I neglected to check it for just a tat bit longer and it browned more in certain regions. Still it was delicious, definitely much more delicious than store-bought granola. The bub couldn’t wait for it to come out of the oven, declaring that it was hers.

Today’s breakfast? Granola, served up with cold milk.

Homemade Granola

Ingredients

  • 2 1/2 cups rolled oats
  • 1 cup sliced almonds
  • 3/4 cups golden flaxseed
  • 3/4 cups shredded coconut
  • 2 tablespoons dark brown sugar
  • 1/2 teaspoon sea salt
  • 2 tablespoons maple syrup
  • 2 tablespoons honey
  • 2 tablespoons vegetable oil
  • 1/2 cup dried cranberries
  • 1/2 cup raisins

Directions

Step 1
Preheat oven to 170°C. Position two racks near the middle of the oven.
Step 2
In a large bowl, stir together rolled oats, almonds, flaxseed, coconut and brown sugar.
Step 3
In a small bowl or measuring jug, whisk together oil, maple syrup and honey.
Step 4
Pour honey mixture into large bowl with oats and mix well with a spatula.
Step 5
Spread mixture onto two baking pans and bake for 20 minutes, stirring often to ensure even roasting.
Step 6
After 20 minutes, rotate pans and bake for another 15-20 minutes till evenly golden brown.
Step 7
Allow to cook before stirring in raisins and cranberries.
Step 8
Store in airtight containers.

Blueberry Streusel Top Muffins

blueberry struesel top muffins I baked blueberry muffins… again. Yes, my husband’s colleague asked him a couple of days back when he brought these to work, “You guys really like blueberries, don’t you?” Well, we do. Most importantly, my two year old loves them. They are healthy. They contain lots of antioxidants. Enough said.

Though no one really gets tired of blueberry muffins, I do try to modify them to make them more interesting. A couple of weeks ago, I tried some muffins that a friend made – they had streusel topping. She said it was an allrecipe.com recipe, so I decided to search for them and found them. Since the streusel topping did not sound too healthy, I decided to ease my conscience slightly by replacing part of the flour with wholewheat flour and cutting down on the sugar content.

The result was a lovely moist muffin, with delicious streusel topping. The amount of topping can be varied according to your preference. I was rather generous for this batch but don’t they appear beautiful? 🙂

Blueberry Streusel Top Muffins

Serves 15 muffins
Website adapted from all recipes.com

Ingredients

muffin

  • 2 cups all purpose flour
  • 3/4 cups whole wheat flour
  • 1/2 cup Caster sugar
  • 1 teaspoon salt
  • 4 teaspoons baking powder
  • 1 lemon (zested)
  • 2/3 cups vegetable oil
  • 2 eggs
  • 2/3 cups milk
  • 1 1/2 cup fresh blueberries

topping

  • 1/2 cup caster sugar
  • 1/3 cup all purpose flour
  • 1/4 cup butter (grated while cold)
  • 1 1/2 teaspoon ground cinnamon

Directions

Step 1
Preheat oven to 200°C. Line muffin trays with cups.
Step 2
Sift flours, salt and baking powder together in a large bowl. Add sugar and stir to combine.
Step 3
In a separate bowl, add vegetable oil, egg and milk. Whisk to combine.
Step 4
Add Egg mixture to the dry ingredients. Mix till just combined.
Step 5
Fold in blueberries. Fill muffin cups till 3/4 full.
Step 6
Toss together ingredients for streusel topping. Combine them together with a fork.
Step 7
Sprinkle topping on top of muffin batter.
Step 8
Bake for 20 - 25 minutes, or until a tester comes out clean.

Vegetable and Ham Frittata

veg_frittata I woke up this morning at 6am with the realisation that I had not prepared anything for my toddler’s lunch box. In fact, I had no idea what to prepare. You see, three weeks ago, my two year old started pre-school at a Montessori that required them to bring their own lunchboxes. Since then, the mornings have been more “stressful” than usual. This is because as a teacher, I have to leave for work early too and that gives me very little time to prepare her lunchbox!

A quick glance in the fridge and I realised I had a couple of vegetables and ham. So I decided to modify a baked frittata recipe that I saw somewhere, sometime ago and came up with this. When it finished baking, I had just enough time to throw two into a lunchbox for my own snack and another two for my hubby. Two went to the little one of course.

The good news? Despite the rushed preparations, the frittatas must have tasted good to her because she finished both of them (I think, judging by the empty lunchbox). So this goes into my list of lunchbox ideas. More to come!

Note to self: Come up with a weekly menu……….

Vegetable and Ham Frittata

Ingredients

  • 2 tablespoons Olive Oil
  • 1 clove Garlic (finely chopped)
  • 1/2 Carrot (finely chopped)
  • 1/2 Zucchini (diced)
  • 1 Potato (diced)
  • 2 pieces Turkey Ham (diced)
  • 3 Eggs
  • 1/2 cup Milk
  • 1/2 cup Grated Parmesan
  • Ground black pepper
  • Salt

Directions

Step 1
In a skillet, sauteed garlic, zucchini, potato and carrots in olive oil for 3 minutes. Add ham and sauteed for another 2 minutes. Season with some pepper and salt and set aside to cool.
Step 2
Preheat oven to 180°C.
Step 3
In a large bowl, beat eggs with milk and cheese. Add cooled ingredients and mix to combine. Season with more salt and pepper if necessary.
Step 4
Spoon into prepared muffin cases and bake at middle rack for 20 - 25 minutes. The tops should be puffed up and golden brown.
Step 5
Serve warm, with a salad if you like.

Chef Icon Bakery

Chocolate Trovana I stumbled upon this bakery through an advertisement I saw on facebook. Chef Icon Bakery prides itself in being a nature bakery – they use no artificial ingredients or artificial fats. Seems like a perfect place to shop for a birthday cake for my daughter.

I went there in the afternoon with my husband to shop for a birthday cake and was promptly recommended their signature Chocolate Trovana. The signature cake comes in sizes of 500g, 1kg and 2kg and prior ordering is required. Looking at the array of cakes, we decided to stop for tea too.

Chef Francis was very friendly and recommended that we tried one of his cheesecakes if we liked cheesecakes. He promised that his cheesecakes were very different, and different they were. Even the cookies for the oreo cheesecake base were baked in the shop. His reason? Commercial oreo cookies contained preservatives. Such dedication to his nature baking concept indeed!

We finally decided to try the mango cheesecake and we were definitely not disappointed. The cheesecake was very light, unlike other baked cheesecakes that I’ve tried. Despite it’s lightness, the cake definitely did not lose its flavour. The mango fragrance permeated the cake; every bite was a delight. We were so busy eating the cake that we forgot to take a nice photo of it! Alas, there’s always a chance for visit two.

Now, back to the Chocolate Trovana cake we ordered. The verdict is found below.

chef_icon2 The layers of chocolate mousse and chocolate cake together with the rich chocolate ganache formed a heavenly combination. The cake was velvety smooth and very rich in chocolate flavour. Thankful that I only bought the 500g cake as a small slice goes a long way. This cake is highly recommended. Possibly the best chocolate cake I’ve tasted in a long while.

So where can you find Chef Icon?

Chef Icon Bakery
5 Kampong Bahru Rd
Singapore 169341
Phone: +65 9337 3900Mon – Sat: 8am to 8pm

Salmon Potato Cakes

salmon potato cakes I didn’t use to make salmon potato cakes. I like salmon oven-baked or pan-grilled, but my daughter changed that recently. You see, a couple months ago, my 2-year old daughter developed an adverse taste towards fish. Any kind of fish. So these fish cakes were my attempt to sneakily introduce fish into her meal with something that does not look too “fish-like”. Besides, they are really tasty and the adults loved them too. Salmon and potato – what’s not to like?

Verdict? She liked them. Success!! If you have a picky eater, try them. I make a larger batch and flash freeze them in a baking tray. Once frozen, I pack them in ziplock bags. Easy!

Salmon Potato Cakes

Serves 4
A tasty and flavourful salmon potato cake recipe.

Ingredients

  • 300g Salmon fillet (bones removed)
  • 1 teaspoon Olive oil
  • pinch sea salt
  • pinch ground black pepper
  • 4 Russet potatoes
  • 2 Eggs
  • 1 tablespoon Dijon Mustard
  • 3 stalks Scallions (thinly sliced)
  • 3/4 cups Japanese breadcrumbs
  • 1 tablespoon Butter
  • 1 tablespoon Olive Oil

Optional

  • 1/2 cup Green peas

Note

Salmon potato cakes can be frozen before the pan-frying step. Make a larger batch of these and serve them up for a quick dinner another day! Recipe is adapted from here.

Directions

Step 1
Season salmon with salt and pepper and brush with olive oil. Grill in a pan or in an oven until they are golden brown. Flake salmon into smaller pieces.
Step 2
Boil and mash potatoes. Add salmon, dijon mustard, scallions, beaten eggs and peas and combine. Season with more salt and pepper.
Step 3
Shape into patties and coat evenly with Japanese breadcrumbs.
Step 4
Preheat a skillet over medium heat and add olive oil and butter. Pan-fry salmon potato cakes until they are golden brown on both sides.