Archives for November 2015

Chocolate Ganache-filled cupcakes with Peanut Butter Buttercream

Chocolate Ganache-filled Cupcakes with Peanut Butter Buttercream

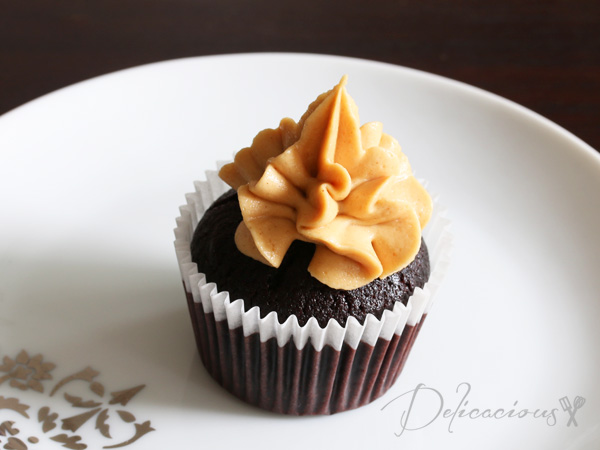
These cupcakes are likely the most decadent cupcakes that I’ve ever made. A moist chocolate cupcake topped with luscious peanut butter frosting. To up the decadent factor, I filled these cupcakes with a rich chocolate ganache. Gorgeous isn’t it? I baked 50 of these lovely beauties in two days. The first batch was for an office gathering and I ended up with so much left-over frosting that I baked another batch for my cell-group party.

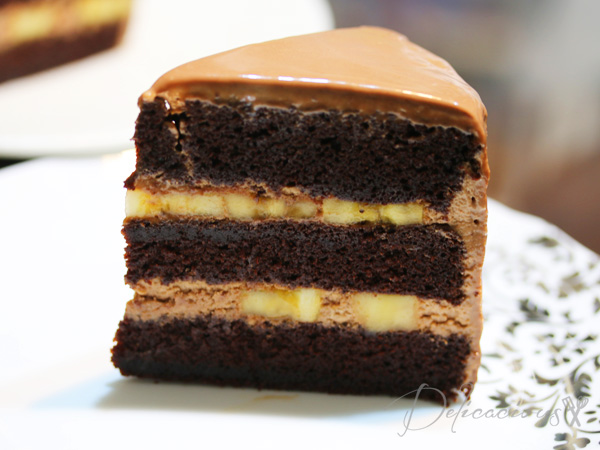
To be honest, I didn’t originally plan to fill these cupcakes with ganache. However, I was inspired when I came across the Wilton filling tip on a trip to  Phoon Huat. Afterall, I had some leftover ganache from making the Chocolate Banana Cake, and thought, why not? More chocolate is always better, right? (By the way, I love love LOVE the filling tip. You don’t need to dig an ugly hole in the cupcake. Just stick the tip in and pipe away. Amazing.)

So there you have it. Chocolate ganache-filled cupcakes, topped with peanut butter buttercream. Don’t tell your guests that you’ve filled them with ganache. Watch their faces after they take a bite. You can also get creative with the filling. How about some chocolate liqueur ganache? That sounds pretty awesome too.

Chocolate Ganache-filled cupcakes with Peanut Butter Buttercream
 
Serves: 24 cupcakes
Ingredients
Chocolate Cupcakes
  • 1 cup cake flour
  • 1 cup plain flour
  • ¾ cup dutch-processed cocoa powder
  • 1 tsp baking powder
  • 2 tsp baking soda
  • 1 tsp salt
  • 1⅓ cup Demerara sugar
  • 2 eggs (room temperature)
  • ¾ cup vegetable oil
  • 1 cup buttermilk (Add 1 tbsp white vinegar and add milk to form 1 cup)
  • 1 cup hot coffee (1 tsp instant coffee granules dissolved in hot water)
  • 1 tsp vanilla extract
Chocolate Ganache
  • 60g dark chocolate couverture (I used a mix of milk and dark couverture)
  • ½ cup whipping cream
Peanut Butter Buttercream
  • 115g unsalted butter
  • 1 cup creamy peanut butter (I used Planters)
  • 1 cup icing sugar, sifted
  • 3 tbsp whipping cream
Instructions
Chocolate Cupcakes
  1. Preheat oven to 175°C and centre an oven rack.
  2. Fill a 12 hole cupcake tray with paper liners.
  3. In a large bowl, sift together the dry ingredients.
  4. In another large bowl, combine the wet ingredients.
  5. Add the wet ingredients to the dry ingredients and using a whisk and starting from the centre, slow combine till you get a smooth batter.
  6. Fill each liner till ¾ full.
  7. Bake for 17-20 minutes or until a tester inserted in the middle of the cupcake cups out clean.
  8. Cool cupcake tray and fill with the remaining batter. You should have 24 cupcakes in total.
  9. Allow cupcakes to cool completely on a wire rack before frosting.
Chocolate Ganache
  1. In a small pot, heat whipping cream till bubbles form at the side. Do not allow it to boil.
  2. Pour hot whipping cream over chocolate and whisk till chocolate melts.
  3. Refrigerate till semi solid for ease of piping.
Buttercream
  1. Using a standing mixer fitted with the paddle attachment, cream together butter and peanut butter.
  2. Add sifted icing sugar and cream on medium high speed for a few minutes till the frosting is light and fluffy.
  3. Add whipping cream and cream for another minute or so.
  4. Use frosting immediately, or refrigerate it for a short while so that it can set up a little for smoother piping.
  5. If using frosting that has been refrigerated for some time, whisk it up before use.
To Assemble
  1. Fill a piping bag fitted with the filling tip with semi-solid chocolate ganache.
  2. Insert ½ way into each cupcake and fill. Do not overfill or cupcake surface may crack.
  3. Fill a piping bag fitted with the 1M open star tip with the peanut butter buttercream.
  4. Pipe swirls or ruffles on each cupcake.
  5. Refrigerate for 30 minutes to allow buttercream to set up before serving.
  6. (For more stability in the buttercream, you can replace half the butter with shortening.)

Bacon, Cheese and Scallions Muffins

bacon cheese and scallions muffins

I’ve been baking alot of muffins lately. Maybe twice to thrice a week. I wake up in the morning, quickly put together the muffins, plop them into the oven and by the time I’m done with my shower, the muffins are also done. Piping hot breakfast for the family. The big plus? Muffins *usually* do not require the use of a mixer. I don’t even bother sifting the flour typically. Just throw all the dry ingredients in the mixing bowl and whisk them together for about 15 seconds. Done.

There a couple of sweet muffin recipes on this blog, but since my dear hubby expressed (a couple of months back) that he very much prefers savoury breakfasts, I’ve been attempting to increase the savoury quotient in our breakfasts. Cheese muffins are great. Add bacon and it’s a combination made in heaven. Scallions cut the edge off the saltiness of the cheese and the bacon. Perfect.

Bacon, Cheese and Scallions Muffins
 
Serves: 12 muffins
Ingredients
  • 2 cups plain flour
  • 2½ tsp baking powder
  • ½ tsp salt
  • ¼ tsp black pepper
  • 1 cup shredded cheese (I used cheddar)
  • ½ cup chopped scallions
  • 1 cup milk
  • 2 eggs
  • 2 tbsp olive oil
  • 4 slices back bacon, baked till crisp and cut into small squares
Instructions
  1. Preheat oven to 175°C or 160°C fan mode.
  2. Line a 12 hole muffin pan with liners.
  3. In a large bowl, whisk together flour, baking powder, salt and pepper.
  4. Add in scallions and cheese and mix to combine.
  5. Whisk together milk, eggs and olive oil in a separate bowl.
  6. Pour wet ingredients into the flour mixture and using a spatula, roughly combine the mixture.
  7. Fold in the bacon. Do not overmix!
  8. Divide among 12 muffin holes.
  9. Top with some more shredded cheese (optional)
  10. Bake on the centre rack for 20-25 minutes, or until tops are golden brown and a tester comes out clean.
Notes
Adapted from http://abeautifulbite.com/ham-scallion-and-cheddar-muffins/

Chocolate Banana Layered Cake

chocolate banana layered cake

This was my birthday cake. And yes, I baked it myself. For the first time in forever (you can tell that my daughter is still having Disney Frozen fever), I baked myself a birthday cake. It was a spur of the moment decision really. I bake my childrens’ birthday cakes, I bake my husband’s birthday cake, I even bake my friends’ children’s’ birthday cake, why shouldn’t I bake my own birthday cake? My hubby didn’t agree though – he said I deprived him of a chance of buying me a cake. 🙂

So happy me got to bake TWO birthday cakes for myself. Well, theoretically this is the birthday cake but I had a staff workshop in the morning and baked a simpler chocolate banana cake (the non-layered type) for my colleagues. But let’s talk about this cake instead. I love the Secret Recipe chocolate banana cake. On the rare occasions that I’m there, that’s the cake I always order. Unfortunately, it’s expensive. Well, most cakes are these days. And so when I saw The Baking Biatch’s Chocolate Banana Cake, I decided to try my hand at making the cake. I didn’t end up using her recipe, as I wanted a more chocolatey cake (her sponge cake is a lighter chocolate cake with less cocoa content), but inspiration came from there.

Essentially, I used my favourite Chocolate Devil’s Food cake (recipe modified from Munira’s chocolate devil food cake) as a base, filled the in-between layers with chocolate whipped cream and bananas, and covered the cake with chocolate ganache. I used Valrhona chocolate for this cake (which really made a difference), but you can use your favourite good quality chocolate. For the many who have been asking for the recipe, here goes…

Chocolate Banana Layered Cake
 
Serves: 1 8 inch cake
Ingredients
Chocolate Cake
  • 1 cup cake flour
  • 1 cup plain flour
  • ¾ cup dutch-processed cocoa powder
  • 1 tsp baking powder
  • 2 tsp baking soda
  • 1 tsp salt
  • 1⅓ cup Demerara sugar
  • 2 eggs (room temperature)
  • ¾ cup vegetable oil
  • 1 cup buttermilk (Add 1 tbsp white vinegar and add milk to form 1 cup)
  • 1 cup hot coffee (1 tsp instant coffee granules dissolved in hot water)
  • 1 tsp vanilla extract
Chocolate whipped cream
  • 85g couverture chocolate (dark or milk, your preference)
  • 1 cup whipping cream
Chocolate ganache
  • 120g dark chocolate couverture (I used a mix of milk and dark couverture)
  • 1 cup whipping cream
To assemble
  • Simple sugar syrup (optional)
  • 3-4 large bananas, sliced
Instructions
Chocolate Cake
  1. Preheat oven to 170°C.
  2. Grease and line three 8 inch cake pans (you can use one large one and split the cake up as well)
  3. In a large bowl, sift together the dry ingredients.
  4. In another large bowl, combine the wet ingredients.
  5. Add the wet ingredients to the dry ingredients and using a whisk and starting from the centre, slow combine till you get a smooth batter.
  6. Divide among the cake pans and bake for 20-25 minutes or until a tester inserted in the middle comes out clean.
  7. Turn the cakes out of the pans and cool on racks completely.
  8. Wrap cakes in cling wrap and chill for 30 minutes or more to allow for easier frosting.
Chocolate whipped cream
  1. Melt chocolate in the microwave or in a double boiler. Allow it to cool for 15 minutes or so.
  2. Meanwhile, whisk whipping cream in the bowl of a standing mixer till it forms stiff peaks. (I chill the bowl and the whisk before use)
  3. Add ⅓ of the whipped cream to the melted chocolate to lighten it.
  4. Then pour the chocolate mixture into the remaining whipped cream and fold gently to combine.
Chocolate ganache
  1. In a small pot, heat whipping cream till bubbles form at the side. Do not allow it to boil.
  2. Pour hot whipping cream over chocolate and whisk till chocolate melts.
  3. Allow it to cool slightly and thicken before use.
To assemble
  1. Spray the first layer of cake with sugar syrup (optional)
  2. Spread whipped cream on the cake and top with sliced bananas
  3. Top with more whipped cream and place the second layer of cake above it.
  4. Add whipped cream, bananas and more whipped cream.
  5. Top with the third layer of cake.
  6. Ice the top and sides of the cake with more whipped cream.
  7. Place in the fridge to chill till firm.
  8. While the cake is chilling in the fridge, you can prepare your ganache.
  9. Place chilled cake on a rack.
  10. Pour ganache over the cake and allow it to flow down the sides.
  11. Chill cake till ganache sets.
  12. Slice, serve and enjoy.