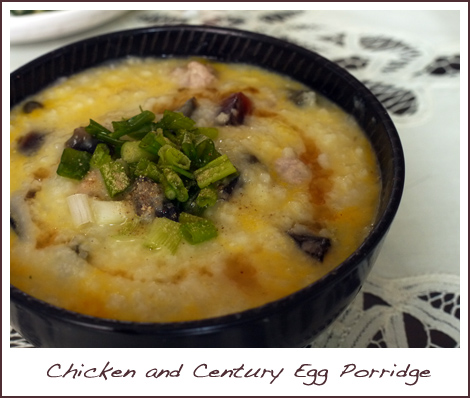
Chicken and Century Egg Porridge

Porridge is one of my comfort foods on a cold rainy day, or when I am recovery from a flu. It is simple to prepare, feeds a large number of people easily, and best of all, has a low glycemic index! Did you know that porridge has a GI index of 42-45, in comparison with steamed rice, that has a whooping GI index of 98? To find out more about the glycemic index, you can refer to my earlier post here.

There are two styles of porridge that I cook at home – Hokkien Style or Cantonese Style. Hokkien style porridge is what you usually get when you visit economic rice stalls and ask for porridge. The rice grains can still be seen, and the porridge is typically watery. Cantonese style porridge is what you get when you go to a restaurant such as Crystal Jade, or any dim sum place and ask for porridge. It is thicker and the grains are not very visible.

My mom prefers the Hokkien Style porridge with separate dishes of ingredients, while my husband prefers the Cantonese style porridge. The recipe below is for the latter.

Chicken and Century Egg porridge
Serves 4

Ingredients:
2 cups of rice, washed and drained dry
1/2 tsp salt
1 tsp oil

4 cups of water
2-3 cups of chicken stock
3 dried scallops
200g chicken breast meat, sliced
3 century eggs, cubed

salt and pepper to taste
2 stalks of spring onions, chopped
sesame oil

Method:

  1. Mix salt and oil into drained rice and set aside for 20 minutes.
  2. In a large pot, bring water and chicken stock to a boil. Stir in rice and dried scallops.
  3. Allow porridge to boil over a medium high flame for 10 minutes, and add in the chicken slices.
  4. Reduce flame and allow porridge to simmer, stirring once in a while.
  5. When porridge is almost ready (approximately 20 – 30 minutes), add in century egg cubes. Porridge should be of a smooth consistency.
  6. Add salt and pepper to taste.
  7. Dish out into bowls and garnish with spring onion, pepper and sesame oil.
  8. Serve hot.

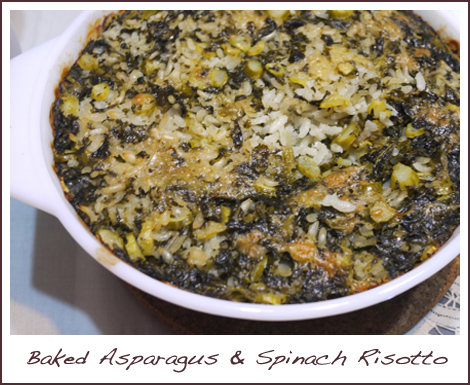
Baked Asparagus and Spinach Risotto

This simple risotto is great for nights where you feel like something fast and “meatless”. Though it is almost vegetarian (just switch the chicken stock to vegetable stock), it is chock full of flavour. A risotto dish typically requires one to stand in front of the stove patiently stirring and adding ladles of hot stock. This one does not require much patience as you just need to pop it into the oven. Both my husband and 18 month old daughter loved it!

Ingredients:
Serves 4
Adapted from Patricia Well’s Trattoria

1 tbsp olive oil
1 small onion, finely chopped
1 cup Arborio rice
2 cups low sodium chicken stock (or vegetable stock if preferred)
1 cup thawed, chopped frozen spinach, packed
10 spears fresh asparagus, cut into thin diagonal slices
salt to taste
1/2 cup freshly grated parmesan

Method:

  1. Preheat oven to 200°C.
  2. In a deep skillet, saute onion in olive oil until translucent.
  3. Add the rice, stirring to coat with the oil.
  4. Add chicken stock, spinach and asparagus and bring to simple over moderate heat.
  5. Stir in half the cheese.
  6. Add salt to taste (I don’t usually add salt)
  7. Transfer to casserole and smooth out the top.
  8. Sprinkle remaining parmesan on top.
  9. Cover the casserole
  10. Bake in the centre of the oven for 35 – 40 minutes, or until rice is cooked through.
  11. Serve immediately.

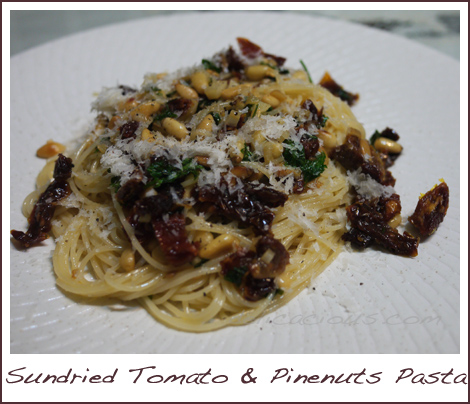
Sundried Tomato and Pine nuts Pasta

This is a really simple recipe that can be whipped up in a couple of minutes if you have the ingredients at home. I enjoyed how the sweetness of the sundried tomato complemented the woody fragrance of the pine nuts. The parmesan cheese brought it all together. I bought sundried tomatoes at the deli of Colds Storage, but I believe you can also buy them in tins or bottles, depending on the amount you wish to have. I’ve used fresh parsley in this recipe, but you can choose to substitute it with dried parsley. Reduce the amount to a third should you wish to do so.

Sundried Tomato and Pine Nuts Pasta
Serves 2

Ingredients:
5 ounces of spaghetti or linguine

2 tbsp olive oil
2 garlic cloves, minced
1/4 cup chopped drained oil-packed sundried tomatoes
2 tbsp fresh parsley, chopped
2 tbsp toasted pine nuts
salt and freshly ground black pepper
freshly grated parmesan cheese

Method:

  1. Cook the pasta according to package instructions till al-dente. Drain pasta and reserve 1/2 cup of pasta liquid.
  2. In a medium skillet, heat olive oil over medium heat.
  3. Saute garlic till tender and add in sundried tomatoes and sauteed for 2 – 3 minutes.
  4. Add in chopped parsley and sauteed for 30 seconds. Stir in pine nuts.
  5. Add in drained pasta and toss to coat.
  6. Season with salt and pepper.
  7. Top with freshly grated parmesan cheese and serve warm.

Do you know about the glycemic index?

I first learnt about the glycemic index when I was in university. I wanted to eat healthily and realised that foods could be classified according to their glycemic index (GI) – a ranking of carbohydrates based on how much they raise blood glucose levels after they are being eaten. Low GI foods are digested and absorbed more slowly and hence produces more gradual rises in blood glucose. These foods have health benefits and are good for weight control because they allow people to feel full for longer periods of times. High GI foods have a value of 55 and above, while low GI foods have a value below 55.

Some diets recommend eating more fruits and vegetables, but did you know that even among fruits, there is a range of different GI values? Dried apricots for example, are a great snack because they not only contain a whole load of nutrients, they are a low GI-food with an index of only 30. Cherries are also low at 22, and prunes are at 29. You may want to eat less watermelon (GI-index 80) and dates (GI-index 108),

For grains and carbs, a few of the low GI options are barley (GI-index 22), brown rice and long grain white rice (GI-index 50), pasta (GI-index 32). Generally, the least processed a cereal/grain is, the lower the glycemic index. Processing most foods increase their GI-index.

Beans and legumes are generally considered low -GI foods. They are a good source of proteins, especially for vegetarians.

Craving for something sweet? Dark chocolate has a low GI of about 25. Sweetened yogurt is a good choice too at 33.

So if you are looking for weight control, paying attention to the Glycemic Index of the foods you eat may prove very useful. Afterall, if you feel full for a longer period of time, you will generally eat less and snack less. Happy eating!

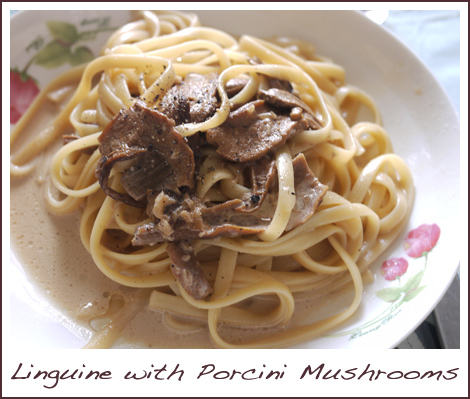
Linguine with Porcini Mushrooms

Porcini mushrooms are one of the most flavourful mushrooms, in my opinion. The flavour of dried porcini mushrooms is very strong, and is often used to add that mushroomy flavour to soups and sauces. This is a very simple recipe that I came up with one lazy morning when I was thinking of what to cook for lunch. Rummaging around the fridge, I found a bottle of half used dried porcini mushrooms and decided to do something with it. This recipe is simple, fast, healthy and definitely delicious. If you do not have porcini mushrooms, you can try substituting them for button or portabello mushrooms, though I am quite sure you would not be able to attain the same flavour. I chose to drizzle my pasta with a tsp of truffle oil for that extra oomph.

Linguine with Porcini Mushrooms
Serves 2

Ingredients:
2 tbsp olive oil
1/2 small onion, chopped
0.5 ounce dried porcini mushrooms
1 cup low sodium chicken broth
1/2 cup milk
salt and black pepper to taste
4 ounces linguine
2 tsp truffle oil (optional)

Method:

  1. Reconstitute dried porcini in 1/2 cup of warm water for 15 – 20 minutes. Drain soaking water and reserve it for later use.
  2. Sauteed onions in olive oil over a medium fire in a frying pan or skillet.
  3. Add mushrooms and mix well.
  4. Add broth, reserved porcini liquid and milk and bring to a boil.
  5. Cover and simmer for 15 minutes, or until mushrooms are tender.
  6. Meanwhile, boil pasta according to package instructions. Drain and reserve some pasta liquid.
  7. Toss pasta with sauce in the skillet, seasoning with salt and black pepper to taste.
  8. If pasta is too dry, add in some reserved pasta liquid.
  9. Drizzle with truffle oil if preferred.
  10. Serve hot.

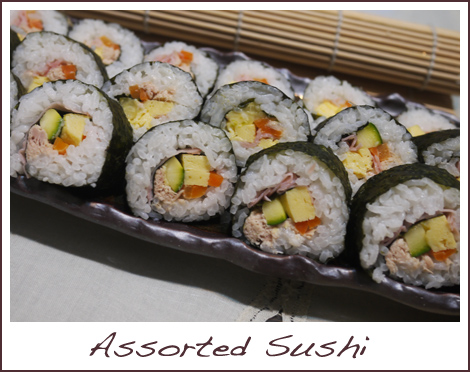
Sushi – a fun alternative to cooking


If you have never made sushi before, I highly recommend you try. Besides cooking the rice, and making your own tamago should you wish to include it, there really isn’t much more cooking needed. What’s more, it’s fun to make and you can be as creative as you wish. The best part? Sushi, for the larger part, is very healthy. There are many fusion types of sushi now that include some “not so healthy” ingredients that you may not find in a traditional Japanese restaurant. These fusion sushi incorporate popular western choices such as Mayonnaise and spicy sauce and sometimes do increase the number of calories, though not significantly. So, why is sushi so healthy?

Sushi can largely be divided into two types – maki and nigiri. Makis are the rolled up sushi while Nigiri are the ones with ingredients on top. Nori or seaweed, an integral part of both types of sushi, is highly nutritious as it contains a great source of minerals found in the ocean such as Iron, vitamin C, vitamin A, magnesium, selenium, choline, eicosapentanoic acid, inositol and other B vitamins. In addition, nori does not contain salt and sugar. Sounds like a super food eh? Rice vinegar, used to prepare sushi rice, helps to promote cell metabolism. It is known to help lower body fat percentage.

If you are convinced to try making sushi at home, here is my favourite sushi rice recipe and some handy tips.

Sushi Rice
Yields 2 cups of rice

2 cups sushi rice
2 1/2 cups water
4 tablespoons rice vinegar
3 tablespoons sugar
2 teaspoons salt
2 tablespoons mirin

Method:

  1. Rinse rice 3 times and drain in a colander till dry.
  2. Combine vinegar, sugar, salt and mirin together in a small pot over low heat till sugar dissolves. Allow this to cool.
  3. Cook rice in rice cooker. Allow rice to rest for 10 – 15 minutes are cooking.
  4. Pour rice out into a large dish (preferably glass or porcelain, not metal).
  5. Add cooled vinegar mixture to rice, mixing carefully with a spatula.
  6. Fan the rice while adding the vinegar mixture.
  7. Allow sushi rice to cool before using.

Tips on rolling sushi

  1. Use a sushi bamboo mat to help you roll sushi. These are easily available at supermarkets, and can also be found at Daiso.
  2. Wrap the bamboo mat with cling film before rolling the sushi. This is especially useful if you are making a uramaki (inverted rice roll)
  3. Place rice on the dull side of the nori.
  4. For one large sheet of nori, approximately 1 tennis ball size of sushi rice is sufficient.
  5. Wet hands before spreading sushi rice. Remember not to crush the rice!
  6. When cutting sushi, remember to wet the knife first.
For sushi recipes, you can visit sushiday or just be creative!

Whole wheat strawberry muffins

Muffins are easy to make because they do not require a mixer, just gentle folding in by hand. It is really quick to prepare, as long as you have all your ingredients on hand. While most muffin recipes use all purpose flour, I prefer to use whole wheat flour because it’s healthier, contains more nutrients and flavour. Here, I share one of my favourite muffin recipes. It is simple and the ingredients can easily be replaced to give you a variety of muffin flavours. Should you find the flavour of whole wheat flour too strong, feel free to replace half of it with all purpose flour. Whole wheat flour can be obtained from most good supermarkets such as Cold Storage or NTUC Finest. Try this easy and healthy recipe and you would never need to buy muffins again!

Strawberry Muffins
Makes 12-15 muffins

Ingredients
1 1/2 cup whole wheat flour
1/3 cup brown sugar
1 1/2 tsp baking powder
1/4 tsp baking soda
1/4 tsp salt
4 oz unsalted butter, melted and cooled
1 cup sour cream
1 egg
1 tsp vanilla extract
1 1/2 cup chopped strawberries

Method:

  1. Preheat oven to 205°C. Line a muffin tray with 12 – 15 muffin liners (depending on the size)
  2. In a large bowl, sift together flour, baking powder, baking soda, salt and sugar.
  3. In another bowl, combine melted butter, sour cream, egg and vanilla.
  4. Add butter mixture to dry ingredients and mix till just combined. Do not overmix!
  5. Gently fold in strawberries.
  6. Divide batter among muffin cups and bake in the middle of the oven for 20 minutes, or until a tester comes out clean.

Variations can be made by adding the following in place of strawberries

  • 1 1/2 cup of fresh blueberries
  • 1 1/2 cup of mashed banana
  • 1 1/2 cup of chopped apple + a dash of cinammon
  • 1 cup of chopped apple + 1/2 cup of almonds/pecans
  • 1 cup of dried cranberries + 1/2 cup of white chocolate chips