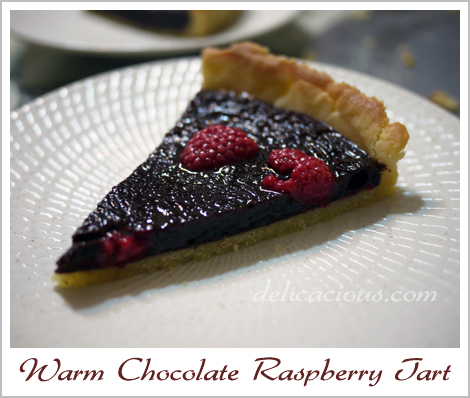
Warm Chocolate Raspberry Tart

I was looking through the photo albums on my computer a few days ago and realised that there were many pictures (and recipes) that I meant to write about but never found time to. So this is catch up time. Hopefully, I will be able to put up as many recipes and pictures of the food we cooked/baked this year before the year ends.

This warm chocolate tart was seriously, hands down, the best one that I’ve made. I attribute this not just to the excellent quality of chocolate used (I used Valrhona Manjari), but also Pierre Herme’s superb sweet tart dough recipe. This can be made with or without the raspberries but I really think that they are so much better with. The tang of the raspberries complement the mild sweetness of the chocolate oh so very well. The velvety texture of the chocolate ganache filling is almost seductive. Have I convinced you to try this recipe yet?

Tart crust
Makes two 22-24 cm tart shells
Recipe adapted from Pierre Herme’s Chocolate Desserts

Ingredients:
142g unsalted butter (room temperature)
75g icing sugar, sifted
50g finely ground almond flour
1/4 tsp vanilla bean paste
1/4 tsp salt
1 large egg (room temperature)
245g plain flour

Method:

  1. Place butter in the bowl of a food processor fitted with the metal blade and pulse, scraping down the sides of the bowl as needed, until creamy.
  2. Add the icing sugar and process to blend.
  3. Add the almond flour, salt and vanilla and continue to process till smooth.
  4. Add eggs and process to blend.
  5. Finally, add in the flour and pulse till mixture starts to come together. Stop when the dough starts to gather into a ball. Do not overwork the dough.
  6. Gather dough into a ball and divide it into 2 pieces.
  7. Press each piece into a disc and wrap with plastic wrap. Allow the dough to rest in the refrigerator for at least 4 hours or up to 2 days.
  8. The dough can be kept frozen for up to a month when wrapped airtight.
  9. To bake, butter a tart ring. On a lightly floured surface, roll the dough to a thickness of between 2 – 4 cm, lifting the dough often and making certain that the work surface and the dough are amply floured at all times.
  10. Roll the dough up around your rolling pin and unroll it onto the tart ring. Fit the dough into the bottom and up the sides of the ring, then run the rolling pin across the top of the ring to cut off the excess.
  11. Prick the dough all over with a fork and chill it for at least 30min in the refrigerator.
  12. Preheat oven to 350ºF. Fit a circle of baking parchment into the crust and fill with dried beans or rice.
  13. Bake for 18-20 mins, then remove the parchment and beans and bake for another 3-5 mins, until shell is golden.
  14. Transfer to a rack to cool.

The filling

Ingredients:
55g raspberries
145 bittersweet chocolate
115g unsalted butter, cut into cubes
1 large egg, stirred with a fork (at room temperature)
3 large egg yolks, stirred with a fork (at room temperature)
2 tbsp sugar

Method:

  1. Center a rack in the oven and preheat the oven to 375ºF.
  2. Fill the cooled tart crust with raspberries.
  3. Melt the chocolate and the butter in separate bowls in a bain marie or in a microwave.
  4. Allow them to cool until they just feel warm to the touch (104ºF).
  5. Using a small whisk or spatula, stir the egg into the chocolate, stirring gently in widening circles and taking care not to agitate the mixture. Do not beat air into the ganache.
  6. Slowly, stir in the egg yolks little by little, followed by the sugar.
  7. Finally, stir in the warm melted butter.
  8. Pour the ganache over the raspberries in the tart shell.
  9. Bake the tart for 11 mins, not more. The centre of the tart will still jiggle, but it will set.
  10. Allow to cool for 10 min before serving.
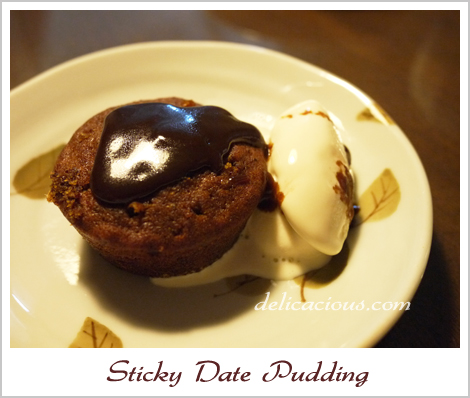
Sticky Date Pudding

The dates had been sitting in the fridge, unopened in their package for many many months. It’s a good thing that dates keep well as I have a bad habit of buying stuff and not using them. One Sunday afternoon, after flipping through a few recipe books, I decided that I would use them in a sticky date pudding. The recipe looked simple, and so, thinking that I had ample time to complete it before dinner, I busied myself with other things. To my horror, I realised a few hours later that the chopped dates needed to be soaked in hot water for an hour before they could be used. Processing of the dates (pitting them and chopping them) also took longer than expected. I ended up with a bowl of mashed dates with insufficient time to complete the recipe. So the dates (mashed this time), went back to the fridge, in a bowl covered with cling film.

A few days later (didn’t I say dates keep well?), I finally had the time to finish the recipe. And oh wasn’t it lovely. The pudding melts in your mouth and the aroma of the dates, together with the toffee sauce was simply heavenly. Family members and colleagues all loved it and I believe you would too! This is definitely a recipe worth trying.

Sticky Date Pudding
(Makes 12 small cakes)
Recipe adapted from Desserts By The Yard

Ingredients:
8 ounces pitted Medijool dates, finely chopped
1 cup boiling water
1 3/4 cups all purpose flour
1 1/2 tsp baking powder
1/8 tsp salt
1 tsp baking soda
4 ounces unsalted butter, softened
3/4 cup packed light brown sugar
1/4 cup sugar
1/4 tsp grated orange zest
1 tsp Trablit coffee extract
2 large eggs, room temperature

Method:

  1. Place the chopped dates in a bowl and pour on boiling water. Let it sit for 1 hour.
  2. Preheat the oven to 350ºF with a rack placed in the middle shelf. Butter 2 cupcake trays.
  3. Sift together flour, baking powder and salt.
  4. Mash dates in the bowl with the water. Stir in baking soda and set aside.
  5. Using a stand mixer, cream butter, brown sugar, sugar, orange zest and coffee extract on medium until fluffy.
  6. Add eggs one at a time, scraping down the bowl after each addition.
  7. Beating on low speed, alternate half the date mixture with half the flour mixture.
  8. Add in the remaining date mixture, then the flour mixture.
  9. Pour into prepared cupcake tray and place in the oven.
  10. Bake for 15 minutes, rotate the pan from front to back and bake for another 10 minutes.
  11. When the cake is done, remove from oven. While the cake is still hot, poke the cake in several places with a skewer and pour on the toffee sauce (see below).
  12. Serve warm, with vanilla bean ice-cream for extra decadence.

Toffee Sauce

Ingredients:
3/4 cup packed dark brown sugar
1 cup heavy cream
1 tbsp unsalted butter
1 tbsp vanilla bean paste
1/4 cup milk
2 tbsp light corn syrup
1 tbsp water (optional)

Method:

  1. Place the brown sugar, cream, butter, vanilla paste, milk and corn syrup in a heavy saucepan.
  2. Simmer over medium-high heat until the mixture thickens and cots the back of a spoon, about 10 minutes.
  3. Continue to cook until golden brown, 1 to 2 minutes more.
  4. Remove from heat and keep warm.

Oatmeal Raisin Cookies

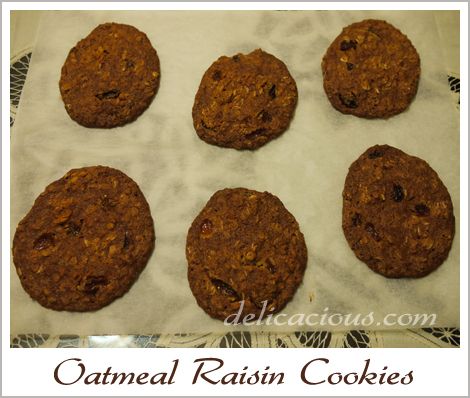
I didn’t manage to take a decent photo of these cookies when I baked them – the photo that you all see above does not look very appetising but I guarantee you, these are really good chewy cookies.

The slightly modified recipe below is taken from one of my favourite books – Desserts By The Yard. The troublesome part about these cookies is that the raisins (that makes them oh so good) require special preparation. The good part about these cookies is that the dough freezes really well, and can last about a month (or slightly more) in the freezer. When you want to eat freshly baked cookies, you’d just have to take the cookie dough logs out of the freezer, slice them up, bake them and wala! Freshly baked oatmeal raisin cookies, straight from the oven.

Recipe:
(Makes 24 large cookies)

1 1/2 cups plain flour
1 tsp baking soda
7 ounces unsalted butter, softened
3/4 cup sugar
3/4 light brown sugar
1 1/2 tsp grated nutmeg
3/4 tsp ground cinnamon
2 eggs at room temperature
3 cups of rolled oats
1 1/2 cups of fat raisins (see other recipe below)

Method:

  1. Sift together flour and baking soda.
  2. Using a mixer, cream butter until lemony yellow, about 2 minutes. Add the sugar, brown sugar, nutmeg and cinnamon. Continue creaming on high speed for about 2 minutes, until the mixture is smooth and lump-free.
  3. Add eggs one at a time, scraping down the bowl and paddle after each addition. Beat on low for 15 to 30 seconds, until the eggs are fully incorporated.
  4. On low speed, add the sifted flour mixture, beating until all the flour is incorporated. Scrape down the sides of the bowl.
  5. On low speed, mix in the oats and raisins.
  6. With a rubber spatula, scoop out the dough and divide it in half. Centre one half along the bottom of a sheet of baking paper and roll up the paper, creating a log of about 2 inches wide and 12 inches long. Repeat with the other portion of dough.
  7. Refrigerate the logs for a minimum of 1 hour. The logs can be wrapped in cling film and stored for 3 days in the refrigerator or 1 month in the freezer.
  8. Preheat oven to 350 degrees F. Remove dough from parchment when it’s firm and chilled and using a serrated knife, slice 1/2 inch rounds off the log.
  9. Place the cookies on prepared baking sheets, 2 – 3 inches apart.
  10. Bake for 12 minutes, rotate the sheets from front to back and bake for another 5 – 8 minutes, until the cookies are nicely browned.
  11. Remove the parchment from the cookie sheets and allow to cool for 5 minutes before eating. Cool completely before storing.

Recipe for Fat Raisins:
(makes 1 cup)

1 cup golden raisins
1/2 cup dry white wine
2 tbsp freshly squeezed orange juice
1 tbsp dark rum
2 tbsp sugar

Method:

  1. Combine all ingredients in a small heavy saucepan, bring just to boil over medium heat, stirring continually.
  2. Lower the heat so that the liquid is at a bare simmer and poach for 20 minutes.
  3. Remove from heat, cover the pan with cling film, and allow to cool to room temperature
  4. Store in an airtight container in the refrigerator.

The raisins can keep for up to 2 weeks.

Lemon Basil Sherbet

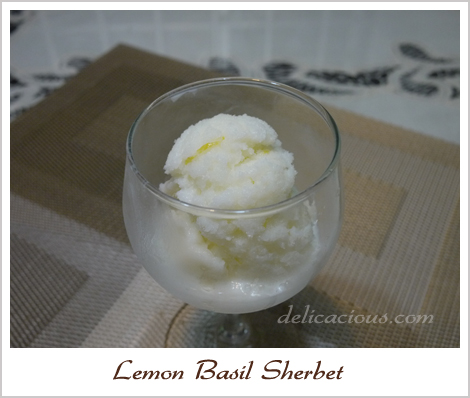
What does one do when she has four lemons leftover in the fridge? Think of a dessert to make with them, of course. I came across the recipe below as I was flipping through Alice Medrich’s Pure Dessert. The heading “lemon-basil sherbet” immediately appealed to me because I had two pots of basil growing crazily on the ledge of my corridor. They definitely needed trimming. I made some small changes to the recipe in the book. The recipe (with my changes) is shared below.

The result was a thoroughly refreshing dessert. It was very tangy of course, with some hint of sweetness. The fragrance of the basil definitely came through. A perfect treat on a hot day.

Lemon Basil Sherbet
(Serves 10)

Ingredients:
3/4 cup of lemon juice (from 4 lemons)
1 1/2 cups of sugar
1 cup of basil leaves
4 cups of milk
1 tbsp grated lemon zest

Method:

  1. Mix together sugar, lemon juice and basil leaves in a medium bowl. Let it sit for at least one hour, up to three hours.
  2. Stir the milk into the lemon juice mixture. The mixture will curdle a little. Strain the mixture, pressing on the basil leaves. Discard the leaves.
  3. Add the lemon zest and mix well.
  4. Pour the mixture into a shallow tray and freeze till hard, about 4 hours.
  5. Break up the chunks of frozen mixture and process in a food processor until smooth.
  6. Freeze again till hard, at least four to five hours.
  7. If the sherbet is too hard to scoop, let it stand for a few minutes after removing from freezer.

Walnut Mooncakes

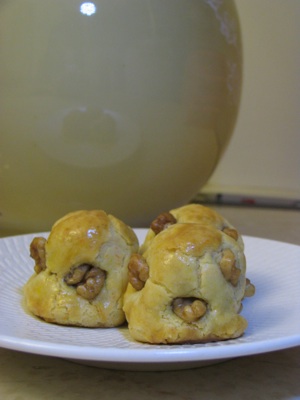
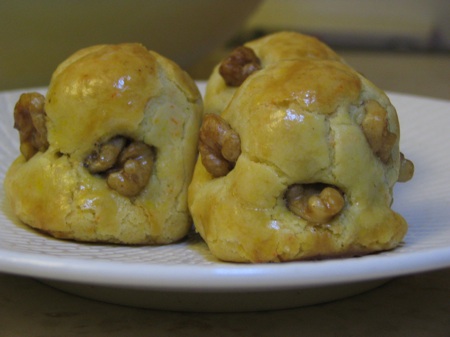
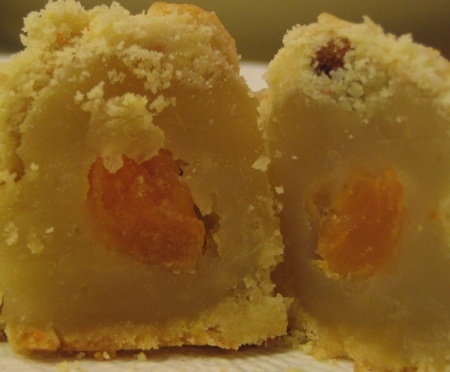
I baked up a new batch of these yesterday for mom, since I was meeting her for dinner. I like the way the crust crumbles when you bite into it, the fragrance of the lotus seed paste mixed with the walnuts and salted egg yolk. The good part about baking them on your own is that I can be indulgent with the amount of walnuts I add. Mom was commenting that the walnut pieces were huge. You’d never find them in store bought ones. Here are some photos! (Photoshop is down so there are no captions, for now.)

walnut_mooncake2

walnut_mooncake3

walnut_mooncake4

For those that were asking, here’s the recipe. It’s taken from here, another baker’s food blog but I’ve made a few slight changes to the filling to suit my own taste.

Ingredients:
360g Plain flour
25g Custard Powder
1/2 tsp Sodium Bicarbonate
50g Icing sugar
50g Shortening
220g Butter (salted)
1 egg
1/2 tsp Vanilla Essence
1/2 tsp Ammonium Bicarbonate
1 Egg + 1 tbsp water (for glazing)
Walnut for decoration

Filling:
1 kg White Lotus Paste
6 salted egg yolks (each cut into 6-8 pieces)

Method:
1. Cream sugar, shortening, butter, vanilla flavour and ammonium together until slightly white. (slow speed first then change to high speed)
2. Gradually add in egg.
3. Lastly add in sifted flour, custard powder and sodium bicarbonate to knead into a dough. (don’t mix too long) Leave dough in fridge overnight.
4. Steam egg yolks for about 5 minutes. Cut each yolk into 6 – 8 pieces, depending on the size of the yolk.
5. Take out dough from fridge and divide into portions of 20 gm each.
6. Divide fillings into about 25 gm each.
7. Make a dent in each ball of filling and place a piece of egg yolk in it.
8. Wrap fillings into dough and decorate with walnut.
9. Apply egg wash and bake at 160ºC for 10 mins. Take it out and leave it for about 10 mins and apply egg wash again. Bake for another 15 -20 mins.