Toasted Oatmeal Muffins

oatmeal muffins 1

First thought that comes to mind when someone mentions oatmeal muffins? Do the words dry, bland, gummy come into mind? Well I was not quite a fan of oatmeal muffins, but THIS oatmeal muffin is very different. For one, it does not use oats whole, but uses toasted ground oatmeal. It has a distinct taste of oats with a fragrance likened to popcorn. Intrigued?

I came across this article on my Cook’s Illustrated magazine on oatmeal muffin. Those of you who read Cook’s Illustrated will know that they spend extended time testing recipes and refining them. They suggested that toasting and grinding up the oatmeal allows it to absorb liquid quickly, while giving it flavour. Who would have thought of doing that?

oatmeal muffins 2

Since I had an unopened packet of oats sitting around, I decided to give the recipe a try. Although muffins are typically fast to prepare, this one does take time. So if you are intending to make this muffin for breakfast, plan ahead! I didn’t and so my starving family had a late breakfast. Also, the original recipe calls for a streusel topping which I find sweet. I removed the streusel topping and added some raisins instead to sweeten up the muffin a little.

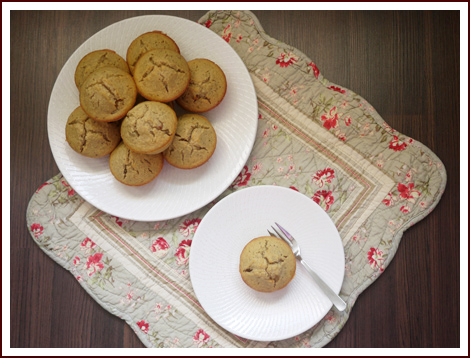
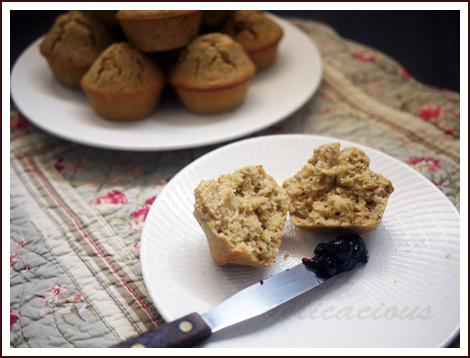
The resulting muffin was fragrant and moist. It went very well with jam and my family enjoyed it. This was baked in conjunction with Cook For Family‘s event which ends today.

Toasted Oatmeal Muffins
 
Recipe type: Muffins
Serves: 12 muffins
Ingredients
  • 2 tbsp butter
  • 2 cups rolled oats
  • 1¾ cups all-purpose flour
  • 1½ tsp salt
  • ¾ tsp baking powder
  • ¼ tsp baking soda
  • 6 tbsp butter, melted
  • 1¼ cup light brown sugar
  • 1¾ cups milk
  • 2 large eggs
  • 1 cup raisins
Instructions
  1. Using a non-stick spray, grease a 12-cup muffin tray.
  2. Melt 2 tbsp butter in a skillet.
  3. Add oats and cook, stirring frequently until oats turn golden brown.
  4. Transfer oats to a food processor.
  5. Process until finely ground, about 30 seconds.
  6. Add flour, salt, baking powder and baking soda and pulse till combined.
  7. In a large mixing bowl, whisk butter and sugar together till thick and smooth.
  8. Add milk and eggs and whisk till smooth.
  9. Using a large whisk, fold half of oat flour mixture into the egg mixture.
  10. Fold in remaining oat flour gently.
  11. Add raisins and stir to combine.
  12. Allow batter to sit for 15 minutes to thicken.
  13. Preheat oven to 190°C and place an oven rack in the middle position.
  14. Using an ice cream scoop, divide batter equally among 12 muffin cups. The batter should fill each cup to the brim.
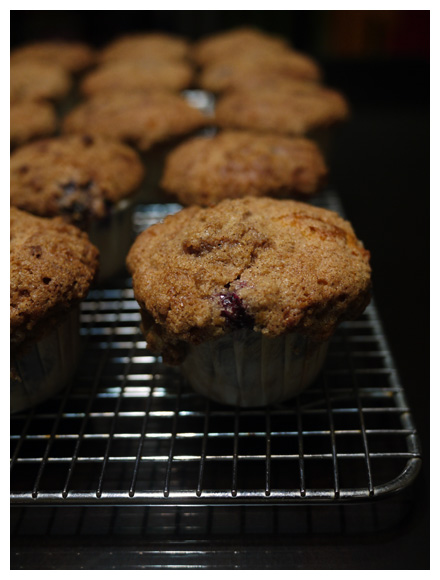
  15. Bake for about 20 minutes till muffins are golden brown and a tester inserted in the middle comes out clean.
  16. Allow muffins to cool on wire racks for 10 minutes.
  17. Serve warm, or allow them to cool completely before storing.
Notes
Adapted from Cook's Illustrated magazine Muffins are best eaten the day they are baked. They can be kept in the fridge for up to 3 days and toasted before eaten.

I link up at these parties.

Blueberry Streusel Top Muffins

blueberry struesel top muffins I baked blueberry muffins… again. Yes, my husband’s colleague asked him a couple of days back when he brought these to work, “You guys really like blueberries, don’t you?” Well, we do. Most importantly, my two year old loves them. They are healthy. They contain lots of antioxidants. Enough said.

Though no one really gets tired of blueberry muffins, I do try to modify them to make them more interesting. A couple of weeks ago, I tried some muffins that a friend made – they had streusel topping. She said it was an allrecipe.com recipe, so I decided to search for them and found them. Since the streusel topping did not sound too healthy, I decided to ease my conscience slightly by replacing part of the flour with wholewheat flour and cutting down on the sugar content.

The result was a lovely moist muffin, with delicious streusel topping. The amount of topping can be varied according to your preference. I was rather generous for this batch but don’t they appear beautiful? 🙂

Blueberry Streusel Top Muffins

Serves 15 muffins
Website adapted from all recipes.com

Ingredients

muffin

  • 2 cups all purpose flour
  • 3/4 cups whole wheat flour
  • 1/2 cup Caster sugar
  • 1 teaspoon salt
  • 4 teaspoons baking powder
  • 1 lemon (zested)
  • 2/3 cups vegetable oil
  • 2 eggs
  • 2/3 cups milk
  • 1 1/2 cup fresh blueberries

topping

  • 1/2 cup caster sugar
  • 1/3 cup all purpose flour
  • 1/4 cup butter (grated while cold)
  • 1 1/2 teaspoon ground cinnamon

Directions

Step 1
Preheat oven to 200°C. Line muffin trays with cups.
Step 2
Sift flours, salt and baking powder together in a large bowl. Add sugar and stir to combine.
Step 3
In a separate bowl, add vegetable oil, egg and milk. Whisk to combine.
Step 4
Add Egg mixture to the dry ingredients. Mix till just combined.
Step 5
Fold in blueberries. Fill muffin cups till 3/4 full.
Step 6
Toss together ingredients for streusel topping. Combine them together with a fork.
Step 7
Sprinkle topping on top of muffin batter.
Step 8
Bake for 20 - 25 minutes, or until a tester comes out clean.

Whole wheat strawberry muffins

Muffins are easy to make because they do not require a mixer, just gentle folding in by hand. It is really quick to prepare, as long as you have all your ingredients on hand. While most muffin recipes use all purpose flour, I prefer to use whole wheat flour because it’s healthier, contains more nutrients and flavour. Here, I share one of my favourite muffin recipes. It is simple and the ingredients can easily be replaced to give you a variety of muffin flavours. Should you find the flavour of whole wheat flour too strong, feel free to replace half of it with all purpose flour. Whole wheat flour can be obtained from most good supermarkets such as Cold Storage or NTUC Finest. Try this easy and healthy recipe and you would never need to buy muffins again!

Strawberry Muffins
Makes 12-15 muffins

Ingredients
1 1/2 cup whole wheat flour
1/3 cup brown sugar
1 1/2 tsp baking powder
1/4 tsp baking soda
1/4 tsp salt
4 oz unsalted butter, melted and cooled
1 cup sour cream
1 egg
1 tsp vanilla extract
1 1/2 cup chopped strawberries

Method:

  1. Preheat oven to 205°C. Line a muffin tray with 12 – 15 muffin liners (depending on the size)
  2. In a large bowl, sift together flour, baking powder, baking soda, salt and sugar.
  3. In another bowl, combine melted butter, sour cream, egg and vanilla.
  4. Add butter mixture to dry ingredients and mix till just combined. Do not overmix!
  5. Gently fold in strawberries.
  6. Divide batter among muffin cups and bake in the middle of the oven for 20 minutes, or until a tester comes out clean.

Variations can be made by adding the following in place of strawberries

  • 1 1/2 cup of fresh blueberries
  • 1 1/2 cup of mashed banana
  • 1 1/2 cup of chopped apple + a dash of cinammon
  • 1 cup of chopped apple + 1/2 cup of almonds/pecans
  • 1 cup of dried cranberries + 1/2 cup of white chocolate chips

Dark Chocolate Ice Cream

Many would agree that there are few foods as seductive as good, dark chocolate. Combine that with ice cream and it can become an almost out-of-the-world treat. I especially enjoy dark chocolate ice cream when I am feeling down, or am in a pensive mood. I like it served on its own, as that allows me to fully appreciate the full flavours of the dark chocolate. Not that it does not go well with waffles, souffles, cakes and other desserts.

The ice cream recipe I used is adapted from Pierre Herme’s Chocolate Desserts. He wrote about how good chocolate ice cream should never be made with cocoa powder, but with real dark chocolate. He doesn’t believe in using custards in chocolate ice creams as the yolks interfere with the rich flavour of the dark chocolate. Hence, chocolate ice creams are made using the Philadelphia method. After tasting the ice cream, I must say that I agree with his conclusions. Each spoonful was pure chocolate and it was sheer delight.

Dark Chocolate Ice Cream
Makes 3/4 litres
Adapted from Chocolate Desserts by Pierre Hermes

Ingredients:
1/3 cup powdered milk
3 cups whole milk
1/3 cup sugar
8 ounces Valrhona Manjari 64%, finely chopped

Method:

  1. Place the powdered milk in a heavy-bottomed medium saucepan and gradually whisk in the whole milk.
  2. When the powdered milk is dissolved, whisk in the sugar and bring the mixture to a boil.
  3. Stir in the chocolate and bring it to the boil again.
  4. Remove the pan from the heat and pour it into a small bowl. Place the small bowl in a larger bowl filled with water and ice-cubes.
  5. Keep the chocolate over ice, stirring frequently until it reaches room temperature.
  6. Churn the ice cream in an ice-cream maker.

Vanilla Bean Ice Cream

My dear husband bought me an ice-cream maker for my birthday in November and since then, we’ve been making our own ice-cream rather than buying them. Our old ice-cream maker required us to pre-freeze the bowl for 24 hours before using it, and the products that it yielded weren’t quite smooth and satisfying. This new one came with a chiller and I no longer have to pre-freeze the bowl. Definitely a welcomed improvement. Moreover, it yields smooth and creamy ice-creams!

The recipe below for vanilla bean ice-cream is adapted from “The Perfect Scoop”, one of my favourite ice-cream recipe books. The rich flavour of this ice-cream goes well with many other desserts. I served this with my maple pecan tart. The guests all asked for more! Though the flavour is creamy and rich, this ice-cream is made using the Philadelphia method, which does not involve the making of a custard. It is quicker and easier on your hips.

For this recipe, I substituted vanilla beans with vanilla bean paste. I love Nielsen Massey’s vanilla bean paste as it is extremely fragrant and convenient. One tablespoon of it packs the same punch as a vanilla bean. Also, remember to use pure vanilla extract and not vanilla essence. They are miles different in terms of their taste and flavour.

Vanilla Bean Ice-cream
Makes 1 litre
Adapted from The Perfect Scoop

Ingredients:
2 cups heavy cream
1 cup low fat milk
3/4 cup sugar
Pinch of salt
1 tbsp Nielsen Massey vanilla bean paste
3/4 tsp vanilla extract

Method:

  1. Pour 1 cup of cream into a medium saucepan. Add the sugar and salt and vanilla bean paste.
  2. Warm over medium heat, stirring until the sugar is dissolved.
  3. Remove from the heat and mix in the remaining 1 cup of cream and 1 cup of milk and vanilla extract.
  4. Chill the mixture thoroughly in the refrigerator, then freeze the mixture in your ice-cream maker.

Pistachio and Cranberry Biscotti

Cranberry and pistachio are two common ingredients. I suspect this is more to do with their colours than their flavours. Meaning to do something Christmasy, I decided to make cranberry pistachio biscotti by modifying a basic recipe from Dorie Greenspan’s book – Baking, from my home to yours. This recipe is interesting in that it incorporated cornmeal which added a surprising fragrance and crunch to the biscotti.

So did the cranberry and pistachio combination work? Definitely. The biscotti received raving reviews from all who tried it. I even had requests for orders for it for Chinese New Year! I had to explain that it was a Christmas flavour, but on second thought, I guess it is a wonderful biscotti to have all year round.

Cranberry and Pistachio Biscotti

Ingredients:
1 1/2 cup all-purpose flour
1 1/2 tsp baking powder
1/4 tsp salt
1/2 cup yellow cornmeal
4 oz unsalted butter, at room temperature
1 cup sugar
2 large eggs
1  tsp vanilla extract
1/2 cup lightly toasted chopped pistachio nuts
1/2 cup dried cranberries

Method:

  1. Place a rack in the center of the oven and preheat the oven to 350ºF. Line a baking sheet with parchment.
  2. Whisk flour, baking powder and salt together. Add the cornmeal and whisk again.
  3. Using a stand mixer, beat butter and sugar together at medium speed for 3 minutes, until very smooth.
  4. Add eggs and continue to beat, scraping down the sides of the bowl as needed, for another 2 minutes or so, until the mixture is light and creamy.
  5. Beat in the vanilla extract.
  6. Reduce the mixer speed to low and add in the dry ingredients mixture, mixing only until they are just incorporated.
  7. Scrape down the sides of the bowl, add in the chopped pistachios and cranberries and mix just to blend.
  8. Scrape half the dough onto one side of the baking sheet. Using your fingers and a rubber spatula, work the dough into a log about 12 inches long and 1 1/2 inches wide.
  9. Form another log on the other side of the baking sheet.
  10. Bake for 20 minutes, or until the logs are lightly golden but still soft and springy to the touch.
  11. Transfer the baking sheets to a rack and cool the logs on the baking sheet for 30 minutes.
  12. Carefully transfer the logs onto a cutting board and with a serrated knife, trim the ends and cut the logs into 3/4 inch thick slices. Return the slices to the baking sheet, this time standing up.
  13. Bake the biscotti for another 15 minutes, until they are golden brown and firm.
  14. Transfer them to racks and cool to room temperature.

These will keep well at room temperature if stored in an air-tight container.

Maple Pecan Tart

Pecan candy, pecan fudge, pecan rolls, honeyed pecans… somehow pecans always seem to be associated with Thanksgiving or Christmas, though I not quite know why. I tried searching around for information on it, but could not seem to find any. Nonetheless, in the spirit of Christmas, I decided to bake a maple pecan tart for the pizza gathering I wrote about in an earlier post. If you had read that post, you’d know that the attempt to make the dough for the tart went quite wrong, with it being blended into a paste form accidentally, when it was supposed to have bits of butter in it to ensure flakiness. I am happy to report that the tart crust recipe was pretty forgiving. Even though it was not as flaky as it should have been, it was still fairly crumbly. An untrained tongue probably would not have known that something went wrong.

When I looked through the recipe before baking the tart, I was pretty sure I was going to end up with an overly sweet tart, looking at the amount of maple syrup and sugar the recipe calls for. Nonetheless, those amounts were needed for the right balance between the sugars and the eggs to enable the filling to set. I was pretty glad when the tart did not turn out quite as sweet as I expected, thanks to the addition of the orange zest. It’s a pity I could not get hold of any kumquats, which was what the original recipe called for.

I served the tart with homemade vanilla bean ice-cream, the recipe of which I will post up soon. The vanilla bean ice-cream complemented the pecan tart perfectly. In fact, I think it’s more winning a combination than the suggested whipped cream accompaniment.

Maple Pecan Tart
Makes 1 9-inch tart
Recipe adapted from Tartine

Ingredients:
Fully baked and cooled flaky tart shell (see below)
3/4 cup sugar
1/2 maple syrup
1/2 cup light corn syrup
2 tbsp bourbon whiskey
1/2 tsp salt
2 oz unsalted butter
1 tsp vanilla extract
3 large eggs, lightly beaten
2 cups of pecan halves
zest of 1 orange
vanilla bean ice-cream for serving

Method:

  1. In a saucepan, combine the sugar, maple syrup, corn syrup, bourbon and salt. Place over medium heat, bring to a boil and continue to boil for a minute.
  2. Take the pan off the heat and whisk in the butter as it melts.
  3. Let the mixture cool to room temperature.
  4. Preheat the oven to 350ºF while the mixture cools.
  5. Add the vanilla extract and beaten eggs to the cooled mixture and stir till combined.
  6. Stir in the pecans and orange zest and pour the mixture into the tart shell.
  7. Bake until the filling is just set, about 50 minutes. If the top is browning too quickly, tent it with a piece of foil.
  8. Let it cool on a wire rack before cutting.
  9. Serve at room temperature (or warm if you prefer), with a scoop of vanilla bean ice-cream.

Flaky Tart Shell
Makes 1 9-inch tart shell

Ingredients:
1/2 tsp salt
1/3 cup of very cold water
1 1/2 cups + 2 tbsp of plain flour
5 1/4 oz very cold unsalted butter, cut into 1 inch cubes

Method:

  1. Add salt to the water and stir to dissolve. Keep in the refrigerator until very cold.
  2. Place the flour in the bowl of a food processor. Add the cold butter cubes to the flour and pulse briefly until mixture forms large crumbs.
  3. Add the water and salt mixture and pulse for several seconds until the dough begins to come together. Do not over pulse!
  4. Shape the dough into a disc 1 inch thick and wrap tightly in plastic. Chill overnight.
  5. Roll chilled dough to 1/8 inch thick. Lightly dust work surface with flour to prevent dough from sticking.
  6. Cut out a circle about 2 inches larger than the pan, and carefully transfer it to the tart pan.
  7. Cut away the remaining dough or crimp the edge.
  8. Chill the shell for at 30 minutes to an hour.
  9. Preheat the oven to 375ºF.
  10. Line the shells with parchment paper and fill with pie weights or a mixture of grains and beans.
  11. Bake for 25 minutes on a middle rack.
  12. Remove parchment and pie weights and continue to bake for another 5 to 10 minutes, until the shell is golden brown.
  13. Let the shells cool completely on wire racks before filling.