Archives for December 2010

The night where things went wrong…

Yesterday night. That was the night. Well you see, my husband, J had invited his colleagues over for a pizza party this afternoon. Pizza party meaning that he was going to make pizzas, from scratch, for them. I was tasked to prepare dessert. After giving it some thought, I decided to make Maple Pecan Tart. It’s almost Christmas, and pecans make me feel christmasy. It wouldn’t be tough anyway, just prepare the tough, throw it into the fridge and bake the tart shell the next morning. How difficult could that be?

Not difficult, if nothing went wrong. Well, to start things off, the food processor was not quite cooperative. After just a couple of pulses, its motor decided to stop running. “A safety feature to prevent overheating”, the Cusinart food processor manual reads. Great. So I had to wait for 10 minutes before it started working again. I added the ice cold water and proceeded to pulse and realised that once again, the motor had stopped running. After maybe 5 pulses? I always knew pulsing the dough heats up the motor more than just typical blending but after 5 pulses? And I was only making dough for ONE tart shell! So it was 10 minutes waiting time once again. For those who are wondering if I should get a new food processor, my food processor is barely a year old.

After twiddling my thumbs for 10 minutes, I proceeded to finish pulsing the dough, making sure that there were enough butter bits so that the tart would be perfectly flaky. I tried to remove the bowl from the processor and realised it was stuck and so I had to enlist the help of my strong husband. He too couldn’t easily remove it, and while trying to remove it, hit the power on button on the food processor and off the food processor went, blending my dough into a smooth paste. I gave a yelp before he turned it off. And there it was, my nice flaky dough with butter bits was not a smooth smooth paste, with no butter bits to be seen at all. I took a look at the clock and decided that I was NOT going to redo the tart dough. We would just see how forgiving this dough is, today.

And so that was my most unfortunate experience with preparing tart dough. The next time, I would be less lazy and do it by hand.

Could things get any worse? Well yes. J had intended to prepare the pizza dough yesterday night and allow it to proof overnight in the fridge. Unfortunately (once again), the pump in the fish tank decided not to work. We have three totally adorable puffer fishes (actually I only think that two of them are adorable) and they are housed in their own tanks, lest they kill each other. The pump in the middle stopped functioning and the poor fish was in slight distress. J attempted to fix the pump, only to realise that a small part of the pump had broken into two. Figuring that out took him almost the whole night and he couldn’t finish the pizza dough, obviously. And the fish was still in distress.

At 12 am, I conked out and J followed suit, not before throwing an air stone into the distressed puffer’s tank. Hopefully nothing else will go wrong at the pizza party today.
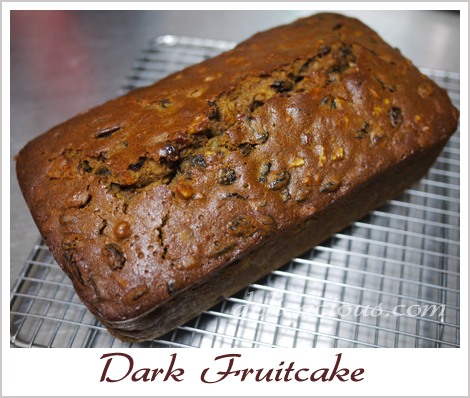
Tis the season for the fruitcake…

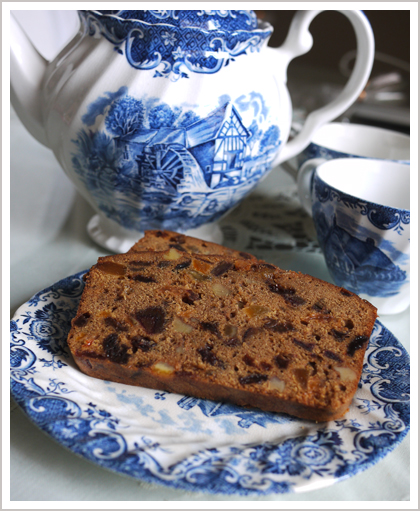
My mother surprised me a couple of weeks back by requesting that I bake her a fruitcake this year. She does not have a very sweet tooth, and hardly ever requests for any baked goods and so this was indeed surprising. I didn’t even think she liked fruitcakes! Anyway, it was too late to start soaking fruits in brandy then, so I decided to make one that didn’t involve any soaking of fruits. The cake however, should be stored for a couple of weeks before eating. As I type this, my loaf of fruitcake is sitting in the refrigerator, nicely wrapped in plastic and foil. I know that fruitcakes are supposed to be able to keep at room temperature for a month or more, but seeing how my kitchen seems to be a war zone for ants lately, I am not taking any chances.

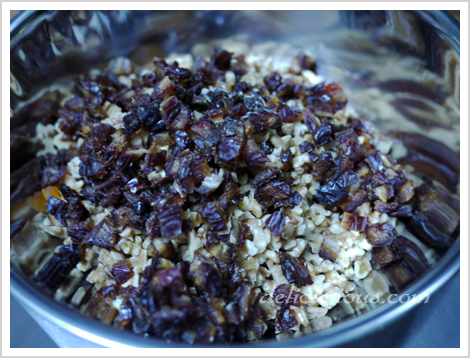
The amount of fruit and nuts used for this recipe is rather phenomenal. All that fruit and nuts in the photograph above yielded two 9 X 5 inch loaves. The fruitcake turned out nicely after baking with the aroma of brandy wafting through the oven doors. We finally cut the cake up a month later and boy was it lovely. Best enjoyed with a fragrant cup of English tea.

Dark Fruitcake
(yields two 9 X 5 inches loaves)
Recipe adapted from Joy of Cooking

Ingredients:
3 cups plain flour
1 tsp baking powder
1/2 tsp baking soda
1/4 tsp salt
1 tsp ground cinnamon
1 tsp ground nutmeg
1 tsp ground all spice
4 oz unsalted butter, at room temperature
2 cups packed dark brown sugar
6 large eggs
1/2 cup molasses
Grated zest and juice of 1 orange
Grated zest and juice of 1 lemon
1/2 cup brandy
2 1/2 cups diced mixed fruits
2 cups coarsely chopped walnuts
1 1/2 cups chopped dates
1 1/2 cups dried golden raisins
1 cup chopped dried apricots

Method:

  1. Preheat the oven to 300ºF. Grease two 9 X 5 inch loaf pans and line the bottom and sides with parchment paper.
  2. In a large bowl, sift together flour, baking powder, baking soda, salt and all the ground spices.
  3. Using a standing mixer, beat butter till creamy. Add in dark brown sugar and beat till creamy and lightened in colour and texture, 3 to 5 minutes.
  4. Beat in one egg at a time, scraping the sides of the bowl as necessary.
  5. Beat in molasses, lemon and orange zest and juice.
  6. On low speed, add in the flour mixture in 3 parts, alternating in 2 parts with the brandy.
  7. Finally, stir in the mixed dried fruits using a spatula.
  8. Scrape the batter into the two pans and spread evenly.
  9. Bake until a toothpick inserted in the centre comes out clean, about 1 1/2 hours. If the cake gets too dark on top, tent it loosely with foil for the last 30 – 45 minutes.
  10. Let cool in the pan on a rack for 1 hour.
  11. Invert the cake and remove the liner and let it cool the right side up on a rack.
  12. When totally cool, wrap cake with plastic wrap followed by foil.
  13. Cake are recommended to be stored for 3 – 4 weeks before serving.

Potato Mushroom Gratin

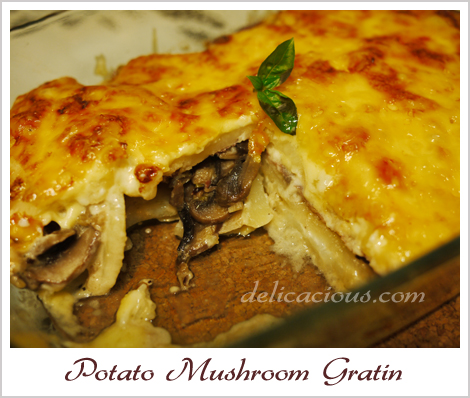
It was one of those days where we had potatoes to spare after making mash potatoes for dinner the previous night. We wanted something simple – a one dish meal paired with perhaps a salad, and so a gratin seemed like a good choice. When making potato gratins, I find that boiling the potatoes in milk or cream gives them a melt-in-your-mouth texture, and also improves the flavour of the entire dish. For gratins or baked rice/pastas, Swiss cheese (Gruyere especially) is the preferred choice as they yield a creamier result. I couldn’t find any Swiss cheese in that particular supermarket and chose to substitute it with Gouda, which though is a less preferred choice, still made a great gratin.

Potato Mushroom Gratin
Serves 2 generously

Ingredients:
2 tbsp olive oil
1 cup chopped leeks (only the white and pale green parts)
170g sliced button mushrooms
2 garlic cloves, minced
340g russet potatoes, peeled and sliced to about 0.5 cm thick
1 cup half and half
1/2 tsp salt
1/2 tsp pepper
1/2 cup grated Swiss cheese
salt and black pepper

Method:

  1. Heat oil in a frying pan and sauteed leeks till soft and lightly brown, about 8 minutes.
  2. Add mushrooms, season with salt and pepper and sauteed till soft and liquid almost evaporates, about 6 – 8 minutes.
  3. Add garlic and sauteed for another minute.
  4. Set aside.
  5. In a saucepan, combine half-and-half  with salt and pepper and add in the sliced potatoes. Bring to a boil and simmer till potatoes are partially cooked and half of the liquid has evaporated, about 3 minutes.
  6. Preheat oven to 375ºF. Grease a gratin dish and transfer half of the potato mixture to the dish. Top with mushroom mixture and cover with the remaining potato mixture. Sprinkle cheese evenly over the potato mixture.
  7. Tent dish with foil and bake for 20 minutes. Uncover and bake for another 15 – 20 minutes, until cheese is bubbling and golden brown.
  8. Let it rest for about 5 – 10 minutes before serving hot.

Joy is when your cookbook haul from Amazon arrives

Yes yes, so we’ve all sworn off buying more cookbooks because we simply have too many or that we’ve run out of shelf space or that we don’t use the existing ones enough. But once I start surfing around Amazon.com, I always find cookbooks that I “simply must have”. Afterall, I’ve used at least one recipe from each of my cookbooks thus far. Some justification eh?

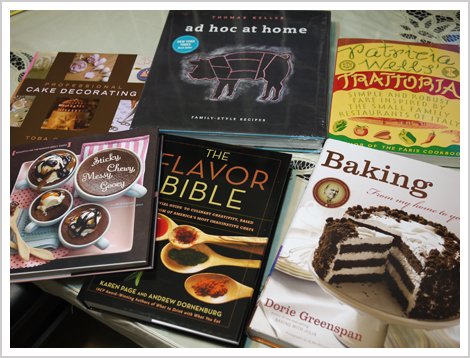
And so this is my latest haul from Amazon.com, with one more book due to arrive soon. They somehow split the shipment into a few smaller shipments, and these ones that shipped later actually arrived first. Kinda weird. Ever since I did a price comparison on cookbooks sold in local bookshops like Borders or Kino with those sold on Amazon.com, I’ve almost solely bought cookbooks from Amazon. Especially those that are large, hardcover, and heavy. Amazon calculates shipping by book, not by weight (unless of course you exceed 4 pounds per book), and so even with shipping thrown in, they are still about 40% cheaper than what I can get locally. Sometimes, they’re up to 60% cheaper!

In this latest haul I’ve acquired eight new books – 6 of them are shown in the picture above, one of them is on its way and the other is a baby puree book. And I’m happy. It’s my Christmas present to myself.

Chocolate Pear Pudding Cake

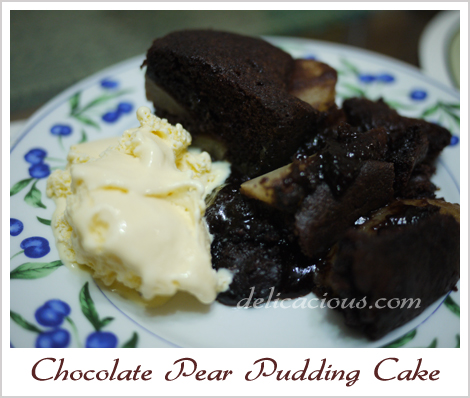
Ever had those days where you needed a dessert but had too little time? Well, yesterday was one of those days. Hubby and I had a wedding to attend in the afternoon but were also invited to dinner at a lovely couple’s place. Determined to bring along something home-baked for dessert and so started browsing through my collection of recipe books in the morning. I decided to try something from Nigella Express, a cookbook I rarely used. I had but one “small” problem. The recipe called for canned pears and we had none. Canned pears are not very common around here and I knew that I could probably only find it in the better supermarkets. I decided that I’d grab the pears after the wedding and attempt to finish the dessert in the short amount of time I had between the wedding and the dinner. This will definitely put Nigella Express to the test – could it deliver good food, fast?

I managed to find the pears in a decent supermarket after the wedding and proceeded home to start on the cake. I finished the preparations in about 20 minutes (my hubby helped to grease the pan and line the pears in the pan). The baking took another 30 minutes. The results? A delicious moist chocolate pudding cake that our host couple and their children (and ourselves of course) enjoyed. Definitely a recipe worth keeping.

Chocolate Pear Pudding Cake
(Makes one square cake, 8″ X 8″)
Adapted from Nigella Express

Ingredients:
1 large can pear halves in juice (About 465g drained weight)
3/4 cup sugar
3/4 cup + 1 tbsp plain flour
1/4 cup cocoa (dutch-processed)
5 oz unsalted butter
1 tsp baking powder
1/4 tsp baking soda
2 eggs (room temperature)
2 tsp vanilla extract

Method:

  1. Preheat oven to 400ºF. Grease an 8 inch square pan with butter.
  2. Drain pears and arrange them in the base of the dish.
  3. In a food processor, blitz butter and sugar till smooth. Add in eggs, roughly beaten and vanilla extract and blitz till combined.
  4. Lastly, add in flour, cocoa, baking powder and soda and blitz till you have a soft and smooth batter.
  5. Spread the batter over the pears and bake in the oven for 25 – 30 minutes.
  6. Let it stand for 5 to 10 minutes and then cut into 9 slices. Serve with chocolate sauce or vanilla ice-cream.

Tip: To get a gooey molten centre in the cake, do not overbake!

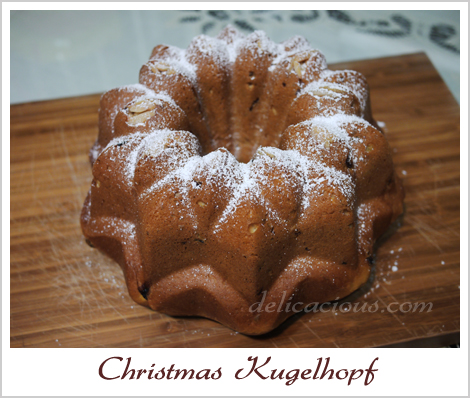
Christmas Kugelhopf

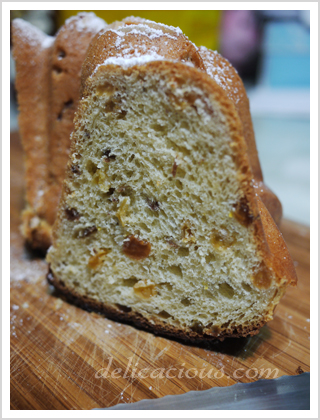
I really wanted to try to bake one of the popular Christmas breads this year. After flipping through a few recipe books, I initially settled on the one from Joy of Cooking. Something went wrong however, during the mixing process. The dough just didn’t seem to come together sufficiently for me to shape it (or knead the raisins) into it. It just felt wrong. Not wanting to waste any more time or raisins, I decided to dump that batter and try again with another recipe. This time, it worked perfectly. The result? A lovely sweet bread filled with raisins and a wonderful reminder of Christmas. The icing sugar on the top of the bread is optional but it looks so Christmasy so why not?

I didn’t have a kugelhopf pan but figured this star bundt would work as well. Nordic Ware makes such great bundt pans. They only need slight greasing and they hardly ever stick. Not to mention they ensure that your cakes/breads bake evenly. And no, I’m not paid to do a promotion for them here. It’s just that good things are worth sharing.

Kugelhopf
Fills a 11-12 cup bundt pan
Recipe adapted from Gourmet, 2002

Ingredients:
1 1/2 tsp instant yeast
2 tbsp warm water (105–115°F)
1 cup whole milk
7 tbsp unsalted butter, cut into tablespoon pieces and softened
6 tbsp granulated sugar
3 3/4 cups all-purpose flour
1 tsp salt
2 large eggs
1 cup golden raisins
1 cup dark raisins
4 tbsp rum
1 teaspoon finely grated fresh lemon zest
1/2 oz almond slivers (for decoration)
1 tablespoon confectioners sugar (for dusting)

Method:

  1. Cover 1 cup dark raisins with just enough water in a small saucepan and bring to a boil. Drain raisins and place them in a small bowl. Add 4 tbsp of rum and let them sit for at least 4 hours or overnight.
  2. Stir together yeast and water in a small bowl and let stand until foamy, 5 to 10 minutes.
  3. Heat milk with 6 tablespoons butter and granulated sugar over low heat, stirring, until mixture is warm (105 to 115°F), butter is melted, and sugar is dissolved.
  4. Sift together flour and salt into bowl of standing mixer. Make a well in flour and add yeast mixture. Add warm milk in a slow stream, mixing at low speed with paddle attachment. Increase speed to medium and beat in eggs 1 at a time, then beat in golden raisins, dark raisins with remaining rum and zest. Continue to beat until dough is smooth and elastic, about 5 minutes.
  5. Butter kugelhopf mold or bundt pan with remaining tablespoon butter. Put 3-4 almond slivers in each depression in bottom of mold (the almonds are only decorative; you can skip them altogether if your mold has no depressions), then scrape spoonfuls of dough evenly into mold (dough will be very elastic). Cover top of mold with oiled plastic wrap and a kitchen towel and let dough rise in a warm place until it fills pan, about 2 hours.
  6. Preheat oven to 400°F.
  7. Remove towel from kugelhopf and gently peel off plastic wrap. Bake kugelhopf in middle of oven 15 minutes, then loosely cover mold with foil and continue to bake until golden and a tester inserted in center comes out clean, 20 to 25 minutes more. Cool in pan 2 minutes, then invert cake onto a rack to cool completely, about 1 hour. Dust with confectioners sugar.


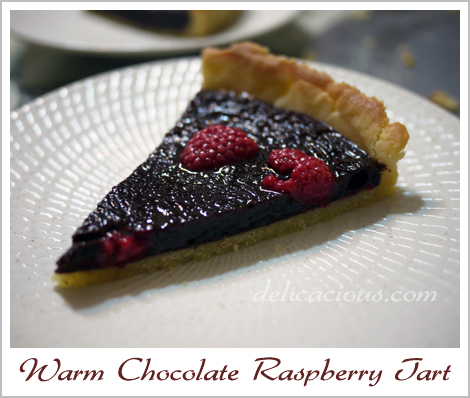
Warm Chocolate Raspberry Tart

I was looking through the photo albums on my computer a few days ago and realised that there were many pictures (and recipes) that I meant to write about but never found time to. So this is catch up time. Hopefully, I will be able to put up as many recipes and pictures of the food we cooked/baked this year before the year ends.

This warm chocolate tart was seriously, hands down, the best one that I’ve made. I attribute this not just to the excellent quality of chocolate used (I used Valrhona Manjari), but also Pierre Herme’s superb sweet tart dough recipe. This can be made with or without the raspberries but I really think that they are so much better with. The tang of the raspberries complement the mild sweetness of the chocolate oh so very well. The velvety texture of the chocolate ganache filling is almost seductive. Have I convinced you to try this recipe yet?

Tart crust
Makes two 22-24 cm tart shells
Recipe adapted from Pierre Herme’s Chocolate Desserts

Ingredients:
142g unsalted butter (room temperature)
75g icing sugar, sifted
50g finely ground almond flour
1/4 tsp vanilla bean paste
1/4 tsp salt
1 large egg (room temperature)
245g plain flour

Method:

  1. Place butter in the bowl of a food processor fitted with the metal blade and pulse, scraping down the sides of the bowl as needed, until creamy.
  2. Add the icing sugar and process to blend.
  3. Add the almond flour, salt and vanilla and continue to process till smooth.
  4. Add eggs and process to blend.
  5. Finally, add in the flour and pulse till mixture starts to come together. Stop when the dough starts to gather into a ball. Do not overwork the dough.
  6. Gather dough into a ball and divide it into 2 pieces.
  7. Press each piece into a disc and wrap with plastic wrap. Allow the dough to rest in the refrigerator for at least 4 hours or up to 2 days.
  8. The dough can be kept frozen for up to a month when wrapped airtight.
  9. To bake, butter a tart ring. On a lightly floured surface, roll the dough to a thickness of between 2 – 4 cm, lifting the dough often and making certain that the work surface and the dough are amply floured at all times.
  10. Roll the dough up around your rolling pin and unroll it onto the tart ring. Fit the dough into the bottom and up the sides of the ring, then run the rolling pin across the top of the ring to cut off the excess.
  11. Prick the dough all over with a fork and chill it for at least 30min in the refrigerator.
  12. Preheat oven to 350ºF. Fit a circle of baking parchment into the crust and fill with dried beans or rice.
  13. Bake for 18-20 mins, then remove the parchment and beans and bake for another 3-5 mins, until shell is golden.
  14. Transfer to a rack to cool.

The filling

Ingredients:
55g raspberries
145 bittersweet chocolate
115g unsalted butter, cut into cubes
1 large egg, stirred with a fork (at room temperature)
3 large egg yolks, stirred with a fork (at room temperature)
2 tbsp sugar

Method:

  1. Center a rack in the oven and preheat the oven to 375ºF.
  2. Fill the cooled tart crust with raspberries.
  3. Melt the chocolate and the butter in separate bowls in a bain marie or in a microwave.
  4. Allow them to cool until they just feel warm to the touch (104ºF).
  5. Using a small whisk or spatula, stir the egg into the chocolate, stirring gently in widening circles and taking care not to agitate the mixture. Do not beat air into the ganache.
  6. Slowly, stir in the egg yolks little by little, followed by the sugar.
  7. Finally, stir in the warm melted butter.
  8. Pour the ganache over the raspberries in the tart shell.
  9. Bake the tart for 11 mins, not more. The centre of the tart will still jiggle, but it will set.
  10. Allow to cool for 10 min before serving.