Steamed Red Bean Buns (Tau Sar Pau)

red bean buns1

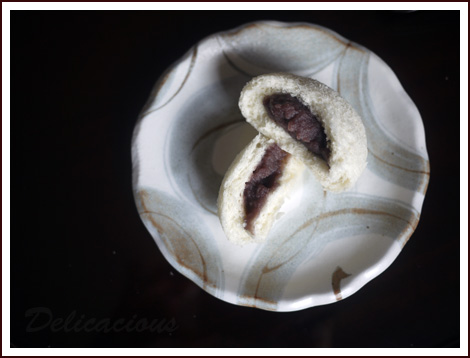
Two weeks ago, my mother went for a class to learn how to make steamed red bean buns. A few days later, she tried to replicate the recipe with not-so-successful results. The bread of the buns tasted weird, and the red bean filling was grainy. Needless to say, she was rather discouraged even though we tried to render support by eating a few of the buns.

red bean buns 2

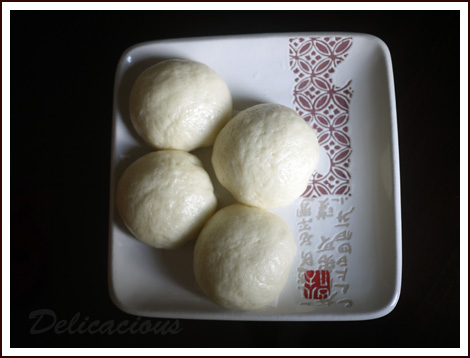
So on Saturday, in preparation for Mother’s Day, I decided to make my version of steamed red bean buns. I combed through many variations of making red bean paste and pau dough, and came up with my own variation. It was a success! True, it was much work making the red bean paste from scratch and it required some forward planning, something that is not my forte. But the results were rewarding – especially when the red bean paste actually tastes like red bean, and not some sweetened mush that you buy in a packet.

red bean buns 3

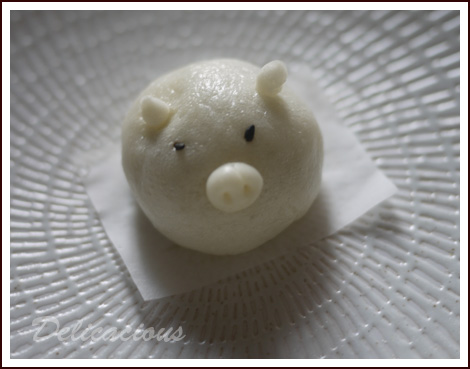
My husband participated in the making of the buns too! His favourite activity? Making animal faces. He became very popular with my daughter after she saw this little piggy. His effort disappeared in a couple of minutes though, as my daughter declared that she was going to eat the piggy soon after she saw it.

So you’ve decided that you want to embark on the journey of making your very own steamed buns? Here are some photo tips.

red bean paste steps

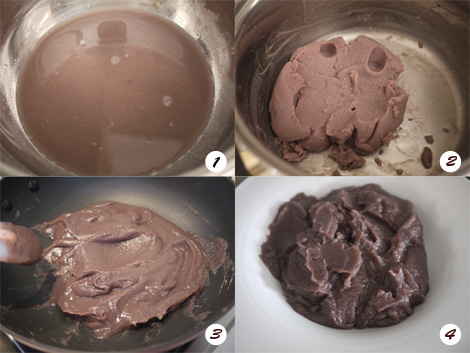
  1. When straining the red bean paste into the bowl, immerse the sieve into the red bean water. This will help remove the skins. After straining the paste twice, you should get a water red bean paste mixture.
  2. When squeezing out excess water, be careful not to squeeze out too much water. The paste should not be crumbly, and you should be able to form indentations with a spoon or finger.
  3. When mixing the red bean paste with sugar, the paste will become more fluid and glossy. Mix until you obtain the thickness of paste that you desire.
  4. The completed red bean paste should look like this.
  5. Guide to making steamed buns
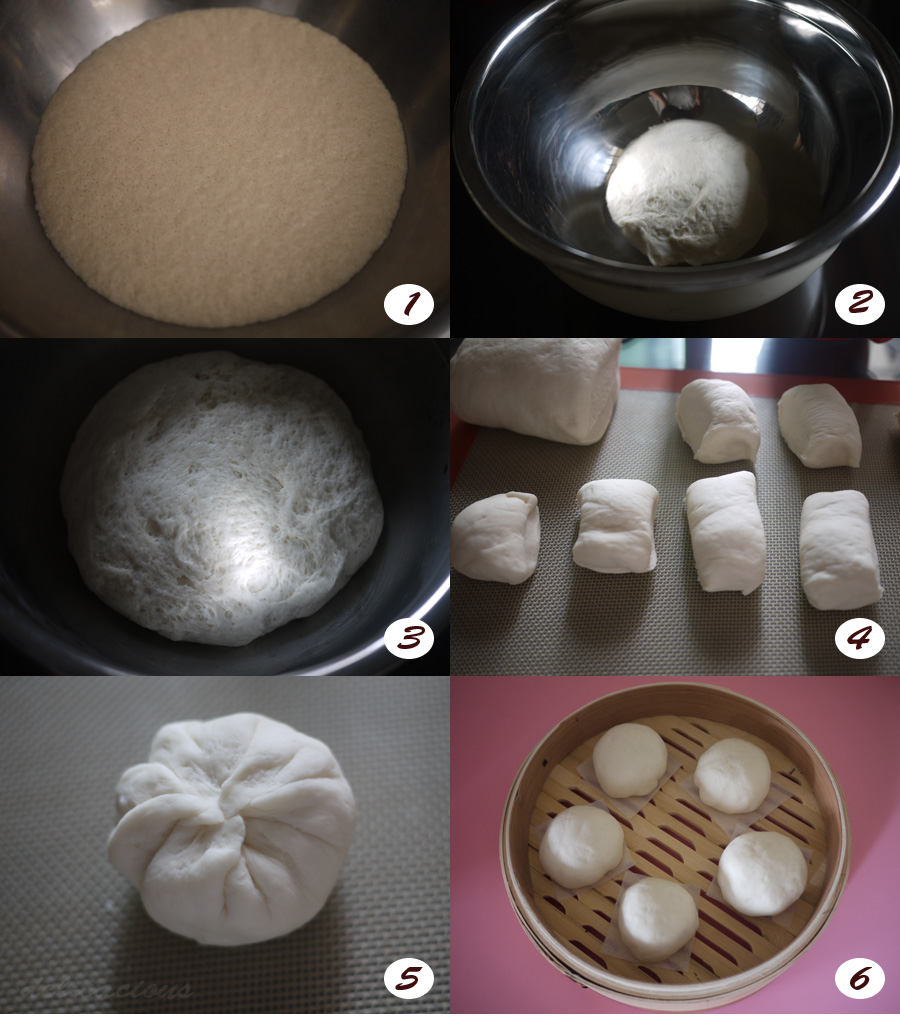
  1. Ensure that your yeast is active. It should foam like shown in the picture.
  2. After kneading in the mixer (or by hand), the dough should be smooth and should not be sticky. Shape it into a ball and allow it to rest.
  3. It should triple in volume.
  4. Knead the dough gently and divide the dough into 14 equal pieces (my pieces are not very equal). This dough handles very easily.
  5. Enclose the red bean paste filling by forming little pleats and pinching the dough towards the centre. This forms the base.
  6. Ensure that your buns are spaced at least 2 – 2.5 inches apart as they will expand when they steam.

So now you are ready to try to make your own steamed buns!

Steamed Red Bean Buns (Tau Sar Pau)
 
A recipe on making steamed red bean buns (tau sar pau) from scratch! Make your own red bean paste (tau sar) and sweeten it according to your taste.
Recipe type: Bread
Cuisine: Chinese
Serves: 14
Ingredients
Red Bean Paste (Tau Sar)
  • 1 cup of red beans
  • ¾ to 1 cup of sugar
Dough
  • 3 tbsp sugar
  • ⅞ cup warm water
  • 11/2 tsp dried yeast
  • 3 cups Hong Kong flour
  • 11/2 tsp baking powder
  • 1 tbsp shortening
Instructions
Red Bean Paste
  1. Soak red beans in water overnight. The water should cover the red beans.
  2. Pour away the water used to soak the red beans.
  3. In a large pot, add the soaked red beans. Add water to the pot - it should be about 1 inch above the red beans.
  4. Bring to a boil over a medium flame and turn off the flame. Allow it to stand for about 10 minutes. Pour away the hot water.
  5. Fill the pot once again with water till about 1 inch above the red beans.
  6. Bring to a boil and then turn the flame down.
  7. Simmer for about 1 hour, or until red beans are soft.
  8. Sieve the red beans and water into a large bowl.
  9. Using a metal spoon, mash the red beans in the sieve, leaving only the red bean skins behind. Repeat till all the red beans are mashed and skins removed. Wash the sieve.
  10. Sieve the red bean paste and water through the sieve to remove any bits.
  11. Using a cheesecloth bag, squeeze out excess water from the red bean paste and water mixture.
  12. Put the paste into a metal pot over medium heat. Add sugar (according to your taste) to the paste and stir in a back and forth motion till the sugar dissolves. The paste will become more fluid.
  13. Continue to stir in a back and forth motion until you reach the desired thickness for your paste.
  14. Optional: If you'd like your paste to be more glossy, you can fry your red bean paste in 1-2 tbsp of vegetable oil after the last step.
  15. Allow red bean paste to cool to room temperature. Keep in fridge until required.
  16. Shape red bean paste into 1 oz balls and set aside till dough is ready.
Dough
  1. In a bowl, dissolve sugar in warm water.
  2. Sprinkle yeast on the surface of the water and allow it to foam (about 10 minutes).
  3. Meanwhile, sift flour and baking powder into the bowl of a standing mixer prepared with a dough hook.
  4. Add shortening.
  5. When the yeast mixture foams, add it to the flour mixture in the mixer bowl.
  6. Knead the dough using the mixer for about 5-7 minutes, until it is smooth and does not stick. (If using hands, this step takes about 10-12 minutes).
  7. Remove dough from the mixer bowl and shape it into a ball.
  8. Place in a large clean bowl and cover with cling wrap.
  9. Allow it to rise in a warm place till it triples in volume.
  10. Remove from the bowl and knead it slightly to remove some air.
  11. Divide the dough into two portions and roll each portion into a log.
  12. Divide each log into 7 equal pieces.
  13. Shape each piece with your palm till it is a 10-12cm in diameter circle.
  14. Add a ball of red bean paste to the centre. Enclose the red bean paste by forming neat pleats and folding towards the centre. Place the folded side on a piece of small baking paper.
  15. Repeat till all the dough and paste has been used up.
  16. Let the buns stand for about 15 minutes before arranging them in a bamboo steamer. The buns should be about 2 inches apart as they will expand.
  17. Steam for 10 minutes.
  18. Serve hot or cool to room temperature and freeze.

Braised Pork Belly

tau yew bakAlas, after multiple attempts to post the recipe, this post is finally successful. It must be some bug in the recipe widget that does not like pork belly! Anyhow, this is one of my comfort foods – salty, fragrant, garlicky, fatty goodness. I cut down the fatty portion by not eating the layers of fat, and only eating the meat. My husband chastised me on this every so often. He declares that the fatty portion of the braised pork belly is the best portion! I’m sure many readers will agree.

Whether or not you eat the fatty part of the pork belly, this recipe is sure to please. My toddler loves the egg and tau kwa that goes into this! The pork belly is soft and tender, as a result of the braising process. Absolutely delicious. If you wish to reduce the calorie intake of this dish, replace the pork belly with pork shoulder. For non-pork eating friends, you can replace the pork belly with chicken too!

As I am typing, this dish is cooking in the kitchen. My mom’s version though, not mine. My mom adds chilli to this dish to add some heat and more star anise and cloves than I like. She sometimes uses the packet ingredients for Tau Yew Bak too. I’m partial to my version though. Try it and let me know!

Tau Yew Bak

Serves 6-8
Prep time 30 minutes
Cook time 1 hour, 15 minutes
Total time 1 hour, 45 minutes
Meal type Lunch, Main Dish
Misc Serve Hot
Region Chinese

Ingredients

  • 600g Pork Belly (Sliced)
  • 8 Dried Chinese mushrooms (Soaked and stalks removed)
  • 5 cloves Garlic (Lightly pounded)
  • 1 piece Tau Kwa (firm tofu) (Cut into large cubes)
  • 10 small tofu puffs (Tau Pok)
  • 6 hard boiled eggs (Peeled)
  • 3 tablespoons dark soya sauce
  • 3 tablespoons light soya sauce
  • 1/2 teaspoon ground white pepper
  • 1 teaspoon sugar
  • 2 star anise
  • 6 cloves
  • 1 stick cinnamon
  • 800ml water

Directions

Step 1
Season pork belly with 1 tbsp of dark soya and light soya sauce. Leave meat to marinate for 30 minutes.
Step 2
In a large claypot or casserole, lightly brown pork belly. (No oil is needed)
Step 3
Add garlic and mushrooms and stir to combine. Cook for 3 minutes.
Step 4
Add tau kwa, remaining dark and light soya sauces, sugar and pepper. Mix well and allow to cook for another 5 minutes.
Step 5
Add in star anise, cloves, cinnamon and water and bring to a boil.
Step 6
Allow to boil for 5 minutes then add tau pok and reduce to a simmer for 20 minutes.
Step 7
Add hard boiled eggs and simmer for another 40 minutes or until meat is tender.
Step 8
Serve hot with rice.

Cereal Chicken

I’ve tried making cereal prawns several times, but I’ve never attempted using chicken in place of prawns. My cousin was coming over for dinner, and since she was allergic to prawns, I decided to tweak my usual cereal prawn recipe. The result was surprisingly delicious – the chicken was juicy and the cereal and curry leaves added flavour and fragrance. Though I personally prefer cereal prawns to cereal chicken still, this would make for a good alternative. If you prefer, you can use thinly sliced chicken strips instead, though the chicken may be less tender.

Cereal Chicken
Serves 4 (as a side)

Ingredients:
2 large piece of chicken breast meat, lightly tenderised
1 tsp corn flour
2 tsp light soy sauce
1/4 tsp pepper
1/4 tsp sesame oil
oil for frying

1 tbsp unsalted butter
1 tbsp vegetable oil
2 cloves of garlic, chopped finely
6 sprigs of curry leaves, rinsed and dried, stalks removed
1 chilli padi, thinly sliced (remove seeds if preferred)
3/4 cup Nestum cereal
1 tsp sugar
1/2 tsp salt

Method:

  1. Tenderise chicken with a tenderiser.
  2. Marinate chicken breast with corn flour, soy sauce, pepper and sesame oil. Cover and set aside in the fridge for at least 30 minutes.
  3. In a skillet, heat oil over a medium flame.
  4. Fry chicken breast till light brown on both sides. Chicken should be just cooked through.
  5. Allow to cool slightly before cutting into slices. Set aside.
  6. In a clean skillet or wok, heat butter and oil.
  7. When butter has melted, add garlic, curry leaves and chilli and fry till fragrant.
  8. Add in sliced chicken and mix well.
  9. Add in sugar, salt and cereal and mix well. Do not overdo this step or cereal will not be crispy.
  10. Serve hot with steamed white rice.


Chicken and Century Egg Porridge

Porridge is one of my comfort foods on a cold rainy day, or when I am recovery from a flu. It is simple to prepare, feeds a large number of people easily, and best of all, has a low glycemic index! Did you know that porridge has a GI index of 42-45, in comparison with steamed rice, that has a whooping GI index of 98? To find out more about the glycemic index, you can refer to my earlier post here.

There are two styles of porridge that I cook at home – Hokkien Style or Cantonese Style. Hokkien style porridge is what you usually get when you visit economic rice stalls and ask for porridge. The rice grains can still be seen, and the porridge is typically watery. Cantonese style porridge is what you get when you go to a restaurant such as Crystal Jade, or any dim sum place and ask for porridge. It is thicker and the grains are not very visible.

My mom prefers the Hokkien Style porridge with separate dishes of ingredients, while my husband prefers the Cantonese style porridge. The recipe below is for the latter.

Chicken and Century Egg porridge
Serves 4

Ingredients:
2 cups of rice, washed and drained dry
1/2 tsp salt
1 tsp oil

4 cups of water
2-3 cups of chicken stock
3 dried scallops
200g chicken breast meat, sliced
3 century eggs, cubed

salt and pepper to taste
2 stalks of spring onions, chopped
sesame oil

Method:

  1. Mix salt and oil into drained rice and set aside for 20 minutes.
  2. In a large pot, bring water and chicken stock to a boil. Stir in rice and dried scallops.
  3. Allow porridge to boil over a medium high flame for 10 minutes, and add in the chicken slices.
  4. Reduce flame and allow porridge to simmer, stirring once in a while.
  5. When porridge is almost ready (approximately 20 – 30 minutes), add in century egg cubes. Porridge should be of a smooth consistency.
  6. Add salt and pepper to taste.
  7. Dish out into bowls and garnish with spring onion, pepper and sesame oil.
  8. Serve hot.

Hainanese Chicken Rice

Hainanese chicken rice was one of those things that I had always wished to try cooking, but never got around to it. It seemed all to troublesome. Some time last month however, I decided that trouble or no trouble, I was going to make myself some homestyled Hainanese chicken rice.

I searched around for an authentic looking chicken rice recipe, and settled on the one by Amy Beh. It can be found here. I used a smallish kampung chicken as the meat is usually leaner and more tender. If you ask me, preparing the condiments was a little more troublesome than preparing the chicken and the rice. The chicken turned out very tender and tasty, despite the fact that I cooked it slightly longer because I didn’t want it to be bloody inside. I was too lazy to roll the rice into balls but it tasted good anyway. The recipe is definitely a keeper. The chilli sauce recipe was rather good and packed quite a spicy punch. The minced ginger condiment was a little too spicy for my liking and so I added a little chicken soup to dilute it. I discovered though, that the hubby did not care much for chicken rice condiments. I can probably save some time the next round.