Pizza Dinner for #cookforfamily

pizza2 My husband’s favourite foods are pizza and baguette. Yes, he will survive very well in both France and Italy. Whenever the question of “what shall we eat today?” surfaces, his answer will likely be pizza. Our family may well be eating pizza every other day, if he has his way around things. Fortunately, he doesn’t.

So, he has been on a “I want to eat pizza” mood for a couple of weeks, and since the family wasn’t quite well (the flu bug has been going around), he hadn’t had his pizza fix. He signed up for cook for family event, I suggested to him to kill two birds with one stone – have his pizza fix AND cook for the family. He gamely took up my suggestion and we had fun making pizza!

pizza3

We modified a Jamie Oliver’s basic pizza dough recipe and had enough dough for four medium size pizzas. One of the pizzas was made with a tomato base and the other with a pesto base. We even had a splitza! Half ham, mushroom and peppers and the other butter chicken.

pizza_girl

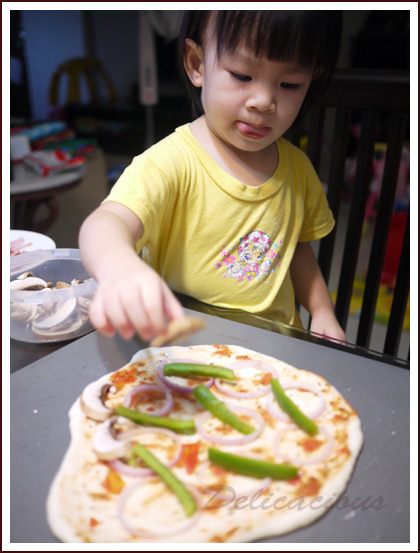
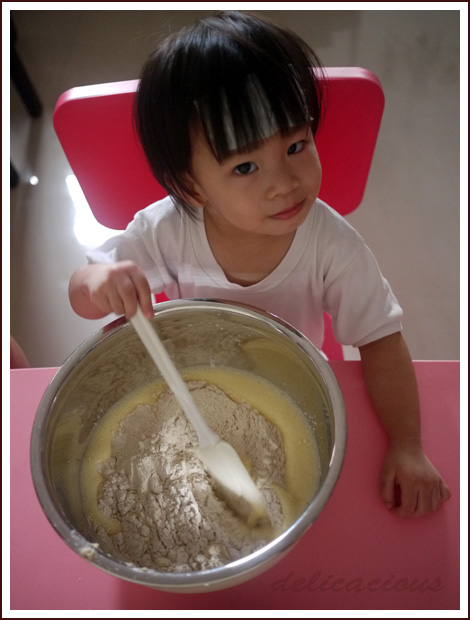
It was all hands on deck for pizza night! Yes, even my two year old toddler had fun adding ingredients to the pizza. Here in this picture, she is adding her favourite mushrooms to the pizza. I love this candid shot!

pizza1

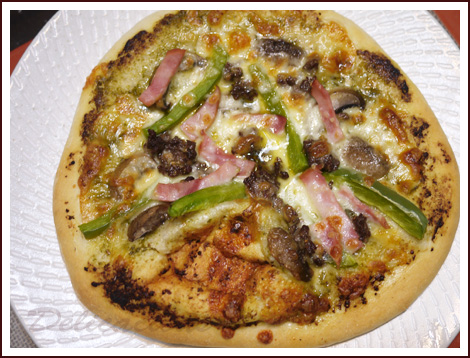
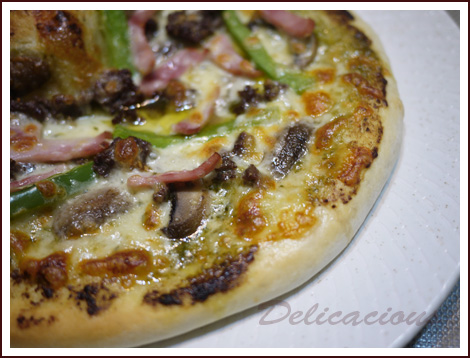
I made the above pizza with a pesto base, using a good ready-made pesto sauce. Spread the pesto as a base, heap on the ingredients to your liking, sprinkle with mozzarella and in the oven it goes!

pizza4

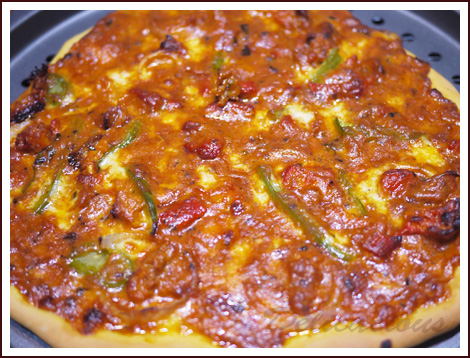
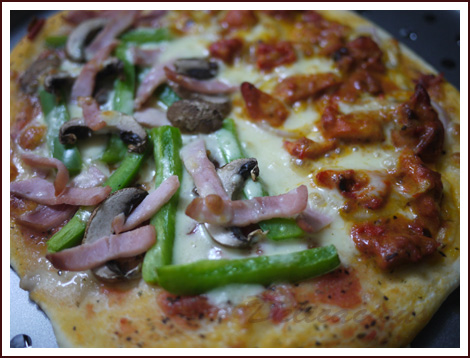
And this picture brings me to the discovery of the day: Butter chicken pizza. Ok, I know what you must be thinking. This gooey mess of red? Are you kidding me? Well, we did go overboard with the butter chicken sauce, but trust me, this is the most delicious combination we have had on a pizza in a long while. Perhaps, it would have looked prettier if we had remembered to spread butter chicken sauce on the base, heap on chunky pieces of butter chicken with added onions and peppers and topped it with mozzarella cheese. But no, I forgot to spread the pizza base with sauce so I decided to drizzle it most liberally on the pizza. The result? This messy looking pizza that tasted every bit delicious.

So are you sold yet? What is butter chicken, some of you may ask. It’s this tasty chicken dish that is sold at most tandoori food stalls and it is a fantastic accompaniment to naan. I say, it is even better on pizza.

The next time you are wondering what to do for dinner, consider making pizza and having fun with your family! Pizza making is one of the the things that is sure to engage everyone, from the oldest to the youngest. No real recipe, just your favourite ingredients mixed and matched the way you like it. After all, dinner together as a family is supposed to be fun!

Simple pizza crust
 
This simple pizza dough makes four medium size pizzas.
Author:
Ingredients
  • 500g bread flour
  • ½ tsp fine sea salt
  • 7g dried yeast (not instant)
  • 1½ tsp brown sugar
  • 2 tbsp extra virgin olive oil
  • 325 ml warm water (43-46°C)
Instructions
Pizza dough
  1. Sieve flour and salt onto a clean surface.
  2. In a large measuring jug, mix yeast, brown sugar, olive oil and warm water.
  3. Leave it to stand for about 5-7 minutes (the mixture should look foamy).
  4. Make a well in the centre of the flour.
  5. Add the liquid mixture into the well and slowly mix in flour from the sides.
  6. When the dough comes together, knead the dough until it is smooth and elastic (about 10 - 15 minutes).
  7. Shape dough into a ball and place it in a large flour-dusted bowl.
  8. Cover the bowl with a damp cloth and leave it to rise until double in bulk.
  9. Remove dough from bowl and knead it gently to remove some air.
  10. Divide dough into four portions and cover dough with a piece of cling wrap for 10-15 minutes.
  11. Roll out each piece of dough till about 0.5cm thick.
  12. Use immediately or stack them up, cover with cling wrap and place them into the fridge.
Baking pizza
  1. Preheat oven to 205°C 20 minutes before pizza is to be baked.
  2. Place a baking stone (if using) in the oven while it is heating up.
  3. Place pizza on a baking sheet.
  4. Spread sauce on pizza and place toppings on top of the sauce base.
  5. Sprinkle liberally with mozzarella cheese.
  6. Place baking sheet on top of baking stone and bake for 15 minutes, or until pizza crust is golden brown.
  7. Serve hot.
Notes
Recipe is adapted from Jamie Oliver's pizza dough

Blueberry wholewheat pancakes for #cookforfamily

wholewheat pancakes

Yes it’s the Cook For Family event again and this time it’s for ONE WHOLE WEEK! It was planned to coincide intentionally with Singapore’s Eat With Your Family Day happening next Friday, 31 May. So, Cook For Family is encouraging everyone to join in the fun and cook a meal for your family this week!

I decided to kickstart this week’s cooking with these blueberry wholewheat pancakes. These are butter free (I used olive oil as a substitute) and made with whole wheat flour. The original recipe called for buttermilk but I used a buttermilk substitute instead. Simply add 1 tbsp of vinegar and top up with milk till it forms one cup. This gives 1 cup of buttermilk substitute.

little chef

I enlisted the help of my very young chef to make these pancakes. She’s running a slight temperature but she was very happy to help!

The resulting pancakes are fluffy and moist, but I want to try tweaking the recipe to reduce the amount of baking powder it called for. Somehow the amount that the recipe called for gave the pancakes a slightly metallic taste in my opinion. I happened to chat with a friend and she mentioned “aluminium-free baking powder”. It’s not easily available over here and I’ve never heard of it! Now I’ve got to go find it. Once I’ve tried it out, I will post the recipe.

If you wish to join the Cook For Family event, you still have time! You don’t have to be in Singapore, we have people participating from all over the world! Check out the facebook event link here.


BBQ cum Potluck gathering

Salad 1st of May is Labour Day and we celebrated Labour Day by having a BBQ cum potluck gathering with CG friends. The menu was quite varied – salad, chip and dips, pasta, wings, slaw and the list goes on. The highlights of the evening in my opinion were the beef and the ribs, and oh yes, the cornbread.

dry rub ribs The dry rub ribs were prepared painstakingly by Andrew, our host and main chef. He prepared 10 slabs of ribs and slow-baked them in the oven. In addition to the ribs, he prepared a oh-so-delicious cornbread (I need to ask him for the recipe) and slaw.

cornbread I’ve tried a few variations of cornbread but I’d have to say this is one of the best. Initially when we were cutting through the cornbread, we thought it was not baked long enough as it seemed a little sticky. However, it turned out superbly moist and yet it didn’t stick to the teeth. And yes, it is chock full of corn. Did I say I need to ask him for his recipe?

grilled beef The beef. One of our dear friends bought rib-eyed steaks and delivered them to the BBQ even though he could not be there. The guys grilled them up and the result is seen in the picture above. Succulent, flavourful, juicy steaks.

slaw There were desserts of course – apple crumble and my humble red wine chocolate cake. Everyone ate and was satisfied beyond measure. No surprise that there were mentions of gym visits today.

Red wine chocolate cake with mascarpone cream

redwinecake2 I posted some time earlier about a red wine chocolate bundt cake that received rave reviews from my friends. So when I had half a bottle of unfinished red wine, I thought about baking that cake again. While surfing though, I came across a recipe on smitten kitchen that looked simpler and really good. So I tried that instead and tested it on my colleagues.

The texture of the cake is a cross between a brownie and a cake. It is dense but moist and boy was it rich. Deb from smitten kitchen calls it the real velvet cake and I think she is right. The cake is baked at a fairly low temperature of 160°C and so the alcohol does not boil off much. The red wine flavour comes through really strongly so my advice would be to use a fairly good bottle of red wine. I used a merlot for this cake, but you can use pretty much any kind you like. The mascarpone cream topping is a must. Do not omit that!

Red wine chocolate cake with mascarpone cream

Website adapted from smitten kitchen

Ingredients

cake

  • 3oz unsalted butter (at room temperature)
  • 2/3 cups brown sugar
  • 1/4 cup caster sugar
  • 1 egg + 1 yolk
  • 3/4 cups red wine
  • 1 teaspoon vanilla extract
  • 1 Cup + 1 Tablespoon plain flour
  • 1/2 cup Dutch processed cocoa powder
  • 1/2 teaspoon baking powder
  • 1/8 teaspoon baking soda
  • 1/4 teaspoon salt
  • 1/4 teaspoon ground cinnamon

mascarpone cream

  • 1/2 cup mascarpone cheese
  • 1/2 cup chilled whipping cream
  • 2 tablespoons caster sugar
  • 1/2 teaspoon vanilla extract

Directions

Step 1
Preheat oven to 160°C. Line a 9 inch round cake pan and spray the interior with a non-stick spray.
Step 2
Using a standing or a handheld mixer, cream butter until smooth then add the sugars and beat till light and fluffy.
Step 3
Add the egg and yolk, then the red wine and the vanilla and beat after each addition. The batter will look lumpy.
Step 4
In a separate large bowl, sift together flour, cocoa powder, baking powder, baking soda, salt and cinnamon.
Step 5
Sift the ingredients over the wet ingredients and combine on low speed. Fold in the last bits with a rubber spatula. Do not overmix!
Step 6
Bake for 25 minutes on the centre rack of the oven. The tester should come out clean. Do not overbake or the cake will be dry.
Step 7
Cool for 5-10 minutes in the tin then turn it out onto a rack and cool till it comes to room temperature. Dust with icing sugar if you like.
Step 8
Whip together mascarpone cheese, whipping cream, sugar and vanilla extract till soft peaks form. (Cream can be refrigerated for a couple of hours)
Step 9
Serve each slice of cake with a large dollop of cream.

Easy Beef Stroganoff

stroganoff2 There are days where my family feels like having beef for dinner, but steak is well, too heavy. These are the times when I make stroganoff. It is somewhat of a comfort food to us, and I serve it over buttered noodles or rice. I usually use tenderloin, though there is no stopping you from using other cuts of beef such as rib-eye. My mother-in-law buys us nice pieces of tenderloin from Ghim Moh market often enough and so we usually have beef stashed in our fridge.

Even though beef stroganoff sounds like a fanciful dish, it really is quite simple to prepare, and requires but a few ingredients. I must emphasise here that dijon mustard is paramount to the taste of this dish – you must include it. I am not a big mustard fan, but the addition of the mustard in this dish brings out the flavours so much more.

stroganoff1

Easy Beef Stroganoff

Serves 3-4
From magazine Adapted from Bon Appetit

Ingredients

  • 600g beef tenderloin (cut into 2X1X1/2 inch strips)
  • 2 tablespoons olive oil
  • 4 tablespoons olive oil
  • 1/4 cup chopped shallots
  • 300g brown button mushrooms (sliced thickly)
  • 1 cup chicken/beef broth (low sodium)
  • 3/4 cups whipping cream
  • 2 teaspoons dijon mustard
  • 1/2 teaspoon dried dill
  • 1/4 teaspoon paprika
  • salt and black pepper

Directions

Step 1
Dry beef strips using paper towels. In a large skillet, heat 2 tbsp oil over high heat. Brown beef strips in batches. Set aside.
Step 2
Add remaining oil to skillet and saute shallots until tender. Add mushrooms and stir fry till liquids evaporate slightly. Season with black pepper.
Step 3
Add in stock and simmer till stock thickens about 10 minutes. Stir in cream and dijon mustard. Add in beef and simmer till heated through.
Step 4
Stir in dill and paprika. Season with salt and pepper.
Step 5
Serve hot over rice or buttered noodles.

Homemade Granola

Homemade Granola The idea of making granola came the day after I accidentally bought a second pack of rolled oats, thinking that my box of rolled oats had expired. My helper reminded me that those were rather new too, and so being stuck with two packs of rolled oats, I knew I better be using them rather quickly.

So yesterday, it being the first day of the school holidays and I having to entertain my easily-bored two year old toddler, I decided to involve her in making granola. She had great fun scooping and pouring the rolled oats with this very cute whale measuring cup that I bought earlier from ToTT, stirring the mixture and sticking in her grubby little fingers every once so often. Sensory play for her perhaps?

Perhaps the only troublesome thing about making granola is having to check the oven quite frequently to stir up the mixture so that the granola bakes evenly. I neglected to check it for just a tat bit longer and it browned more in certain regions. Still it was delicious, definitely much more delicious than store-bought granola. The bub couldn’t wait for it to come out of the oven, declaring that it was hers.

Today’s breakfast? Granola, served up with cold milk.

Homemade Granola

Ingredients

  • 2 1/2 cups rolled oats
  • 1 cup sliced almonds
  • 3/4 cups golden flaxseed
  • 3/4 cups shredded coconut
  • 2 tablespoons dark brown sugar
  • 1/2 teaspoon sea salt
  • 2 tablespoons maple syrup
  • 2 tablespoons honey
  • 2 tablespoons vegetable oil
  • 1/2 cup dried cranberries
  • 1/2 cup raisins

Directions

Step 1
Preheat oven to 170°C. Position two racks near the middle of the oven.
Step 2
In a large bowl, stir together rolled oats, almonds, flaxseed, coconut and brown sugar.
Step 3
In a small bowl or measuring jug, whisk together oil, maple syrup and honey.
Step 4
Pour honey mixture into large bowl with oats and mix well with a spatula.
Step 5
Spread mixture onto two baking pans and bake for 20 minutes, stirring often to ensure even roasting.
Step 6
After 20 minutes, rotate pans and bake for another 15-20 minutes till evenly golden brown.
Step 7
Allow to cook before stirring in raisins and cranberries.
Step 8
Store in airtight containers.

Blueberry Streusel Top Muffins

blueberry struesel top muffins I baked blueberry muffins… again. Yes, my husband’s colleague asked him a couple of days back when he brought these to work, “You guys really like blueberries, don’t you?” Well, we do. Most importantly, my two year old loves them. They are healthy. They contain lots of antioxidants. Enough said.

Though no one really gets tired of blueberry muffins, I do try to modify them to make them more interesting. A couple of weeks ago, I tried some muffins that a friend made – they had streusel topping. She said it was an allrecipe.com recipe, so I decided to search for them and found them. Since the streusel topping did not sound too healthy, I decided to ease my conscience slightly by replacing part of the flour with wholewheat flour and cutting down on the sugar content.

The result was a lovely moist muffin, with delicious streusel topping. The amount of topping can be varied according to your preference. I was rather generous for this batch but don’t they appear beautiful? 🙂

Blueberry Streusel Top Muffins

Serves 15 muffins
Website adapted from all recipes.com

Ingredients

muffin

  • 2 cups all purpose flour
  • 3/4 cups whole wheat flour
  • 1/2 cup Caster sugar
  • 1 teaspoon salt
  • 4 teaspoons baking powder
  • 1 lemon (zested)
  • 2/3 cups vegetable oil
  • 2 eggs
  • 2/3 cups milk
  • 1 1/2 cup fresh blueberries

topping

  • 1/2 cup caster sugar
  • 1/3 cup all purpose flour
  • 1/4 cup butter (grated while cold)
  • 1 1/2 teaspoon ground cinnamon

Directions

Step 1
Preheat oven to 200°C. Line muffin trays with cups.
Step 2
Sift flours, salt and baking powder together in a large bowl. Add sugar and stir to combine.
Step 3
In a separate bowl, add vegetable oil, egg and milk. Whisk to combine.
Step 4
Add Egg mixture to the dry ingredients. Mix till just combined.
Step 5
Fold in blueberries. Fill muffin cups till 3/4 full.
Step 6
Toss together ingredients for streusel topping. Combine them together with a fork.
Step 7
Sprinkle topping on top of muffin batter.
Step 8
Bake for 20 - 25 minutes, or until a tester comes out clean.