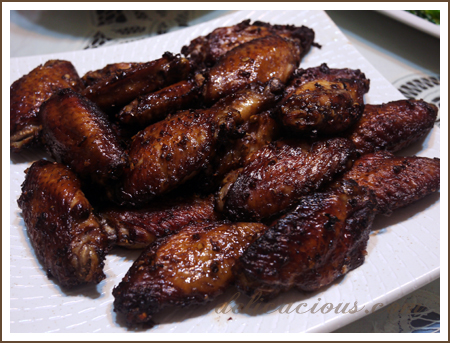
Grilled Wings using the Airfryer

I love the Philips Air-fryer. It makes frying so much easier, and healthier too, since it uses hot air to crisp up food instead of hot oil. I discovered that it does a pretty good grill too! One just needs to control the temperature well. Before we got the air-fryer, I hardly fry food at home. It is too oily, greasy, unhealthy, and creates too much of a mess. I bought it because I thought that maybe, I could cook healthier “fried” food alternatives for my little one in future. I discovered more use for it than just that.

These wings were simply marinated in oyster sauce, dark soya sauce, pepper and loads of minced garlic. They were then placed in the air-fryer for 10 minutes at 200°C and then for 5 minutes at 150°C. The results? Succulent, juicy grilled chicken wings. More air-fryer experiments to follow!
Daring Cooks March Challenge – Red Wine Braised Beef

After a super long hiatus from Daring Cooks, (now, when was my last challenge?), I’ve decided to embark on this monthly challenge again. The past year has been crazy, and committing to a monthly challenge has been rather impossible. Now that the babe is 1 year old, it’s time for me to return to my monthly cooking/baking challenge.

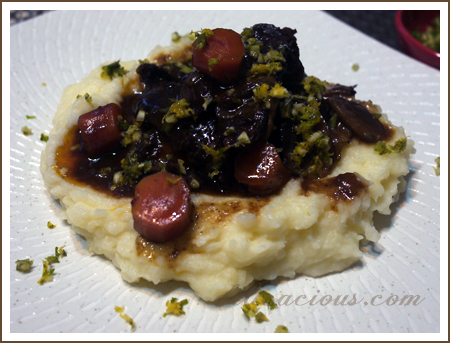
The March, 2012 Daring Cooks’ Challenge was hosted by Carol, a/k/a Poisonive – and she challenged us all to learn the art of Braising! Carol focused on Michael Ruhlman’s technique and shared with us some of his expertise from his book “Ruhlman’s Twenty”. I wanted to cook braised beef short ribs initially but couldn’t find short ribs. Seeing that I had 1kg of old beef sitting in the freezer, I decided to use that up instead. For the braising sauce, I used a combination of 2 cups of red wine (that was all I had left in the bottle) and 1 cup of beef stock. After simmering in the oven for 4 hours, the results were delicious. The beef was absolutely tender and chock full of flavour. I served it over fluffy potato mash and everyone had clean plates at the end of dinner.The picture above does not do justice to the dish – if only I can figure out how to take better pictures using indoor lighting!

I learnt something new in this challenge – gremolata. See that greenish yellow thing that’s sprinkled on top of the braised beef? That’s gremolata, a combination of parsley, minced garlic and lemon zest. It was an amazing addition. It added much freshness to the braise, something I’ve never quite tasted before.

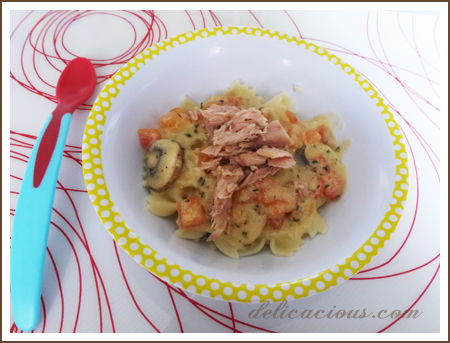
Cheesy tomato and tuna pasta for the little one

In a recent shopping trip to the supermarket, I discovered salt-free canned spring water tuna. I didn’t even know they sell that at NTUC finest! What a lovely discovery as that means that I can cook tuna pasta for my little one. I made extra pasta sauce and cooked some spaghetti so that the adults could have some too. The little one had hers with mini pasta bows. When she saw her bowl of pasta, her eyes lit up and she went, “WOW!” That was worth all the effort.

Cheesy Tomato and Tuna Pasta
Serves 4 adults

Ingredients:
1 small onion, chopped
40g unsalted butter
6 button mushrooms, sliced
1/4 tsp dried thyme
2 tbsp plain flour
300ml milk
100g cheddar cheese, grated
1 tomato, peeled and deseeded, chopped
1 can tuna in springwater, flaked
salt and black pepper to taste
sprinkling of parsley
pasta of your choice

Method:

  1. Saute onions in butter until translucent.
  2. Add sliced mushrooms and saute for 2-3 minutes.
  3. Mix in dried thyme.
  4. Add flour and stir till well mixed. Slowly add in milk and cook till thickened.
  5. Stir in tomatoes and cheese and heat through.
  6. Season with black pepper (and small amount of salt if cooking for children above 1)
  7. Pour over cooked pasta and top with flaked tuna.
  8. Sprinkle with parsley and serve.

Chicken Cacciatore Reloaded

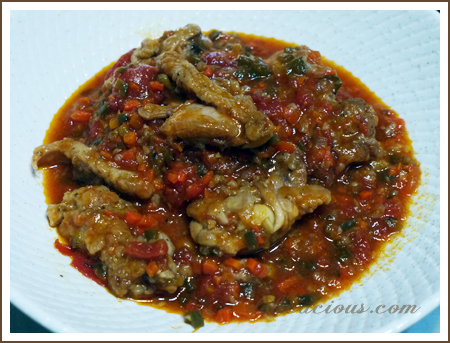
I enjoy one-pot dishes. It means less fuss, less washing and meals get prepared in a much shorter time. An added bonus if both adults and children can enjoy it. My other chicken cacciatore recipe on this blog uses pepper flakes to add depth to the sauce. This will definitely not go well with my 13 month old daughter and hence, I cooked up another version of  chicken cacciatore, a more child-friendly one. Interestingly, this turned out just as well, if not tastier, than the previous version.

Chicken Cacciatore
Serves 3 – 4

Ingredients:
4 chicken thighs, cut into 3 pieces each
salt and pepper
2-3 tbsp flour
3 tbsp olive oil
1 onion, chopped
3 cloves of garlic, minced
1 green pepper, diced finely
1 carrot, chopped finely
1/4 tsp dried oregano
1/4 tsp dried thyme
3 bay leaves
1 can diced plum tomatoes
1 cup chicken stock
1 tbsp brown sugar
salt and pepper to taste

Method:

  1. Season chicken with salt and pepper and coat with flour.
  2. In a large deep pot/french oven, brown chicken pieces in olive oil.
  3. Remove chicken and set aside.
  4. In the same pot, add garlic and onion and sauteed till onion is translucent.
  5. Add carrot and green peppers and stir fry for about 3 – 4 minutes.
  6. Add in dried herbs, bay leaves, brown sugar, tomatoes and chicken stock and bring to a boil.
  7. Nestle the chicken pieces in the sauce, cover the pot and simmer for 30 – 40 minutes or until chicken is tender and sauce is thickened.
  8. Season with salt and pepper.
  9. Serve hot, over rice or mash potatoes.

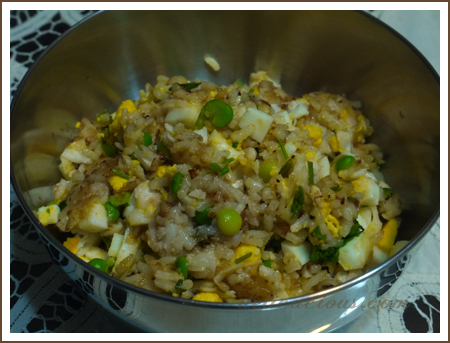
Child’s Kedgeree

I made Kedgeree for the little one yesterday. Well, a mock kedgeree would be more accurate, seeing that I replaced curry powder with paprika. I would have loved to add a little tumeric but I realised that we had none at home. The little girl was enthusiastic about it, tumeric or not, and that’s what counts.

Child’s Kedgeree
Serves 1 hungry toddler

Ingredients:
A small piece of white fish (approximately 4-5 ounces)
1 bay leaf
A few peppercorns
Milk for poaching
1 tbsp unsalted butter
1/2 an onion, chopped
1/8 tsp paprika
1/8 tsp tumeric
1/4 cup green peas
1 hard boiled egg, chopped
1 cup cooked long grain white rice
1 small bunch of parsley, chopped
salt and pepper to taste

Method:

  1. In a small saucepan, poach the fish in milk with the bay leaf and peppercorns. Fish is ready once it flakes.
  2. Flake fish carefully and set aside.
  3. In a frying pan, melt butter and sauteed onions till soft and translucent.
  4. Add paprika and tumeric (if using)
  5. Add green peas, rice and hard boiled egg. Mix well till heated through.
  6. Lastly stir in flaked fish and parsley.
  7. Serve warm.

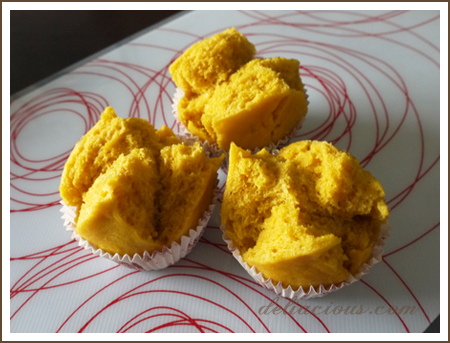
Pumpkin Huat Kueh (Steamed Pumpkin Cake)

I realised I had some pumpkin left in the fridge today and hence decided to steam it up to make pumpkin huat kuehs for my little girl. Huat Kueh, translated literally, means “prosperous cake”. Some people believe that if it rises and breaks open like a smile (as shown in the photo above), you will have good luck. I believe in none of that but that doesn’t stop me from making some yummy, oil-free steamed cakes for my little girl. They are slightly more troublesome to make than traditional muffins, but they have a nice soft chewy texture.

Most pumpkin huat kueh recipes you see out there uses coconut milk, because the combination of coconut milk and pumpkin is absolutely aromatic. In order to make this more healthy and child-friendly, I chose to use whole milk instead of coconut milk.

Pumpkin Huat Kueh
 
Author:
Serves: 10
Ingredients
Starter dough
  • 50g Hong Kong Flour
  • 50ml water
  • 1 tsp instant yeast
Batter
  • 200g pumpkin, steamed and pureed
  • 100ml whole milk
  • 1 egg
  • 120g brown sugar
  • 320g Hong Kong flour
  • 2 tsp baking powder
Instructions
  1. Mix starter dough ingredients in a bowl and set aside for 30 minutes.
  2. Sift together flour and baking powder and set aside.
  3. In a large mixing bowl, combine pureed pumpkin, milk, eggs and brown sugar.
  4. Add in sifted flour and baking powder and mix well.
  5. Finally, add in proofed starter dough and mix well. The mixture will be sticky.
  6. Set a steamer over boiling water. Fill muffin cups almost to the top with the mixture.
  7. Steam over rapid boiling water for 15 minutes.
Notes
Adapted from http://sakurambokitchen.blogspot.sg/2007/07/huat-kueh-pumpkin-durian-sweet-potato.html

This post is shared at Saturday Dishes Pumpkin.

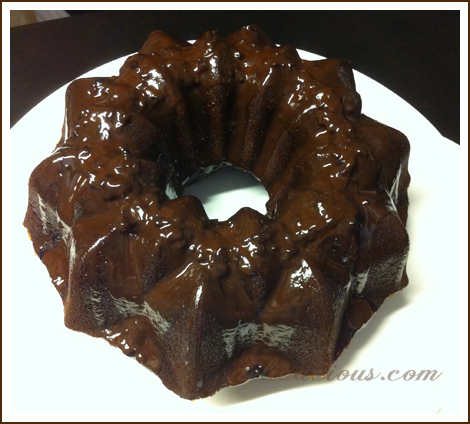
Red wine chocolate bundt cake

Disclaimer: This cake is NOT suitable for children consumption.

I love bundt pans because they are easy to handle, produce moist cakes and the large bundt pans produce cakes that feed a small crowd! That coupled by the fact that they look pretty without elaborate decorations, and that they are easy to divide and slice up (the patterns serve as a guide for servings), I think I should be baking bundts more. I was given a cheaper bundt pan years ago, but didn’t quite fancy it as it tended to stick despite being greased and floured. A year back, I purchased a few Nordicware bundt pans and have been sold ever since.

I baked this last Saturday for my CG mates. Originally, I just wanted to bake a simple chocolate cake but I stumbled upon a recipe that incorporated red wine into the chocolate cake. I thought, why not? The results? A moist and flavourful cake, made more delicious by a double glaze of red wine black berry sauce and milk chocolate ganache. To make the cake slightly more friendly for pregnant and breastfeeding mothers in the CG, I boiled the red wine mixture a little longer. You don’t have to, though.

Red Wine Chocolate Cake
Makes 1 large bundt
Adapted from Kiss my Bundt

Ingredients:

For the bundt cake
2 cups all-purpose flour
3/4 cups dutch-processed cocoa powder
1 1/4 tsp baking powder
1 1/4 tsp baking soda
1/2 tsp salt
1 1/2 cups sugar
2 eggs
1 cup whole milk
1/2 cup vegetable oil
1/2 cup water
1/2 cup dry red wine

For the blackberry red wine glaze
4 tbsp seedless blackberry jam
1/3 cup dry red wine

For the chocolate ganache
1/2 cup heavy cream
4 oz milk chocolate or dark chocolate

Method (for bundt cake):

  1. Preheat oven to 175°C
  2. Sift flour, cocoa powder, baking soda, baking powder and salt in a large bowl. Mix in sugar and set aside.
  3. Using a standing mixer, combine eggs, milk and oil. Beat on medium speed for about 1 minute.
  4. Turn the mixer speed to low and add in the dry ingredients, half a cup at a time.
  5. Meanwhile, combine water and wine and bring to a boil
  6. When batter is combined, slowly add in water and wine mixture. The batter will be quite thin.
  7. Pour into 10-C bundt pan that has been greased and floured and bake for about 45 minutes or until a cake tester comes out clean.
  8. Invert onto cooling rack and allow to cool for an hour before frosting.

Method (for blackberry red wine glaze)

  1. Whisk red wine and blackberry jam in a small saucepan over medium heat
  2. Bring mixture to a boil and let it boil for 1 – 2 minutes (the glaze will thicken)
  3. Remove from heat and let it cool for 5 minutes before spooning it over cooled bundt cake

Method (for chocolate ganache)

  1. In a small saucepan, bring cream to a near boil (hot but not boiling)
  2. Pour hot cream over chocolate in a large bowl and whisk till smooth
  3. Spoon over the blackberry red wine glaze on the cooled bundt cake