Oatmeal Pancakes

After a year long hiatus from this food blog, I’m back!

The hiatus was largely due to the birth of my daughter, who just turned one recently. The demands of coping with a baby plus juggling a full-time job made me put off updating this blog, and alas, I realised recently that it has been a year! Time really flies. I decided that I will try to keep this blog alive with new updates of my food. Readers will probably see more “child-friendly” recipes, no prizes for guessing why. 🙂
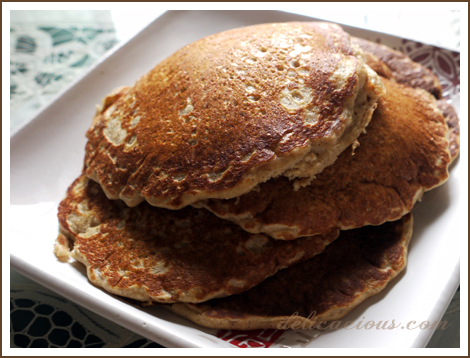

So back to my post on oatmeal pancakes. My daughter dislikes oatmeal, even after I dress it up with bananas and raisins. I discovered recently though, that she gladly eats up these oatmeal pancakes! A joyous discovery indeed, as it means that I can use up my large container of oatmeal. The addition of buttermilk and oatmeal makes the pancakes fluffy and soft, definitely suitable for children. Feel free to dress the pancakes up with bananas or blueberries, whatever you fancy. I serve mine with butter and a small dab of maple syrup.

Oatmeal Pancakes
Makes 6 – 8 pancakes

Ingredients:
3/4 ground oats
1 1/2 cups buttermilk or buttermilk substitute*
3/4 cup all purpose flour
1 1/2 tsp baking powder
3/4 tsp baking soda
1/2 tsp cinnamon
1 egg, beaten
2 tbsp unsalted butter, melted
1 tbsp brown sugar

Method:

  1. Combine oats with 3/4 cup of buttermilk. Allow to stand for 5 minutes.
  2. Sift together flour, baking powder, baking soda and cinnamon in a large bowl.
  3. In a separate bowl, whisk together egg, sugar, oats in buttermilk and remaining buttermilk.
  4. Add wet ingredients to dry ingredients and stir to combine. Do not over-stir.
  5. Heat a lightly greased frying pan or griddle. Cook pancakes in batches, adding approximately 1/3 cup of batter each time.
  6. Cook each pancake till bubbles appear on the surface, approximately 1 min. Flip pancake and cook the other side for another minute or so.
  7. Serve warm with butter and maple syrup.

* I add 1 tbsp of vinegar to measuring cup and top it up to 1 cup with milk. Let it stand for 10 minutes, stir well and there you have it, buttermilk substitute! You can use lemon juice instead of vinegar if you prefer.
Banana Walnut Bread

Hubby bought a huge bunch of bananas some time back, and since it’s just the two of us, most of the bananas ripened (or over ripened) before we could eat them. We froze about 8 of them in a box – over ripe bananas freeze well, without their skins of course, and are delicious in all kinds of baked goods.

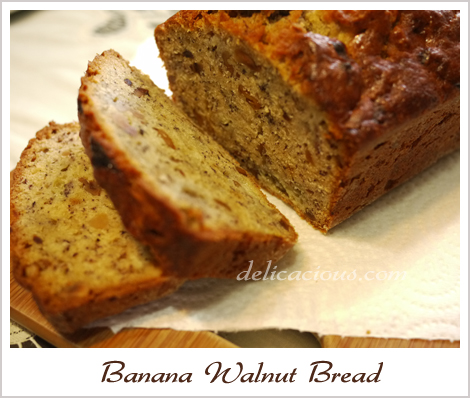
Seeing that I had some leftover walnuts from the not so recent mooncake making attempts, I decided to try a recipe from the book “The new best recipe“. The recipe is really simple because it does not require the use of a mixer. All the mixing can be done just with a wooden spoon and spatula. The results, as you can see from the picture above, is a moist, fragrant and very flavourful banana walnut bread. One of the best I’ve tasted, if I say so myself. Below is the slightly modified recipe that I used from the book.

Banana Walnut Bread
(Makes one 9-inch loaf)

Ingredients:
2 cups unbleached all purpose flour
1 cup of walnuts, chopped coarse
3/4 cup sugar
3/4 tsp baking soda
1/2 tsp salt
4 very ripe medium sized bananas (mashed)
1/4 whipping cream
2 large eggs, lightly beaten
6 tbsp melted and cooled unsalted butter
1 tsp vanilla extract

Method:

  1. Preheat oven to 350 degrees F and place an oven rack in the middle position. Grease and flour the bottom and sides of a 9 by 5 inch loaf pan.
  2. Lightly toast chopped walnuts on a baking sheet till fragrant.
  3. Whisk flour, sugar, baking soda, salt and walnuts together in a large bowl. Set aside.
  4. Mix mashed bananas, cream, eggs, butter and vanilla with a wooden spoon in a medium bowl.
  5. Lightly fold the banana mixture into the dry ingredients with a rubber spatula until just combined. Do not overmix.
  6. Scrape the batter into the prepared pan and bake till loaf is golden brown and a toothpick inserted in the centre comes out clean, about 55 minutes.
  7. Cool in the pan for 5 minutes, then transfer to a wire rack. Serve warm or at room temperature.
  8. The bread can be wrapped with plastic wrap and stored at room temperature for up to 3 days. It is best consumed on the day it is baked though.

Crustless Spinach Quiche

I had bought a packet of frozen spinach last week, meaning to cook creamed spinach some time this week. When this did not materialise, I decided to do something else with the spinach.

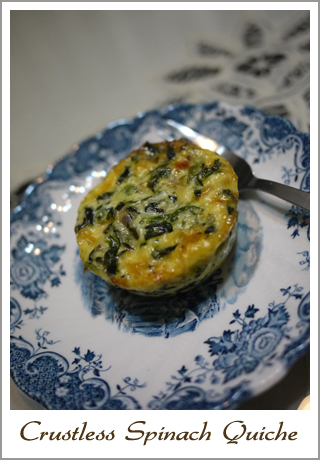
I was too lazy to roll out a crust, and so I decided that this quiche was going to be crustless. To save the trouble of having to cut it up, I decided to bake the quiche mixture in a cupcake tin. I used some aged pecorino cheese in place of gruyere cheese, the typical choice for quiches.

The quiche turned out nicely, though I think it was a tad bit salty, as I forgot that pecorino is saltier than gruyere, and forgot to cut down the salt.

Crustless Spinach Quiche
(Makes 10 mini quiche)

Ingredients:
1 packet of chopped frozen spinach
1 red onion, chopped
2 tbsp olive oil
4 eggs
1 1/2 cups of cream or half and half
1 cup of cheese (gruyere/pecorino/mozarella etc)
1/2 tsp of salt (or less)
1/4 tsp of ground black pepper
1/8 tsp of ground nutmeg

Method:

  1. Preheat oven to 205°C.
  2. Fry the chopped red onion in olive oil until fragrant and translucent.
  3. Add drained spinach until it wilts and is dry.
  4. Remove from heat to cool.
  5. In a large bowl, combine eggs, cream, cheese and seasonings.
  6. Add in cooled spinach and mix to combine.
  7. Fill 10 cupcake molds.
  8. Bake for 20 minutes or until tops of quiches are golden brown.