Brown Velvet Rose Cakes

velvetcake2

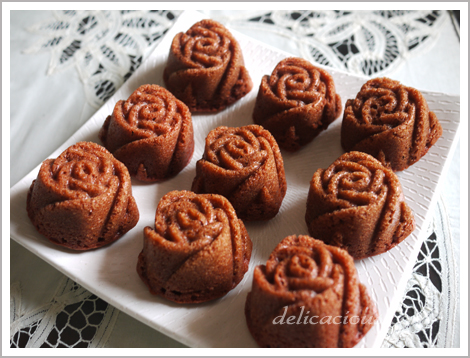
My rose bundt pan finally arrived in the mail and I simply had to make something with it. Since I had leftover buttermilk, I decided to try making red velvet cakes. Yes, RED velvet cakes. How did they end up brown then? Simply when you don’t add enough red food colouring, which was what happened. Sigh, the problem with gel food colourings and liquid food colourings is that you don’t quite know how much to substitute each for when the recipe calls for one or the other. Estimation does not always yield the best results. Oh well, the next time I try this again, I would know better.

I decided to do a slight twist to the basic red velvet recipe by adding coffee extract, since coffee typically complements chocolate. I think it tastes pretty good, but I will definitely up the amount of coffee extract the next time I redo this. The adapted recipe below shows my recommended dose of coffee extract.

velvetcake

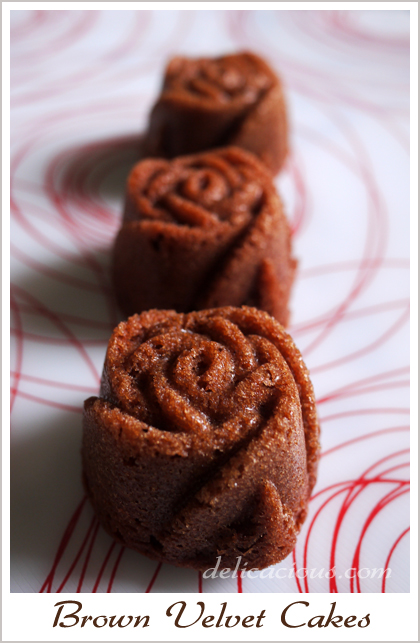
So how does red velvet taste like? It is not overwhelmingly chocolaty but the texture is fantastic – moist and dense. People typically serve this with a cream cheese topping but I was lazy and decided to serve it plain. My friends did not complain so I guess it’s good enough to be eaten on its own too.

Brown Velvet Rose Cakes
 
Brown velvet rose cakes are the result of a traditional red velvet cake made without the red colouring. It tastes every bit as good though!
Author:
Recipe type: Cake
Serves: 16
Ingredients
  • 1¼ cup canola oil
  • 1 cup buttermilk
  • 2 eggs at room temperature
  • 2 tbsp liquid food colouring
  • 1 tsp white wine vinegar
  • 1 tsp vanilla extract
  • 2 tbsp coffee extract
  • 2½ cup all-purpose flour
  • 1¼ cup sugar
  • 1 tsp baking soda
  • ¾ tsp fine salt
  • 1 tbsp cocoa powder
Instructions
  1. Preheat oven to 350ºF with a rack centered in the middle.
  2. Using a standing mixer, combine oil, buttermilk, eggs, food colouring, vinegar, vanilla and coffee extract. Beat on medium speed for 1 minute.
  3. In a medium bowl sift together flour, baking soda, salt, cocoa powder and sugar.
  4. With the mixer on low, add dry ingredients to the batter ½ cup at a time. Add slowly so that the mixture does not form lumps.
  5. Lightly grease the pan and pour batter into each cavity till they are ⅔ full.
  6. Bake until inserted toothpick comes out clean, about 20 minutes.
  7. If frosting, cool completely first.


Cranberry Shortbread Cake

I made this for a dinner party on Christmas eve, but I think it works well as an everyday cake. The cake has three distinct textures – First, you bite into the crunchy and sugary shortbread. Next, your teeth sinks into the moist jam layer before finishing at the cake layer at the bottom. The tartness of the cranberry jam perfectly balances the sugary crust of the shortbread. I served this with vanilla ice cream but it’s perfect on its own too.

Cranberry Shortbread Cake
Serves 8 to 10
Adapted from Baking from my home to yours

Ingredients for cranberry jam:
1 large orange
1/4 cup orange juice
12 ounces fresh or frozen cranberries
3/4 cup sugar

Method:

  1. Grate the zest of one orange into a medium heavy-bottomed saucepan.
  2. Remove the peel and pith and segment the orange between membranes. Add the orange segments into the saucepan.
  3. Reserve the juice from the orange. If it does not form 1/4 cup, top up with more orange juice.
  4. Put the cranberries and sugar into the pan and bring to a boil over medium heat, stirring frequently.
  5. Continue stirring for 5 – 8 minutes, until the cranberries pop and your spoon leaves tracks.
  6. Scrape the jam into a bowl and cool to room temperature.

Ingredients for the cake:
2 1/2 cups all-purpose flour
1 tsp baking powder
Pinch of salt
6.5 oz unsalted butter, room temperature
1 cup sugar
1 large egg
1 egg yolk
1 tsp vanilla extract
2 tsp sugar (for dusting)

Method:

  1. Mix together flour, baking powder and salt.
  2. Using a standing mixer with a paddle attachment, beat the butter on medium speed till soft and smooth.
  3. Add sugar and continue beating till it is well-combined.
  4. Reduce the mixer speed to low and add in the egg and yolk, beating until they are well incorporated.
  5. Beat in the vanilla extract.
  6. Add in the flour mixture in two parts, mixing only until it is just incorporated. Do not overmix.
  7. Turn the dough out onto a work surface and divide it into half. Pat each into a disk and wrap the disks up in plastic.
  8. Refrigerate each disk for 15 to 30 minutes (or refrigerate it overnight and thaw it for 20 minutes the next day before using).
  9. Preheat the oven to 350ºF while dough is chilling.
  10. Butter a non-stick 9-inch springform pan and place it on a baking sheet lined with parchment.
  11. Roll out one disk to the size of the springform and press it lightly into the pan.
  12. Spread the cranberry jam evenly over the dough.
  13. Roll the second piece of dough to the size of the pan and carefully invert it onto the filling.
  14. Brush the top lightly with water and sprinkle with 2 tsp of sugar.
  15. Bake for 40 minutes, until the top of the cake is golden brown.
  16. Transfer onto a cooling rack to cool for 20 minutes in the pan, before removing the sides and allowing it to cool to room temperature.
  17. Serve at room temperature.

Tis the season for the fruitcake…

My mother surprised me a couple of weeks back by requesting that I bake her a fruitcake this year. She does not have a very sweet tooth, and hardly ever requests for any baked goods and so this was indeed surprising. I didn’t even think she liked fruitcakes! Anyway, it was too late to start soaking fruits in brandy then, so I decided to make one that didn’t involve any soaking of fruits. The cake however, should be stored for a couple of weeks before eating. As I type this, my loaf of fruitcake is sitting in the refrigerator, nicely wrapped in plastic and foil. I know that fruitcakes are supposed to be able to keep at room temperature for a month or more, but seeing how my kitchen seems to be a war zone for ants lately, I am not taking any chances.

The amount of fruit and nuts used for this recipe is rather phenomenal. All that fruit and nuts in the photograph above yielded two 9 X 5 inch loaves. The fruitcake turned out nicely after baking with the aroma of brandy wafting through the oven doors. We finally cut the cake up a month later and boy was it lovely. Best enjoyed with a fragrant cup of English tea.

Dark Fruitcake
(yields two 9 X 5 inches loaves)
Recipe adapted from Joy of Cooking

Ingredients:
3 cups plain flour
1 tsp baking powder
1/2 tsp baking soda
1/4 tsp salt
1 tsp ground cinnamon
1 tsp ground nutmeg
1 tsp ground all spice
4 oz unsalted butter, at room temperature
2 cups packed dark brown sugar
6 large eggs
1/2 cup molasses
Grated zest and juice of 1 orange
Grated zest and juice of 1 lemon
1/2 cup brandy
2 1/2 cups diced mixed fruits
2 cups coarsely chopped walnuts
1 1/2 cups chopped dates
1 1/2 cups dried golden raisins
1 cup chopped dried apricots

Method:

  1. Preheat the oven to 300ºF. Grease two 9 X 5 inch loaf pans and line the bottom and sides with parchment paper.
  2. In a large bowl, sift together flour, baking powder, baking soda, salt and all the ground spices.
  3. Using a standing mixer, beat butter till creamy. Add in dark brown sugar and beat till creamy and lightened in colour and texture, 3 to 5 minutes.
  4. Beat in one egg at a time, scraping the sides of the bowl as necessary.
  5. Beat in molasses, lemon and orange zest and juice.
  6. On low speed, add in the flour mixture in 3 parts, alternating in 2 parts with the brandy.
  7. Finally, stir in the mixed dried fruits using a spatula.
  8. Scrape the batter into the two pans and spread evenly.
  9. Bake until a toothpick inserted in the centre comes out clean, about 1 1/2 hours. If the cake gets too dark on top, tent it loosely with foil for the last 30 – 45 minutes.
  10. Let cool in the pan on a rack for 1 hour.
  11. Invert the cake and remove the liner and let it cool the right side up on a rack.
  12. When totally cool, wrap cake with plastic wrap followed by foil.
  13. Cake are recommended to be stored for 3 – 4 weeks before serving.

Chocolate Pear Pudding Cake

Ever had those days where you needed a dessert but had too little time? Well, yesterday was one of those days. Hubby and I had a wedding to attend in the afternoon but were also invited to dinner at a lovely couple’s place. Determined to bring along something home-baked for dessert and so started browsing through my collection of recipe books in the morning. I decided to try something from Nigella Express, a cookbook I rarely used. I had but one “small” problem. The recipe called for canned pears and we had none. Canned pears are not very common around here and I knew that I could probably only find it in the better supermarkets. I decided that I’d grab the pears after the wedding and attempt to finish the dessert in the short amount of time I had between the wedding and the dinner. This will definitely put Nigella Express to the test – could it deliver good food, fast?

I managed to find the pears in a decent supermarket after the wedding and proceeded home to start on the cake. I finished the preparations in about 20 minutes (my hubby helped to grease the pan and line the pears in the pan). The baking took another 30 minutes. The results? A delicious moist chocolate pudding cake that our host couple and their children (and ourselves of course) enjoyed. Definitely a recipe worth keeping.

Chocolate Pear Pudding Cake
(Makes one square cake, 8″ X 8″)
Adapted from Nigella Express

Ingredients:
1 large can pear halves in juice (About 465g drained weight)
3/4 cup sugar
3/4 cup + 1 tbsp plain flour
1/4 cup cocoa (dutch-processed)
5 oz unsalted butter
1 tsp baking powder
1/4 tsp baking soda
2 eggs (room temperature)
2 tsp vanilla extract

Method:

  1. Preheat oven to 400ºF. Grease an 8 inch square pan with butter.
  2. Drain pears and arrange them in the base of the dish.
  3. In a food processor, blitz butter and sugar till smooth. Add in eggs, roughly beaten and vanilla extract and blitz till combined.
  4. Lastly, add in flour, cocoa, baking powder and soda and blitz till you have a soft and smooth batter.
  5. Spread the batter over the pears and bake in the oven for 25 – 30 minutes.
  6. Let it stand for 5 to 10 minutes and then cut into 9 slices. Serve with chocolate sauce or vanilla ice-cream.

Tip: To get a gooey molten centre in the cake, do not overbake!

Brownie Cupcakes

I baked these some time ago for a gathering of students at my place. If you are a chocolate fan, these brownie cupcakes will be straight down your alley. Sinfully rich and chocolaty, they are bound to fix your chocolate craving. The best part? They are not difficult to make at all! The ingredients are simple, but the sheer quantity of butter, sugar and eggs may shock you. Well, they are for a large batch of cupcakes afterall, and didn’t I say earlier that these were sinful?

Brownie Cupcakes
(Makes 60 cupcakes)
Recipe adapted from Gourmet, Dec 1999

Ingredients:
16 oz unsalted butter, cut into cubes
8 oz bittersweet chocolate (I use Valrhona equatorial)
1 3/4 cups all purpose flour
1/2 cup unsweetened cocoa powder
1/4 tsp salt
3 1/4 cups sugar
8 large eggs

Method:

  1. Preheat oven to 350ºF. Line muffin tray with liners.
  2. Melt butter and chocolate in a heavy saucepan over moderately low heat, stirring till smooth.
  3. In a separate bowl, whisk together flour, salt and cocoa powder.
  4. Remove saucepan from heat and whisk in sugar.
  5. Add eggs, 1 at a time, whisking after each addition until incorporated.
  6. Lastly, fold in flour mixture until just blended.
  7. Spoon batter into muffin liners, filling the liner almost to the top. Bake for 25 – 30 mins. A skewer inserted will have some crumbs adhered when the cupcakes are done.
  8. Cool for 5 minutes in tins and remove to cool on a rack.
  9. Repeat with the remaining batter.
  10. These can keep in an air-tight container for about 2 days at room temperature.

Walnut Mooncakes

I baked up a new batch of these yesterday for mom, since I was meeting her for dinner. I like the way the crust crumbles when you bite into it, the fragrance of the lotus seed paste mixed with the walnuts and salted egg yolk. The good part about baking them on your own is that I can be indulgent with the amount of walnuts I add. Mom was commenting that the walnut pieces were huge. You’d never find them in store bought ones. Here are some photos! (Photoshop is down so there are no captions, for now.)

walnut_mooncake2

walnut_mooncake3

walnut_mooncake4

For those that were asking, here’s the recipe. It’s taken from here, another baker’s food blog but I’ve made a few slight changes to the filling to suit my own taste.

Ingredients:
360g Plain flour
25g Custard Powder
1/2 tsp Sodium Bicarbonate
50g Icing sugar
50g Shortening
220g Butter (salted)
1 egg
1/2 tsp Vanilla Essence
1/2 tsp Ammonium Bicarbonate
1 Egg + 1 tbsp water (for glazing)
Walnut for decoration

Filling:
1 kg White Lotus Paste
6 salted egg yolks (each cut into 6-8 pieces)

Method:
1. Cream sugar, shortening, butter, vanilla flavour and ammonium together until slightly white. (slow speed first then change to high speed)
2. Gradually add in egg.
3. Lastly add in sifted flour, custard powder and sodium bicarbonate to knead into a dough. (don’t mix too long) Leave dough in fridge overnight.
4. Steam egg yolks for about 5 minutes. Cut each yolk into 6 – 8 pieces, depending on the size of the yolk.
5. Take out dough from fridge and divide into portions of 20 gm each.
6. Divide fillings into about 25 gm each.
7. Make a dent in each ball of filling and place a piece of egg yolk in it.
8. Wrap fillings into dough and decorate with walnut.
9. Apply egg wash and bake at 160ºC for 10 mins. Take it out and leave it for about 10 mins and apply egg wash again. Bake for another 15 -20 mins.