Archives for January 2011

Raisin Challah Loaf

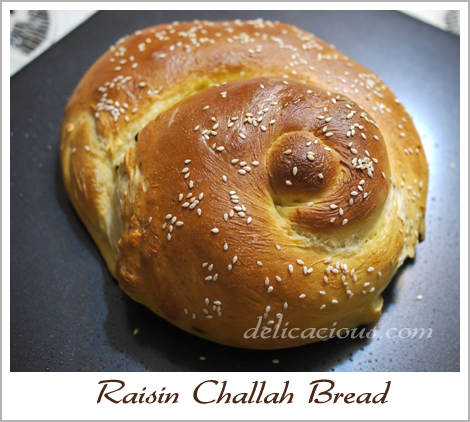
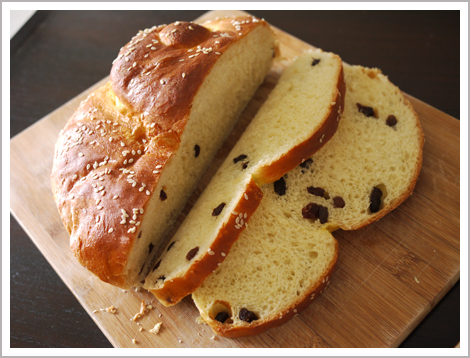
This simple raisin bread is made from the challah dough recipe that can be found here. The result is a soft and fragrant sweet breakfast or teatime bread. I especially enjoy it when it’s lightly toasted, with a little extra butter spread on top. The bread may look complex but I assure you that this dough is really quite easy to handle and shape.
Raisin Challah Loaf
Makes 1 Loaf
Adapted from Artisan Bread in Five Minutes a Day

Ingredients:
1 pound of challah dough (recipe found here)
1/3 cup raisins
Butter for greasing cookie sheet
Egg wash (1 egg mixed with 1 tbsp water)
White sesame seeds

Method:

  1. Grease a cookie sheet.
  2. Dust the surface of the refrigerated dough with flour and cut off a 1 pound piece.
  3. Dust with more flour and quickly shape it into a ball by stretching the surface of the dough around to the bottom on all four sides.
  4. Using a rolling pin and just a little flour, roll out the dough to the thickness of 1/2 inch.
  5. Sprinkle with raisins and roll into a log, starting from the longer end.
  6. Roll the dough between your hands and stretch it to form a single long thin rope with a tapered end.
  7. Starting with the thick end of the rope, form a coil on the prepared cookie sheet. Tuck the tapered end under the loaf.
  8. Allow to rest for 1 hour 20 minutes (40 minutes if you are using fresh dough).
  9. Ten minutes before baking, preheat oven to 350ºF.
  10. Brush the loaf with egg wash and sprinkle with sesame seeds.
  11. Place near the centre of the oven and bake for 25 minutes.
  12. Allow to cool before slicing or eating.
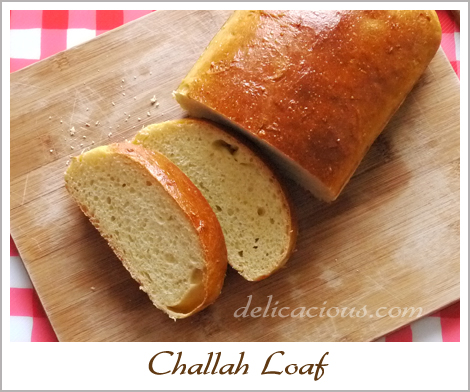
Simple Challah Loaf

Challah is the bread served traditionally in Jewish cultures. It is very fragrant thanks to the addition of butter and eggs, and is also mildly sweet from the added honey. Challah is versatile enough to be substituted in most recipes requiring brioche dough and it contains half the amount of eggs so why not try baking some?

The recipe below is adapted from one of my favourite bread books – Artisan Bread in Five Minutes a Day. I think the brilliant part about their recipes is that one does not need to knead the dough nor punch it down after it rises. Also, a larger batch of dough can be made and stored in the fridge, ready to use whenever you want. How convenient!

Challah Dough
Makes about 4 pounds of dough

Ingredients:

1 3/4 cups lukewarm water (105ºF to 115ºF)
1 1/2 tbsp granulated yeast
1 1/2 tbsp salt
4 large eggs, beaten
1/2 cup honey
1/2 cup unsalted butter, melted
7 cups of unbleached all-purpose flour

Method for mixing dough:

  1. Mix yeast and warm water in the bowl of a standing mixer and leave it for 5 minutes.
  2. Once yeast starts to foam, add in salt, beaten eggs, honey and butter and mix well.
  3. Mix in the flour without kneading using a dough hook.
  4. Transfer dough to a container with a non air-tight lid and leave in a warm place to rise for approximately 1 hour 30 minutes to 2 hours.
  5. Dough can be used immediately or stored in the refrigerator for 5 days. After 5 days, freeze the remaining dough.

Method for making challah loaf:

  1. Dust the surface of the refrigerated dough with flour and cut off a 1-pound piece.
  2. Dust the surface of the piece of dough with more flour and quickly shape it into a ball by stretching the four sides of the dough.
  3. Elongate it to an oval and drop in into a greased loaf pan.
  4. Allow it to rest and rise for 1 hour 20 minutes (for refrigerated dough) or 40 minutes (for fresh dough)
  5. 10 minutes before baking, preheat oven to 350ºF.
  6. Brush the top of the loaf with egg wash made from one egg and one tablespoon of cream.
  7. Place the bread on a rack in the centre of the oven and bake for 35 to 40 minutes, until the top is a nice golden brown.
  8. Allow to cool before slicing.

Cheesy Crab Cakes

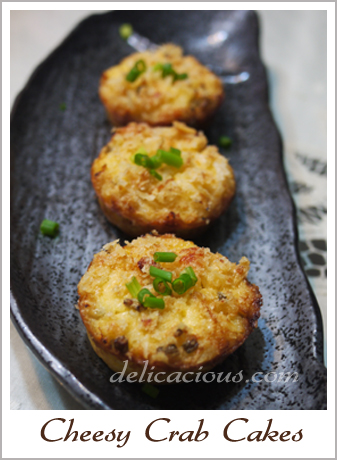
I salute those housewives who cook dinner everyday and not run out of inspiration of what to cook. Because after just two weeks or so of doing so, I am fast running out of ideas and with the growing bump, energy. Yes, since I’m the one who’s at home these days while the hubby is studying, the responsibility of cooking dinner every night seems to have fallen on my shoulders – at least for a week or so more before I pop. Most of the nights it’s Chinese food, but there are days when you do not want to do another stir-fry or see another bowl of rice. Last Saturday was one of those days.

I checked the freezer and found soft frozen crab meat and so decided to do something with it. I didn’t quite want to do a pasta, seeing that both of us had a rather heavy lunch and so decided on these crab cakes. Most crab cakes need to be fried, which was simply too much work when you want a simple meal and so I decided to use a recipe that didn’t require frying, just baking. I served these up with a mushroom soup and a simple salad – a simple yet tasty meal on a weekend evening.

Cheesy Crab Cakes
 
Author:
Serves: 12
Ingredients
Crab mixture
  • 4 ounces cream cheese
  • ⅛ cup grated Parmesan cheese
  • 1 egg
  • 2 tbsp sour cream
  • ½ tsp orange zest
  • ¼ tsp lemon zest
  • ⅛ tsp coarse sea salt
  • Pinch of cayenne pepper
  • 3 oz crabmeat
  • 1 tbsp chopped spring onions
Base and topping
  • ½ cup Japanese breadcrumbs
  • 1 oz unsalted butter, melted
  • 1 tbsp chopped spring onions
  • Salt and pepper
Instructions
  1. Preheat oven to 350ºF and lightly grease a 12 cup muffin tin.
  2. Using a standing or hand-held mixer, beat cream cheese till smooth.
  3. Add in Parmesan cheese, egg and sour cream and beat to blend.
  4. Next, beat in the orange and lemon zests, sea salt, cayenne pepper and spring onions.
  5. Fold in the crab meat and set aside.
  6. In a small bowl, combine breadcrumbs, melted butter and chopped spring onions. Season with salt and pepper.
  7. Place a teaspoon of breadcrumb mixture at the bottom of each muffin cup and flatten it using the back of a spoon.
  8. Top with a generous amount of crab mixture.
  9. Sprinkle another tsp of breadcrumb mixture at the top.
  10. Bake crab cakes for about 25 minutes, until golden on top. Serve warm.
Notes
Adapted from Bon Appetit

Brown Velvet Rose Cakes

velvetcake2

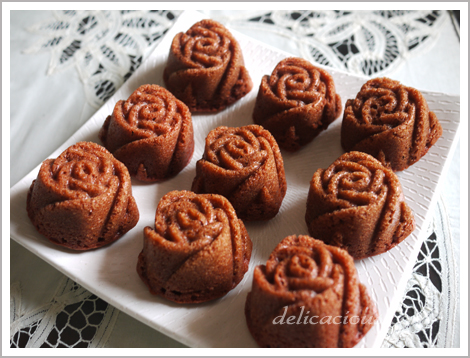
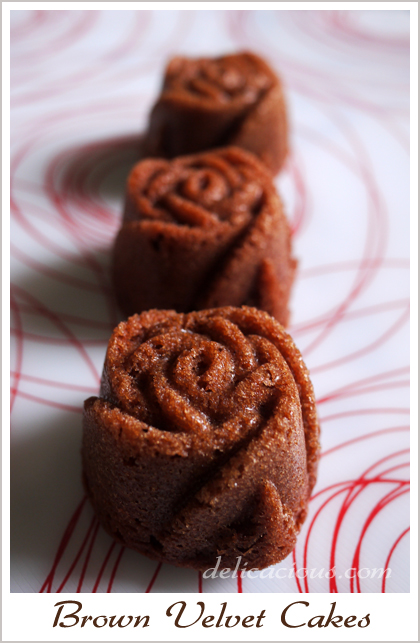
My rose bundt pan finally arrived in the mail and I simply had to make something with it. Since I had leftover buttermilk, I decided to try making red velvet cakes. Yes, RED velvet cakes. How did they end up brown then? Simply when you don’t add enough red food colouring, which was what happened. Sigh, the problem with gel food colourings and liquid food colourings is that you don’t quite know how much to substitute each for when the recipe calls for one or the other. Estimation does not always yield the best results. Oh well, the next time I try this again, I would know better.

I decided to do a slight twist to the basic red velvet recipe by adding coffee extract, since coffee typically complements chocolate. I think it tastes pretty good, but I will definitely up the amount of coffee extract the next time I redo this. The adapted recipe below shows my recommended dose of coffee extract.

velvetcake

So how does red velvet taste like? It is not overwhelmingly chocolaty but the texture is fantastic – moist and dense. People typically serve this with a cream cheese topping but I was lazy and decided to serve it plain. My friends did not complain so I guess it’s good enough to be eaten on its own too.

Brown Velvet Rose Cakes
 
Brown velvet rose cakes are the result of a traditional red velvet cake made without the red colouring. It tastes every bit as good though!
Author:
Recipe type: Cake
Serves: 16
Ingredients
  • 1¼ cup canola oil
  • 1 cup buttermilk
  • 2 eggs at room temperature
  • 2 tbsp liquid food colouring
  • 1 tsp white wine vinegar
  • 1 tsp vanilla extract
  • 2 tbsp coffee extract
  • 2½ cup all-purpose flour
  • 1¼ cup sugar
  • 1 tsp baking soda
  • ¾ tsp fine salt
  • 1 tbsp cocoa powder
Instructions
  1. Preheat oven to 350ºF with a rack centered in the middle.
  2. Using a standing mixer, combine oil, buttermilk, eggs, food colouring, vinegar, vanilla and coffee extract. Beat on medium speed for 1 minute.
  3. In a medium bowl sift together flour, baking soda, salt, cocoa powder and sugar.
  4. With the mixer on low, add dry ingredients to the batter ½ cup at a time. Add slowly so that the mixture does not form lumps.
  5. Lightly grease the pan and pour batter into each cavity till they are ⅔ full.
  6. Bake until inserted toothpick comes out clean, about 20 minutes.
  7. If frosting, cool completely first.


Dark Chocolate Ice Cream

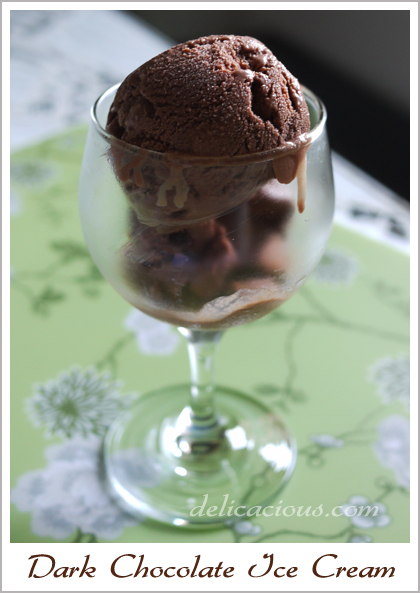
Many would agree that there are few foods as seductive as good, dark chocolate. Combine that with ice cream and it can become an almost out-of-the-world treat. I especially enjoy dark chocolate ice cream when I am feeling down, or am in a pensive mood. I like it served on its own, as that allows me to fully appreciate the full flavours of the dark chocolate. Not that it does not go well with waffles, souffles, cakes and other desserts.

The ice cream recipe I used is adapted from Pierre Herme’s Chocolate Desserts. He wrote about how good chocolate ice cream should never be made with cocoa powder, but with real dark chocolate. He doesn’t believe in using custards in chocolate ice creams as the yolks interfere with the rich flavour of the dark chocolate. Hence, chocolate ice creams are made using the Philadelphia method. After tasting the ice cream, I must say that I agree with his conclusions. Each spoonful was pure chocolate and it was sheer delight.

Dark Chocolate Ice Cream
Makes 3/4 litres
Adapted from Chocolate Desserts by Pierre Hermes

Ingredients:
1/3 cup powdered milk
3 cups whole milk
1/3 cup sugar
8 ounces Valrhona Manjari 64%, finely chopped

Method:

  1. Place the powdered milk in a heavy-bottomed medium saucepan and gradually whisk in the whole milk.
  2. When the powdered milk is dissolved, whisk in the sugar and bring the mixture to a boil.
  3. Stir in the chocolate and bring it to the boil again.
  4. Remove the pan from the heat and pour it into a small bowl. Place the small bowl in a larger bowl filled with water and ice-cubes.
  5. Keep the chocolate over ice, stirring frequently until it reaches room temperature.
  6. Churn the ice cream in an ice-cream maker.

Cranberry Shortbread Cake

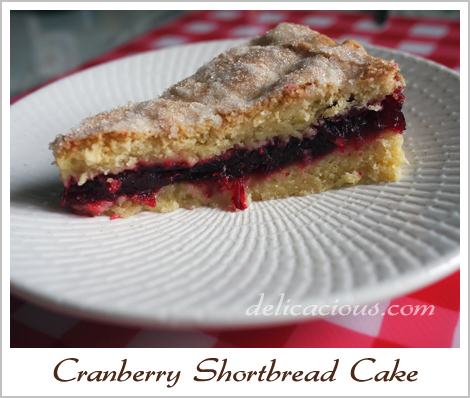
I made this for a dinner party on Christmas eve, but I think it works well as an everyday cake. The cake has three distinct textures – First, you bite into the crunchy and sugary shortbread. Next, your teeth sinks into the moist jam layer before finishing at the cake layer at the bottom. The tartness of the cranberry jam perfectly balances the sugary crust of the shortbread. I served this with vanilla ice cream but it’s perfect on its own too.

Cranberry Shortbread Cake
Serves 8 to 10
Adapted from Baking from my home to yours

Ingredients for cranberry jam:
1 large orange
1/4 cup orange juice
12 ounces fresh or frozen cranberries
3/4 cup sugar

Method:

  1. Grate the zest of one orange into a medium heavy-bottomed saucepan.
  2. Remove the peel and pith and segment the orange between membranes. Add the orange segments into the saucepan.
  3. Reserve the juice from the orange. If it does not form 1/4 cup, top up with more orange juice.
  4. Put the cranberries and sugar into the pan and bring to a boil over medium heat, stirring frequently.
  5. Continue stirring for 5 – 8 minutes, until the cranberries pop and your spoon leaves tracks.
  6. Scrape the jam into a bowl and cool to room temperature.

Ingredients for the cake:
2 1/2 cups all-purpose flour
1 tsp baking powder
Pinch of salt
6.5 oz unsalted butter, room temperature
1 cup sugar
1 large egg
1 egg yolk
1 tsp vanilla extract
2 tsp sugar (for dusting)

Method:

  1. Mix together flour, baking powder and salt.
  2. Using a standing mixer with a paddle attachment, beat the butter on medium speed till soft and smooth.
  3. Add sugar and continue beating till it is well-combined.
  4. Reduce the mixer speed to low and add in the egg and yolk, beating until they are well incorporated.
  5. Beat in the vanilla extract.
  6. Add in the flour mixture in two parts, mixing only until it is just incorporated. Do not overmix.
  7. Turn the dough out onto a work surface and divide it into half. Pat each into a disk and wrap the disks up in plastic.
  8. Refrigerate each disk for 15 to 30 minutes (or refrigerate it overnight and thaw it for 20 minutes the next day before using).
  9. Preheat the oven to 350ºF while dough is chilling.
  10. Butter a non-stick 9-inch springform pan and place it on a baking sheet lined with parchment.
  11. Roll out one disk to the size of the springform and press it lightly into the pan.
  12. Spread the cranberry jam evenly over the dough.
  13. Roll the second piece of dough to the size of the pan and carefully invert it onto the filling.
  14. Brush the top lightly with water and sprinkle with 2 tsp of sugar.
  15. Bake for 40 minutes, until the top of the cake is golden brown.
  16. Transfer onto a cooling rack to cool for 20 minutes in the pan, before removing the sides and allowing it to cool to room temperature.
  17. Serve at room temperature.

Cream of broccoli and potato soup

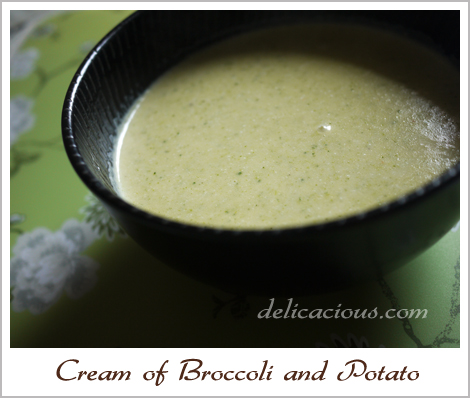
I am not usually prompt in updating my blog with the things I cook and bake. Usually, by the time a recipe shows up on the blog, it has been a few days/weeks/months old. This recipe however, is fresh from the stove. I just finished making this and after a bowl of it, I knew that I would really regret it if I do not pen it down as I would probably forget the ingredients and amounts in a couple of hours. This soup is GOOD.

I was combing around the kitchen for something for lunch and realised that I had a broccoli sitting in the fridge and a couple of russet potatoes that were going to grow into new plants if I do not use them soon. Even the onions were sprouting shoots. Since I had cream in the fridge, I decided to make a cream of broccoli soup, and throw in a couple of potatoes as well. The result was surprisingly tasty and so I’m recording this recipe down for future use.

Cream of broccoli and potato soup
Serves 4

Ingredients:
150g broccoli florets
3 tbsp unsalted butter
1/4 tsp ground cumin
1/4 tsp ground paprika
1 onion, chopped
2 medium russet potatoes, peeled and cubed
2 cups vegetable or chicken broth (I used vegetable)
1/2 cup of shredded mozzarella or chedar
1/2 cup of cream
1/2 cup of milk
salt and black pepper to taste

Method:

  1. Boil the broccoli florets in a pot of boiling salted water for about 5 minutes or till tender. Remove and chop into smaller pieces and set aside.
  2. Meanwhile, melt the unsalted butter in a medium frying pan over medium heat. When the foaming has subsided, add in the cumin and paprika.
  3. Add in the chopped onions and stir fry till translucent.
  4. Add in the cubed potatoes and stir fry for about 5 – 10 minutes.
  5. In a medium pot, bring the broth to a boil.
  6. Add in the onion and potato mixture and simmer till potatoes are tender. Add the reserved broccoli florets.
  7. Using an immersion blender or a blender, process the soup until smooth.
  8. Return to the heat and add in the cheese, stirring continually until it melts.
  9. Stir in the cream and the milk and bring to a boil.
  10. Season with salt and pepper before serving.