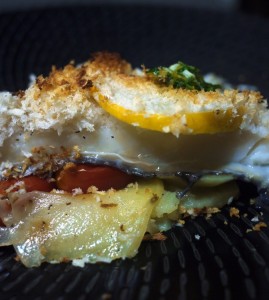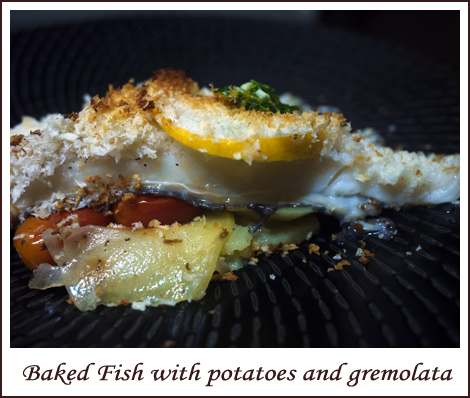
Baked fish with potatoes and gremolata

25th Nov was Cook For Family Day, an event that I had the privilege of organising following a Cook For Family initiative started off earlier by Daniel of Daniel Food Diary.

For Cook For Family Day, I decided to try out a recipe that I saw in an earlier issue of Delicious magazine that I borrowed from my sister-in-law. It is simple and fuss free, as with most one-pot oven meals. Toss everything in and walla! A tasty meal awaits you and your family. If you have a larger family, simply increase the amounts of the recipe below accordingly. Like some spice, add some red chilli slices during the final baking step!

My family and I enjoyed the fish and vegetables very much. The baked fish was moist and tender and the gremolata added alot of flavour. Do not omit it!
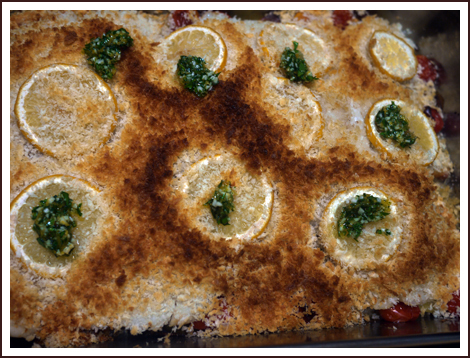
Try out this simple recipe when you have the time. It is definitely worth it.

Baked fish with potatoes and gremolata

Serves 4
Prep time 20 minutes
Cook time 45 minutes
Total time 1 hours, 5 minutes
Allergy Fish
Meal type Main Dish
Misc Child Friendly, Serve Hot
From magazine Delicious

Ingredients

Baked Fish

  • 500g Potato (peeled and thinly sliced)
  • 1 onion (thinly sliced)
  • 2 tablespoons olive oil
  • 20g unsalted butter
  • 250g Cherry Tomatoes
  • 100g breadcrumbs
  • 700g Halibut fillets (3 - 4 pieces, depending on size)
  • 1 lemon

Gremolata

  • 1/4 cup Extra virgin olive oil
  • 2 cloves Garlic (finely chopped)
  • 1 Lemon's zest (Grated)
  • 1 bunch English parsley (finely chopped)

Directions

Step 1
Preheat oven to 180°C.
Step 2
Spread potatoes and onions in a large roasting pan and drizzle with 1 tbsp of olive oil. Season with salt and ground pepper, then toss to coat.
Step 3
Spread it out to cover the base of the pan and dot with butter. Bake for 15 minutes.
Step 4
Add tomatoes, and return to the oven for 10 - 15 more minutes.
Step 5
Meanwhile, mix breadcrumbs with remaining 1 tbsp of olive oil and season with salt and ground pepper. Season the fish fillets with salt and pepper as well.
Step 6
Remove roasting pan from oven and place fish over potatoes. Cover with breadcrumbs and lemon slices and return to the oven for 12 - 15 more minutes.
Step 7
In a small bowl, combine extra virgin olive oil, garlic, parsley and lemon zest. Season to taste with salt and pepper.
Step 8
When fish is ready, remove from oven. Serve hot with gremolata.

Salmon Tofu Miso Casserole

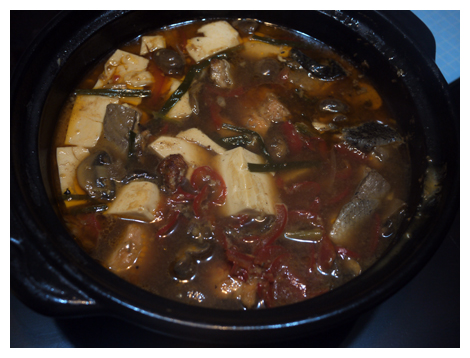
The flu bug is going around and both my husband and my toddler girl are down with flu. I had initially intended to cook salmon tofu balls but seeing that they were sick, I decided that something less “heaty” would be good.

I chanced upon a recipe on epicurious and did some modifications to get this yummylicious dish that even my rather fussy toddler liked it!

Salmon Tofu Miso Casserole

Serves 4
Prep time 20 minutes
Cook time 40 minutes
Total time 1 hour
Meal type Lunch, Main Dish
Misc Child Friendly, Serve Hot
Region Japanese
Delicious Salmon Tofu Miso Casserole, perfect for a cold evening's dinner.

Ingredients

  • 450g Boneless salmon fillet (Cut into cubes)
  • 1/4 teaspoon salt
  • 2 tablespoons oil
  • 150g Assorted japanese mushrooms (cleaned and dried)
  • 2 cloves garlic (chopped finely)
  • 1 Red capsicum (sliced)
  • 1 Block chinese tofu (Cut into cubes)
  • 2 1/2 tablespoons Miso paste ((I use a mix of red and white miso))
  • 2 cups Chicken stock
  • 1 tablespoon Mirin
  • 3 stalks Spring onion (cut into sections)

Directions

Step 1
Marinate salmon pieces with salt for 10 - 15 minutes.
Step 2
Heat 1 tbsp of oil in a casserole. Brown salmon pieces in oil and set aside.
Step 3
Add remaining oil and stir fry garlic, red capsicum and mushrooms in the casserole.
Step 4
Add in the tofu to combine and finally the salmon.
Step 5
Add in miso paste and stir to mix with ingredients.
Step 6
Pour in the chicken stock and mirin and bring to a boil.
Step 7
Simmer for 20 minutes and add the spring onions, and continue to simmer for 5 - 10 minutes more.
Step 8
Serve hot with rice.

Chicken and Century Egg Porridge

Porridge is one of my comfort foods on a cold rainy day, or when I am recovery from a flu. It is simple to prepare, feeds a large number of people easily, and best of all, has a low glycemic index! Did you know that porridge has a GI index of 42-45, in comparison with steamed rice, that has a whooping GI index of 98? To find out more about the glycemic index, you can refer to my earlier post here.

There are two styles of porridge that I cook at home – Hokkien Style or Cantonese Style. Hokkien style porridge is what you usually get when you visit economic rice stalls and ask for porridge. The rice grains can still be seen, and the porridge is typically watery. Cantonese style porridge is what you get when you go to a restaurant such as Crystal Jade, or any dim sum place and ask for porridge. It is thicker and the grains are not very visible.

My mom prefers the Hokkien Style porridge with separate dishes of ingredients, while my husband prefers the Cantonese style porridge. The recipe below is for the latter.

Chicken and Century Egg porridge
Serves 4

Ingredients:
2 cups of rice, washed and drained dry
1/2 tsp salt
1 tsp oil

4 cups of water
2-3 cups of chicken stock
3 dried scallops
200g chicken breast meat, sliced
3 century eggs, cubed

salt and pepper to taste
2 stalks of spring onions, chopped
sesame oil

Method:

  1. Mix salt and oil into drained rice and set aside for 20 minutes.
  2. In a large pot, bring water and chicken stock to a boil. Stir in rice and dried scallops.
  3. Allow porridge to boil over a medium high flame for 10 minutes, and add in the chicken slices.
  4. Reduce flame and allow porridge to simmer, stirring once in a while.
  5. When porridge is almost ready (approximately 20 – 30 minutes), add in century egg cubes. Porridge should be of a smooth consistency.
  6. Add salt and pepper to taste.
  7. Dish out into bowls and garnish with spring onion, pepper and sesame oil.
  8. Serve hot.

Cheesy Crab Cakes

I salute those housewives who cook dinner everyday and not run out of inspiration of what to cook. Because after just two weeks or so of doing so, I am fast running out of ideas and with the growing bump, energy. Yes, since I’m the one who’s at home these days while the hubby is studying, the responsibility of cooking dinner every night seems to have fallen on my shoulders – at least for a week or so more before I pop. Most of the nights it’s Chinese food, but there are days when you do not want to do another stir-fry or see another bowl of rice. Last Saturday was one of those days.

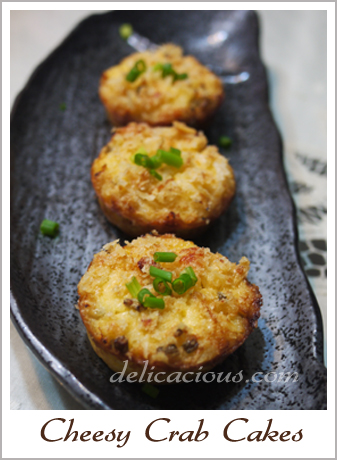
I checked the freezer and found soft frozen crab meat and so decided to do something with it. I didn’t quite want to do a pasta, seeing that both of us had a rather heavy lunch and so decided on these crab cakes. Most crab cakes need to be fried, which was simply too much work when you want a simple meal and so I decided to use a recipe that didn’t require frying, just baking. I served these up with a mushroom soup and a simple salad – a simple yet tasty meal on a weekend evening.

Cheesy Crab Cakes
 
Author:
Serves: 12
Ingredients
Crab mixture
  • 4 ounces cream cheese
  • ⅛ cup grated Parmesan cheese
  • 1 egg
  • 2 tbsp sour cream
  • ½ tsp orange zest
  • ¼ tsp lemon zest
  • ⅛ tsp coarse sea salt
  • Pinch of cayenne pepper
  • 3 oz crabmeat
  • 1 tbsp chopped spring onions
Base and topping
  • ½ cup Japanese breadcrumbs
  • 1 oz unsalted butter, melted
  • 1 tbsp chopped spring onions
  • Salt and pepper
Instructions
  1. Preheat oven to 350ºF and lightly grease a 12 cup muffin tin.
  2. Using a standing or hand-held mixer, beat cream cheese till smooth.
  3. Add in Parmesan cheese, egg and sour cream and beat to blend.
  4. Next, beat in the orange and lemon zests, sea salt, cayenne pepper and spring onions.
  5. Fold in the crab meat and set aside.
  6. In a small bowl, combine breadcrumbs, melted butter and chopped spring onions. Season with salt and pepper.
  7. Place a teaspoon of breadcrumb mixture at the bottom of each muffin cup and flatten it using the back of a spoon.
  8. Top with a generous amount of crab mixture.
  9. Sprinkle another tsp of breadcrumb mixture at the top.
  10. Bake crab cakes for about 25 minutes, until golden on top. Serve warm.
Notes
Adapted from Bon Appetit

Crab Meat Squid Ink Linguine

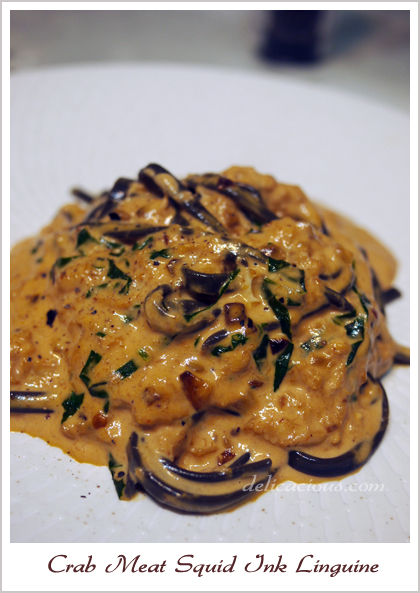
I had attempted something similar awhile back, but didn’t have squid ink linguine then. After acquiring some lately, I decided to give it another shot, and document the recipe if it tastes good. Even though I would not attempt to compare it with my favourite crab meat squid ink pasta from Valentinos, I do think that my attempt to reproduce the very popular pasta dish was a rather good one. Perhaps the next time, I will try using crushed tomatoes instead, and see if that improves the flavour. For now, here’s version 1.

Crab Meat Squid Ink Linguine
Serves 2

Ingredients:
4 oz dried squid ink linguine
3 tbsp olive oil
3 garlic cloves, minced
3/4 tsp crushed red peppers
1/4 cup of basil leaves, sliced thinly
4 oz lump crabmeat
4 tbsp tomato paste (not ketchup)
1 1/2 cup of cream
salt and black pepper to taste

Method:

  1. Bring water to boil in a large pot and salt liberally. Add in pasta and cook until tender but firm. Drain thoroughly.
  2. Heat olive oil in a pan and add in minced garlic and crushed red peppers. Cook till garlic is golden.
  3. Add in the crab meat and the basil and stir fry for a minute or two.
  4. Add in the tomato paste and mix to combine.
  5. Lower the flame and add in the cream, stirring to combine until the tomato paste is well mixed with the cream.
  6. Allow the cream to come to a gentle boil, stirring continuously. Season with salt and pepper.
  7. Add in the cooked linguine and toss to combine.
  8. Serve on warmed plates.

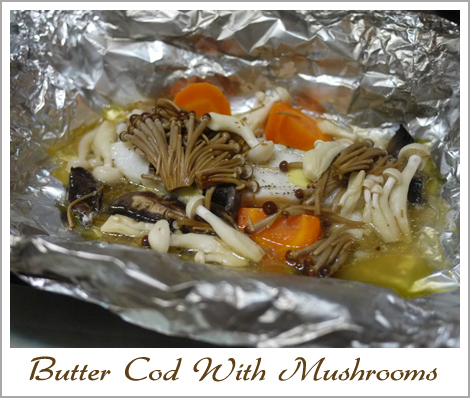
Foil baked butter cod with mushrooms

Mid week Wednesday seems to come by so quickly. Instead of the usual eating out on weekdays (since we’re both too tired to cook), I thought that I’d fix something “simple”. Home cooked food is always healthier anyway. We decided on something Japanese, seeing that we had some japanese ingredients that we hadn’t yet used up. Hubby had been craving for cod since last week and so I figured why not? We can simply merge the two ideas together: Japanese and cod. I didn’t have a recipe for this, but I vaguely remember eating something similar at Ichiban Boshi once, and so I decided to experiment.  The result?

Serves 2

Ingredients:
2 pieces of cod fish  (or buy a piece of cod steak and halve it)
2 Handfuls of Japanese mushrooms (Shimeiji, Bunashimeiji, nametaki etc)
Half a carrot, cut into chunks and partially boiled
2 tbsp of butter (room temperature)
1 tbsp mirin
salt and ground black pepper

Method:

  1. Preheat oven to 220°C.
  2. Cut two large pieces of aluminium foil and fold them into half. Lightly grease the centre of the foil with oil. Make a well in each piece.
  3. Season the cod with salt and pepper.
  4. Place cod in the centre of foil. Add mirin and top cod with a tablespoon of butter.
  5. Add mushrooms and carrots and wrap up parcel. When wrapping parcel, remember to leave some room for the parcel to expand.
  6. Place foil parcels on a baking tray and bake for 10-15 minutes (depending on size of fish)
  7. Serve hot with rice.

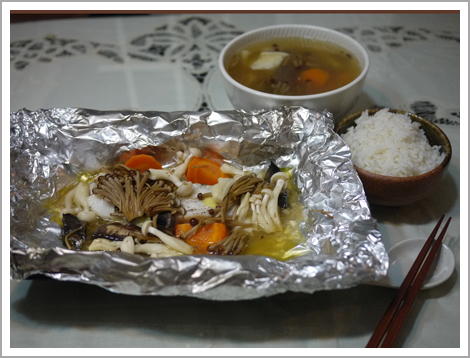
PS: The soup seen in the second picture is a simple dashi stock with added vegetables and tofu. The dashi stock was made from scratch by soaking kombu in water for 1.5 hours, then heating the water with kombu till it just boils. Remove kombu and add 1/2 cup of bonito flakes. Turn off the flame. After some time, strain the soup. Season to taste.


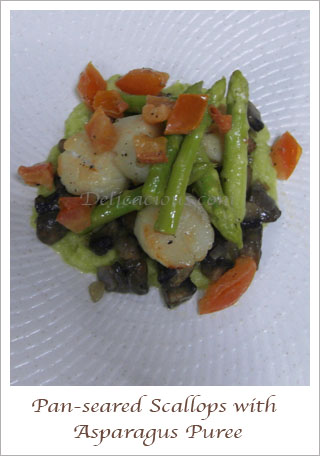
Pan-seared scallops with Mushrooms and Asparagus Puree

I made this dish for dinner when mom came over on the eve of National Day. It was a recipe adapted from Thomas Keller’s “The French Laundry Cookbook”. Soft and tender pan-seared scallops accompanied by mushrooms and asparagus puree. This dish has a myriad of interesting flavours and textures. Everything turned out really tasty and mom raved about it. Dinner was completed with a serving of homemade passion fruit ice-cream with dark chocolate ganache.

scallops

Pan-seared scallops with Mushrooms and Asparagus Puree
 
Serves: 2
Ingredients
  • 10 stalks of asparagus
  • ¾ cup chicken stock
  • 6-8 brown button mushrooms, chopped into cubes
  • 3 tablespoons unsalted butter
  • 1 small sprig of thyme
  • 2 cloves of garlic, meshed and finely chopped
  • ½ tablespoon chopped shallots
  • 1 tablespoon cubed tomatoes
  • 8 medium sized scallops
  • Canola oil
  • white pepper and sea salt to taste
Instructions
  1. Trim away the bottom ⅓ of the asparagus. Cut 1.5 inch long tips from the spears and reserve the stalks.
  2. Blanch the tips in boiling water till just tender and remove to an ice-water bath. Blanch the stalks in boiling water till fully cooked and remove to an ice-water bath.
  3. Puree the stalks in a blender with just enough stock for them to turn. Alternatively, use a hand-held blender.
  4. Pour the puree into a fine sieve and allow to stand for 5 to 10 min to allow the excess liquids to drain. Set aside.
  5. Heat 1 tablespoon butter in a saute pan. When hot, add mushrooms, thyme and garlic. Add the shallot and cook for another minute or so. Remove from heat and season with salt and pepper. Keep warm.
  6. Warm the asparagus tips with the tomatoes and 1 tablespoon of butter over low heat. In a small saucepan, warm the asparagus puree and whisk in the remaining 1 tablespoon of butter. Season both with salt and pepper. Keep warm.
  7. In a skillet, heat the canola oil over medium heat. Dry the scallops and season with salt, place them on the pan. Cook the scallops for only a minute or so on each side, or until they're golden browned. Do not overcook them or they'll become tough and stringy.
  8. To serve, place a spoonful of puree on each plate. Centre a spoonful of mushroom mixture over it and top with the scallops. Arrange the asparagus tips and tomatoes over the scallops.