Blueberry wholewheat pancakes for #cookforfamily

wholewheat pancakes

Yes it’s the Cook For Family event again and this time it’s for ONE WHOLE WEEK! It was planned to coincide intentionally with Singapore’s Eat With Your Family Day happening next Friday, 31 May. So, Cook For Family is encouraging everyone to join in the fun and cook a meal for your family this week!

I decided to kickstart this week’s cooking with these blueberry wholewheat pancakes. These are butter free (I used olive oil as a substitute) and made with whole wheat flour. The original recipe called for buttermilk but I used a buttermilk substitute instead. Simply add 1 tbsp of vinegar and top up with milk till it forms one cup. This gives 1 cup of buttermilk substitute.

little chef

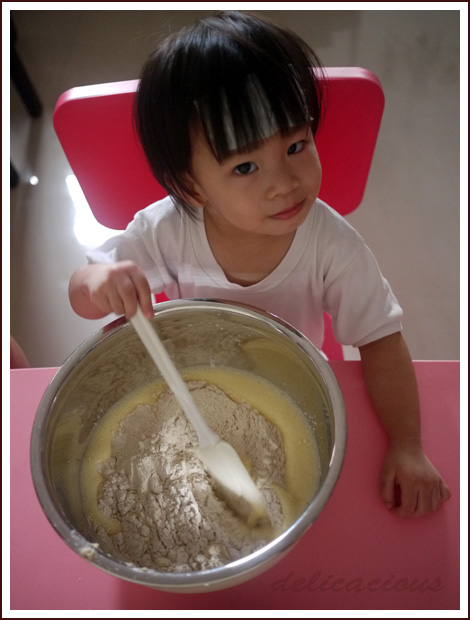
I enlisted the help of my very young chef to make these pancakes. She’s running a slight temperature but she was very happy to help!

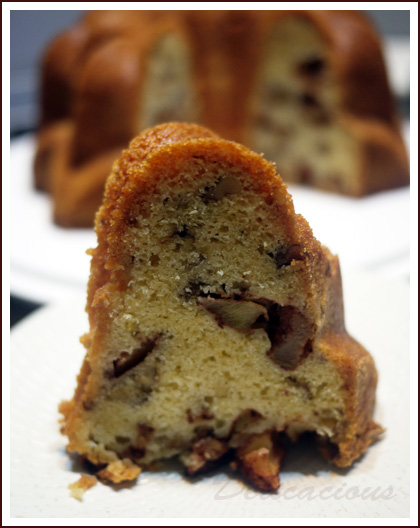
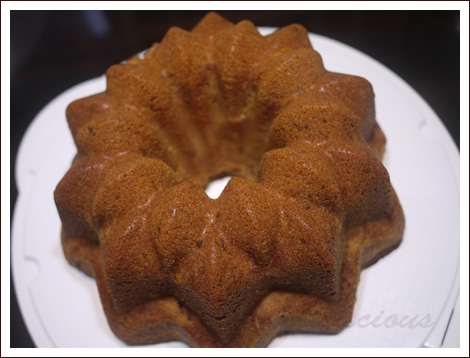
The resulting pancakes are fluffy and moist, but I want to try tweaking the recipe to reduce the amount of baking powder it called for. Somehow the amount that the recipe called for gave the pancakes a slightly metallic taste in my opinion. I happened to chat with a friend and she mentioned “aluminium-free baking powder”. It’s not easily available over here and I’ve never heard of it! Now I’ve got to go find it. Once I’ve tried it out, I will post the recipe.

If you wish to join the Cook For Family event, you still have time! You don’t have to be in Singapore, we have people participating from all over the world! Check out the facebook event link here.


Apple walnut bundt cake

apple bundt 1

Not so long ago there was this fruit sale at my office (yeah, to encourage us to eat healthy). My friend was in-charge of the sale and she was asking me to buy the apples. So I told her jokingly, “Buy them for me and I will bake you something.” WRONG MOVE. An hour later, I had 5 apples sitting on my table and I had to make good my word. I went home and lo and behold, my mom had bought another 4 apples. So I had 9 apples, and I better make something with it, fast.

So I flipped through my books for a simple recipe of something that required a lot of apples. I didn’t want to make a tart because it seemed like too much work for a late night baking session. When I came across this apple cake recipe that required 6 apples, I knew it was the one.

apple bundt 2

Enters apple bundt cake. The original recipe called for the cake to be baked in a tube pan. I didn’t have a tube pan, but I have several bundt pans and figured that they would do the job too. Bundt pans typically do an excellent job in getting the cake evenly baked while keeping it moist. Sounds like the perfect pan to use for this cake. I also like bundt cakes because they typically feed a crowd, and are so easy to cut up and serve (just follow the markings on the cake and you have a perfectly divided cake). They also look pretty and the cake hardly needs any decoration, though a dusting of powdered sugar would perhaps complete the look.

The cake was every bit what it promised to be – fully apple-ly and fully cake. Apples and cinnamon. Add walnuts and you will never go wrong. The walnuts add texture to the already flavourful cake and the bundt pan kept the cake oh so moist. Colleagues raved about it and I am sure you would too, if you try it.

Apple bundt cake
 
An excellent apple bundt cake that's filled with apples, accentuated with walnuts and the flavour of cinnamon.
Recipe type: Cake
Serves: 12-16
Ingredients
  • 6 apples, peeled and cut into ½ inch chunks
  • 1 tbsp ground cinnamon
  • 1½ cup plus 5 tbsp sugar
  • 2¾ cups plain flour
  • 1 tbsp baking powder
  • 1 tsp salt
  • 1 cup canola/vegetable oil
  • ¼ cup orange juice
  • 2½ tsp vanilla extract
  • 4 eggs
  • 1 cup walnuts, chopped
Instructions
  1. Preheat oven to 175°C.
  2. Butter and flour a 10-12 cup large bundt pan or use non-stick spray.
  3. Toss chopped apples with 5 tbsp sugar and cinnamon. Set aside.
  4. Sift the flour, baking powder and salt together in a large bowl.
  5. In a standing mixer fitted with the paddle attachment, combine oil, orange juice, remaining sugar, vanilla extract and eggs.
  6. Add in flour mixture in 2 parts with mixer on low. Scrape bowl to ensure even incorporation. Stir in walnuts.
  7. Pour half of the batter into the pan. Spread half the apple chunks.
  8. Top up pan with remaining batter and spread evenly.
  9. Arrange remaining apple on top.
  10. Bake for 1½ hours, or until a tester comes out clean.
  11. Allow to cool completely in pan before turning it out onto a serving plate.
Notes
Recipe is adapted from The Smitten Kitchen Cookbook

Steamed Red Bean Buns (Tau Sar Pau)

red bean buns1

Two weeks ago, my mother went for a class to learn how to make steamed red bean buns. A few days later, she tried to replicate the recipe with not-so-successful results. The bread of the buns tasted weird, and the red bean filling was grainy. Needless to say, she was rather discouraged even though we tried to render support by eating a few of the buns.

red bean buns 2

So on Saturday, in preparation for Mother’s Day, I decided to make my version of steamed red bean buns. I combed through many variations of making red bean paste and pau dough, and came up with my own variation. It was a success! True, it was much work making the red bean paste from scratch and it required some forward planning, something that is not my forte. But the results were rewarding – especially when the red bean paste actually tastes like red bean, and not some sweetened mush that you buy in a packet.

red bean buns 3

My husband participated in the making of the buns too! His favourite activity? Making animal faces. He became very popular with my daughter after she saw this little piggy. His effort disappeared in a couple of minutes though, as my daughter declared that she was going to eat the piggy soon after she saw it.

So you’ve decided that you want to embark on the journey of making your very own steamed buns? Here are some photo tips.

red bean paste steps

  1. When straining the red bean paste into the bowl, immerse the sieve into the red bean water. This will help remove the skins. After straining the paste twice, you should get a water red bean paste mixture.
  2. When squeezing out excess water, be careful not to squeeze out too much water. The paste should not be crumbly, and you should be able to form indentations with a spoon or finger.
  3. When mixing the red bean paste with sugar, the paste will become more fluid and glossy. Mix until you obtain the thickness of paste that you desire.
  4. The completed red bean paste should look like this.
  5. Guide to making steamed buns
  1. Ensure that your yeast is active. It should foam like shown in the picture.
  2. After kneading in the mixer (or by hand), the dough should be smooth and should not be sticky. Shape it into a ball and allow it to rest.
  3. It should triple in volume.
  4. Knead the dough gently and divide the dough into 14 equal pieces (my pieces are not very equal). This dough handles very easily.
  5. Enclose the red bean paste filling by forming little pleats and pinching the dough towards the centre. This forms the base.
  6. Ensure that your buns are spaced at least 2 – 2.5 inches apart as they will expand when they steam.

So now you are ready to try to make your own steamed buns!

Steamed Red Bean Buns (Tau Sar Pau)
 
A recipe on making steamed red bean buns (tau sar pau) from scratch! Make your own red bean paste (tau sar) and sweeten it according to your taste.
Recipe type: Bread
Cuisine: Chinese
Serves: 14
Ingredients
Red Bean Paste (Tau Sar)
  • 1 cup of red beans
  • ¾ to 1 cup of sugar
Dough
  • 3 tbsp sugar
  • ⅞ cup warm water
  • 11/2 tsp dried yeast
  • 3 cups Hong Kong flour
  • 11/2 tsp baking powder
  • 1 tbsp shortening
Instructions
Red Bean Paste
  1. Soak red beans in water overnight. The water should cover the red beans.
  2. Pour away the water used to soak the red beans.
  3. In a large pot, add the soaked red beans. Add water to the pot - it should be about 1 inch above the red beans.
  4. Bring to a boil over a medium flame and turn off the flame. Allow it to stand for about 10 minutes. Pour away the hot water.
  5. Fill the pot once again with water till about 1 inch above the red beans.
  6. Bring to a boil and then turn the flame down.
  7. Simmer for about 1 hour, or until red beans are soft.
  8. Sieve the red beans and water into a large bowl.
  9. Using a metal spoon, mash the red beans in the sieve, leaving only the red bean skins behind. Repeat till all the red beans are mashed and skins removed. Wash the sieve.
  10. Sieve the red bean paste and water through the sieve to remove any bits.
  11. Using a cheesecloth bag, squeeze out excess water from the red bean paste and water mixture.
  12. Put the paste into a metal pot over medium heat. Add sugar (according to your taste) to the paste and stir in a back and forth motion till the sugar dissolves. The paste will become more fluid.
  13. Continue to stir in a back and forth motion until you reach the desired thickness for your paste.
  14. Optional: If you'd like your paste to be more glossy, you can fry your red bean paste in 1-2 tbsp of vegetable oil after the last step.
  15. Allow red bean paste to cool to room temperature. Keep in fridge until required.
  16. Shape red bean paste into 1 oz balls and set aside till dough is ready.
Dough
  1. In a bowl, dissolve sugar in warm water.
  2. Sprinkle yeast on the surface of the water and allow it to foam (about 10 minutes).
  3. Meanwhile, sift flour and baking powder into the bowl of a standing mixer prepared with a dough hook.
  4. Add shortening.
  5. When the yeast mixture foams, add it to the flour mixture in the mixer bowl.
  6. Knead the dough using the mixer for about 5-7 minutes, until it is smooth and does not stick. (If using hands, this step takes about 10-12 minutes).
  7. Remove dough from the mixer bowl and shape it into a ball.
  8. Place in a large clean bowl and cover with cling wrap.
  9. Allow it to rise in a warm place till it triples in volume.
  10. Remove from the bowl and knead it slightly to remove some air.
  11. Divide the dough into two portions and roll each portion into a log.
  12. Divide each log into 7 equal pieces.
  13. Shape each piece with your palm till it is a 10-12cm in diameter circle.
  14. Add a ball of red bean paste to the centre. Enclose the red bean paste by forming neat pleats and folding towards the centre. Place the folded side on a piece of small baking paper.
  15. Repeat till all the dough and paste has been used up.
  16. Let the buns stand for about 15 minutes before arranging them in a bamboo steamer. The buns should be about 2 inches apart as they will expand.
  17. Steam for 10 minutes.
  18. Serve hot or cool to room temperature and freeze.

BBQ cum Potluck gathering

Salad 1st of May is Labour Day and we celebrated Labour Day by having a BBQ cum potluck gathering with CG friends. The menu was quite varied – salad, chip and dips, pasta, wings, slaw and the list goes on. The highlights of the evening in my opinion were the beef and the ribs, and oh yes, the cornbread.

dry rub ribs The dry rub ribs were prepared painstakingly by Andrew, our host and main chef. He prepared 10 slabs of ribs and slow-baked them in the oven. In addition to the ribs, he prepared a oh-so-delicious cornbread (I need to ask him for the recipe) and slaw.

cornbread I’ve tried a few variations of cornbread but I’d have to say this is one of the best. Initially when we were cutting through the cornbread, we thought it was not baked long enough as it seemed a little sticky. However, it turned out superbly moist and yet it didn’t stick to the teeth. And yes, it is chock full of corn. Did I say I need to ask him for his recipe?

grilled beef The beef. One of our dear friends bought rib-eyed steaks and delivered them to the BBQ even though he could not be there. The guys grilled them up and the result is seen in the picture above. Succulent, flavourful, juicy steaks.

slaw There were desserts of course – apple crumble and my humble red wine chocolate cake. Everyone ate and was satisfied beyond measure. No surprise that there were mentions of gym visits today.

Beef daube

beef daube I love beef stews cooked with red wine. Red wine adds a depth and flavour that stock alone cannot achieve. So when my mother-in-law bought a batch of brisket for stewing, I could not resist trying out this recipe from Dorie Greenspan’s book – Around my french table. I have made a few changes though, to reduce the alcohol amount and have also added mushrooms to it. Through the long hours of cooking (2.5 hours), the alcohol does boil off a little but a significant amount remains.

I made this recipe at night, let it cool overnight and reheated it the next day. I then added the sauteed mushrooms to it. It tastes even better the next day as the flavours combine. I will definitely be making this fuss-free recipe again.

Beef Daube

Serves 4-6
From book Adapted from around my french table

Ingredients

  • 4 medium slices bacon (cut into 1-inch wide pieces)
  • 1kg beef brisket (cut into 2-3 inch cubes)
  • 2 tablespoons canola oil
  • salt and pepper
  • 2 yellow onions (thinly sliced)
  • 1 garlic head (halved horizontally)
  • 3 large carrots (halved horizontally, then quartered lengthwise)
  • 250ml beef stock
  • 500ml red wine
  • 1 sprig dried thyme (or 2 sprigs fresh thyme)
  • 1/4 teaspoon dried rosemary
  • 1/4 teaspoon dried parsley
  • 2 bay leaves
  • 400g button mushrooms (sliced thickly)
  • 2 teaspoons olive oil
  • 1/4 teaspoon dried parsley

Directions

Step 1
Centre an oven rack and preheat oven to 175°C.
Step 2
Put a dutch oven over medium heat and cook the bacon till the bacon just browns. Transfer bacon to a bowl.
Step 3
Dry the beef between sheets of kitchen paper and season with salt and pepper. Add 1 tbsp canola oil to the bacon fat and brown beef in batches. Set aside.
Step 4
Pour off oil in pot, add remaining 1 tbsp of oil and heat it over medium heat. Add in onions and cook till onions soften. Throw in the garlic and carrots and stir to combine. Pour in the red wine, scraping up the brown bits from the bacon.
Step 5
Add in the beef stock, beef and bacon, and herbs. Stir and bring everything to a boil.
Step 6
Place a piece of foil over the pot and cover with the lid. Slide the pot into the oven and allow it to braise for 1 hour.
Step 7
Pull pot out of oven, give everything a stir, and return for another 1.5 hours. Season with salt and pepper. (At this point, you can cool the daube to room temperature and chill it for up to 3 days in the fridge).
Step 8
In a small skillet, heat 2 tsp of olive oil and add in the mushrooms and parsley. Season with salt and pepper. Cook till mushroom releases their liquids. Allow the liquids to cook off before adding mushrooms to the daube.
Step 9
Remove the bay leaves, thyme sprigs and garlic head. Serve hot over mash potatoes or buttered rice.

Red wine chocolate cake with mascarpone cream

redwinecake2 I posted some time earlier about a red wine chocolate bundt cake that received rave reviews from my friends. So when I had half a bottle of unfinished red wine, I thought about baking that cake again. While surfing though, I came across a recipe on smitten kitchen that looked simpler and really good. So I tried that instead and tested it on my colleagues.

The texture of the cake is a cross between a brownie and a cake. It is dense but moist and boy was it rich. Deb from smitten kitchen calls it the real velvet cake and I think she is right. The cake is baked at a fairly low temperature of 160°C and so the alcohol does not boil off much. The red wine flavour comes through really strongly so my advice would be to use a fairly good bottle of red wine. I used a merlot for this cake, but you can use pretty much any kind you like. The mascarpone cream topping is a must. Do not omit that!

Red wine chocolate cake with mascarpone cream

Website adapted from smitten kitchen

Ingredients

cake

  • 3oz unsalted butter (at room temperature)
  • 2/3 cups brown sugar
  • 1/4 cup caster sugar
  • 1 egg + 1 yolk
  • 3/4 cups red wine
  • 1 teaspoon vanilla extract
  • 1 Cup + 1 Tablespoon plain flour
  • 1/2 cup Dutch processed cocoa powder
  • 1/2 teaspoon baking powder
  • 1/8 teaspoon baking soda
  • 1/4 teaspoon salt
  • 1/4 teaspoon ground cinnamon

mascarpone cream

  • 1/2 cup mascarpone cheese
  • 1/2 cup chilled whipping cream
  • 2 tablespoons caster sugar
  • 1/2 teaspoon vanilla extract

Directions

Step 1
Preheat oven to 160°C. Line a 9 inch round cake pan and spray the interior with a non-stick spray.
Step 2
Using a standing or a handheld mixer, cream butter until smooth then add the sugars and beat till light and fluffy.
Step 3
Add the egg and yolk, then the red wine and the vanilla and beat after each addition. The batter will look lumpy.
Step 4
In a separate large bowl, sift together flour, cocoa powder, baking powder, baking soda, salt and cinnamon.
Step 5
Sift the ingredients over the wet ingredients and combine on low speed. Fold in the last bits with a rubber spatula. Do not overmix!
Step 6
Bake for 25 minutes on the centre rack of the oven. The tester should come out clean. Do not overbake or the cake will be dry.
Step 7
Cool for 5-10 minutes in the tin then turn it out onto a rack and cool till it comes to room temperature. Dust with icing sugar if you like.
Step 8
Whip together mascarpone cheese, whipping cream, sugar and vanilla extract till soft peaks form. (Cream can be refrigerated for a couple of hours)
Step 9
Serve each slice of cake with a large dollop of cream.

Easy Beef Stroganoff

stroganoff2 There are days where my family feels like having beef for dinner, but steak is well, too heavy. These are the times when I make stroganoff. It is somewhat of a comfort food to us, and I serve it over buttered noodles or rice. I usually use tenderloin, though there is no stopping you from using other cuts of beef such as rib-eye. My mother-in-law buys us nice pieces of tenderloin from Ghim Moh market often enough and so we usually have beef stashed in our fridge.

Even though beef stroganoff sounds like a fanciful dish, it really is quite simple to prepare, and requires but a few ingredients. I must emphasise here that dijon mustard is paramount to the taste of this dish – you must include it. I am not a big mustard fan, but the addition of the mustard in this dish brings out the flavours so much more.

stroganoff1

Easy Beef Stroganoff

Serves 3-4
From magazine Adapted from Bon Appetit

Ingredients

  • 600g beef tenderloin (cut into 2X1X1/2 inch strips)
  • 2 tablespoons olive oil
  • 4 tablespoons olive oil
  • 1/4 cup chopped shallots
  • 300g brown button mushrooms (sliced thickly)
  • 1 cup chicken/beef broth (low sodium)
  • 3/4 cups whipping cream
  • 2 teaspoons dijon mustard
  • 1/2 teaspoon dried dill
  • 1/4 teaspoon paprika
  • salt and black pepper

Directions

Step 1
Dry beef strips using paper towels. In a large skillet, heat 2 tbsp oil over high heat. Brown beef strips in batches. Set aside.
Step 2
Add remaining oil to skillet and saute shallots until tender. Add mushrooms and stir fry till liquids evaporate slightly. Season with black pepper.
Step 3
Add in stock and simmer till stock thickens about 10 minutes. Stir in cream and dijon mustard. Add in beef and simmer till heated through.
Step 4
Stir in dill and paprika. Season with salt and pepper.
Step 5
Serve hot over rice or buttered noodles.