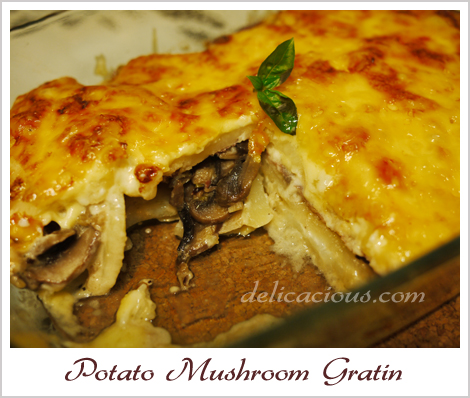
Potato Mushroom Gratin

It was one of those days where we had potatoes to spare after making mash potatoes for dinner the previous night. We wanted something simple – a one dish meal paired with perhaps a salad, and so a gratin seemed like a good choice. When making potato gratins, I find that boiling the potatoes in milk or cream gives them a melt-in-your-mouth texture, and also improves the flavour of the entire dish. For gratins or baked rice/pastas, Swiss cheese (Gruyere especially) is the preferred choice as they yield a creamier result. I couldn’t find any Swiss cheese in that particular supermarket and chose to substitute it with Gouda, which though is a less preferred choice, still made a great gratin.

Potato Mushroom Gratin
Serves 2 generously

Ingredients:
2 tbsp olive oil
1 cup chopped leeks (only the white and pale green parts)
170g sliced button mushrooms
2 garlic cloves, minced
340g russet potatoes, peeled and sliced to about 0.5 cm thick
1 cup half and half
1/2 tsp salt
1/2 tsp pepper
1/2 cup grated Swiss cheese
salt and black pepper

Method:

  1. Heat oil in a frying pan and sauteed leeks till soft and lightly brown, about 8 minutes.
  2. Add mushrooms, season with salt and pepper and sauteed till soft and liquid almost evaporates, about 6 – 8 minutes.
  3. Add garlic and sauteed for another minute.
  4. Set aside.
  5. In a saucepan, combine half-and-half  with salt and pepper and add in the sliced potatoes. Bring to a boil and simmer till potatoes are partially cooked and half of the liquid has evaporated, about 3 minutes.
  6. Preheat oven to 375ºF. Grease a gratin dish and transfer half of the potato mixture to the dish. Top with mushroom mixture and cover with the remaining potato mixture. Sprinkle cheese evenly over the potato mixture.
  7. Tent dish with foil and bake for 20 minutes. Uncover and bake for another 15 – 20 minutes, until cheese is bubbling and golden brown.
  8. Let it rest for about 5 – 10 minutes before serving hot.
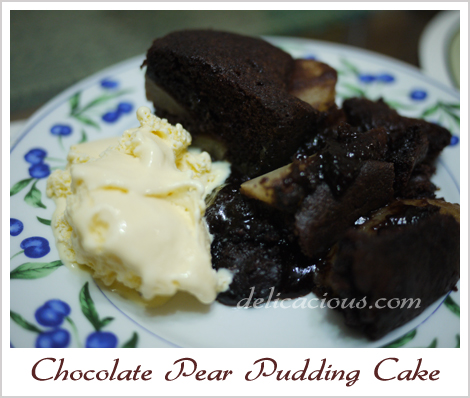
Chocolate Pear Pudding Cake

Ever had those days where you needed a dessert but had too little time? Well, yesterday was one of those days. Hubby and I had a wedding to attend in the afternoon but were also invited to dinner at a lovely couple’s place. Determined to bring along something home-baked for dessert and so started browsing through my collection of recipe books in the morning. I decided to try something from Nigella Express, a cookbook I rarely used. I had but one “small” problem. The recipe called for canned pears and we had none. Canned pears are not very common around here and I knew that I could probably only find it in the better supermarkets. I decided that I’d grab the pears after the wedding and attempt to finish the dessert in the short amount of time I had between the wedding and the dinner. This will definitely put Nigella Express to the test – could it deliver good food, fast?

I managed to find the pears in a decent supermarket after the wedding and proceeded home to start on the cake. I finished the preparations in about 20 minutes (my hubby helped to grease the pan and line the pears in the pan). The baking took another 30 minutes. The results? A delicious moist chocolate pudding cake that our host couple and their children (and ourselves of course) enjoyed. Definitely a recipe worth keeping.

Chocolate Pear Pudding Cake
(Makes one square cake, 8″ X 8″)
Adapted from Nigella Express

Ingredients:
1 large can pear halves in juice (About 465g drained weight)
3/4 cup sugar
3/4 cup + 1 tbsp plain flour
1/4 cup cocoa (dutch-processed)
5 oz unsalted butter
1 tsp baking powder
1/4 tsp baking soda
2 eggs (room temperature)
2 tsp vanilla extract

Method:

  1. Preheat oven to 400ºF. Grease an 8 inch square pan with butter.
  2. Drain pears and arrange them in the base of the dish.
  3. In a food processor, blitz butter and sugar till smooth. Add in eggs, roughly beaten and vanilla extract and blitz till combined.
  4. Lastly, add in flour, cocoa, baking powder and soda and blitz till you have a soft and smooth batter.
  5. Spread the batter over the pears and bake in the oven for 25 – 30 minutes.
  6. Let it stand for 5 to 10 minutes and then cut into 9 slices. Serve with chocolate sauce or vanilla ice-cream.

Tip: To get a gooey molten centre in the cake, do not overbake!

Sticky Date Pudding

The dates had been sitting in the fridge, unopened in their package for many many months. It’s a good thing that dates keep well as I have a bad habit of buying stuff and not using them. One Sunday afternoon, after flipping through a few recipe books, I decided that I would use them in a sticky date pudding. The recipe looked simple, and so, thinking that I had ample time to complete it before dinner, I busied myself with other things. To my horror, I realised a few hours later that the chopped dates needed to be soaked in hot water for an hour before they could be used. Processing of the dates (pitting them and chopping them) also took longer than expected. I ended up with a bowl of mashed dates with insufficient time to complete the recipe. So the dates (mashed this time), went back to the fridge, in a bowl covered with cling film.

A few days later (didn’t I say dates keep well?), I finally had the time to finish the recipe. And oh wasn’t it lovely. The pudding melts in your mouth and the aroma of the dates, together with the toffee sauce was simply heavenly. Family members and colleagues all loved it and I believe you would too! This is definitely a recipe worth trying.

Sticky Date Pudding
(Makes 12 small cakes)
Recipe adapted from Desserts By The Yard

Ingredients:
8 ounces pitted Medijool dates, finely chopped
1 cup boiling water
1 3/4 cups all purpose flour
1 1/2 tsp baking powder
1/8 tsp salt
1 tsp baking soda
4 ounces unsalted butter, softened
3/4 cup packed light brown sugar
1/4 cup sugar
1/4 tsp grated orange zest
1 tsp Trablit coffee extract
2 large eggs, room temperature

Method:

  1. Place the chopped dates in a bowl and pour on boiling water. Let it sit for 1 hour.
  2. Preheat the oven to 350ºF with a rack placed in the middle shelf. Butter 2 cupcake trays.
  3. Sift together flour, baking powder and salt.
  4. Mash dates in the bowl with the water. Stir in baking soda and set aside.
  5. Using a stand mixer, cream butter, brown sugar, sugar, orange zest and coffee extract on medium until fluffy.
  6. Add eggs one at a time, scraping down the bowl after each addition.
  7. Beating on low speed, alternate half the date mixture with half the flour mixture.
  8. Add in the remaining date mixture, then the flour mixture.
  9. Pour into prepared cupcake tray and place in the oven.
  10. Bake for 15 minutes, rotate the pan from front to back and bake for another 10 minutes.
  11. When the cake is done, remove from oven. While the cake is still hot, poke the cake in several places with a skewer and pour on the toffee sauce (see below).
  12. Serve warm, with vanilla bean ice-cream for extra decadence.

Toffee Sauce

Ingredients:
3/4 cup packed dark brown sugar
1 cup heavy cream
1 tbsp unsalted butter
1 tbsp vanilla bean paste
1/4 cup milk
2 tbsp light corn syrup
1 tbsp water (optional)

Method:

  1. Place the brown sugar, cream, butter, vanilla paste, milk and corn syrup in a heavy saucepan.
  2. Simmer over medium-high heat until the mixture thickens and cots the back of a spoon, about 10 minutes.
  3. Continue to cook until golden brown, 1 to 2 minutes more.
  4. Remove from heat and keep warm.

Lemon Basil Sherbet

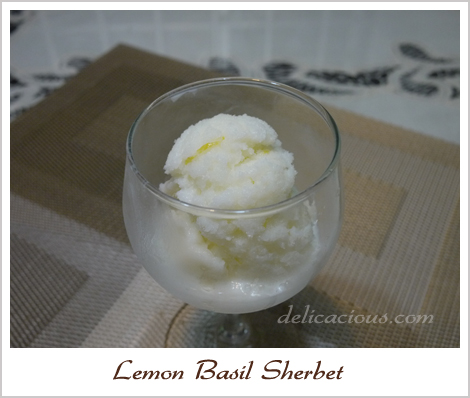
What does one do when she has four lemons leftover in the fridge? Think of a dessert to make with them, of course. I came across the recipe below as I was flipping through Alice Medrich’s Pure Dessert. The heading “lemon-basil sherbet” immediately appealed to me because I had two pots of basil growing crazily on the ledge of my corridor. They definitely needed trimming. I made some small changes to the recipe in the book. The recipe (with my changes) is shared below.

The result was a thoroughly refreshing dessert. It was very tangy of course, with some hint of sweetness. The fragrance of the basil definitely came through. A perfect treat on a hot day.

Lemon Basil Sherbet
(Serves 10)

Ingredients:
3/4 cup of lemon juice (from 4 lemons)
1 1/2 cups of sugar
1 cup of basil leaves
4 cups of milk
1 tbsp grated lemon zest

Method:

  1. Mix together sugar, lemon juice and basil leaves in a medium bowl. Let it sit for at least one hour, up to three hours.
  2. Stir the milk into the lemon juice mixture. The mixture will curdle a little. Strain the mixture, pressing on the basil leaves. Discard the leaves.
  3. Add the lemon zest and mix well.
  4. Pour the mixture into a shallow tray and freeze till hard, about 4 hours.
  5. Break up the chunks of frozen mixture and process in a food processor until smooth.
  6. Freeze again till hard, at least four to five hours.
  7. If the sherbet is too hard to scoop, let it stand for a few minutes after removing from freezer.

Crustless Spinach Quiche

I had bought a packet of frozen spinach last week, meaning to cook creamed spinach some time this week. When this did not materialise, I decided to do something else with the spinach.

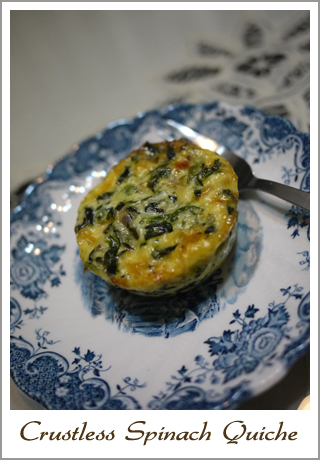
I was too lazy to roll out a crust, and so I decided that this quiche was going to be crustless. To save the trouble of having to cut it up, I decided to bake the quiche mixture in a cupcake tin. I used some aged pecorino cheese in place of gruyere cheese, the typical choice for quiches.

The quiche turned out nicely, though I think it was a tad bit salty, as I forgot that pecorino is saltier than gruyere, and forgot to cut down the salt.

Crustless Spinach Quiche
(Makes 10 mini quiche)

Ingredients:
1 packet of chopped frozen spinach
1 red onion, chopped
2 tbsp olive oil
4 eggs
1 1/2 cups of cream or half and half
1 cup of cheese (gruyere/pecorino/mozarella etc)
1/2 tsp of salt (or less)
1/4 tsp of ground black pepper
1/8 tsp of ground nutmeg

Method:

  1. Preheat oven to 205°C.
  2. Fry the chopped red onion in olive oil until fragrant and translucent.
  3. Add drained spinach until it wilts and is dry.
  4. Remove from heat to cool.
  5. In a large bowl, combine eggs, cream, cheese and seasonings.
  6. Add in cooled spinach and mix to combine.
  7. Fill 10 cupcake molds.
  8. Bake for 20 minutes or until tops of quiches are golden brown.

Pork wrapped asparagus with sesame seeds

My mom-in-law gave us two thick stalks of asparagus today. I decided to make use of some of the left over ingredients that we had to make something rather unique.

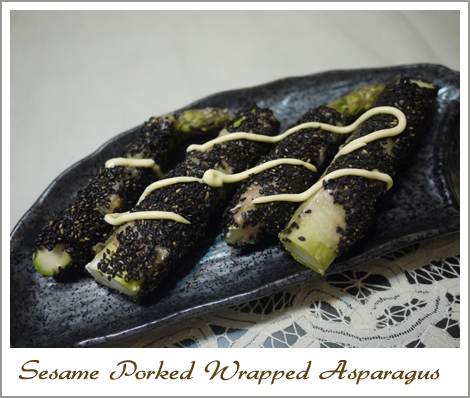
What’s that you ask? Well, it’s asparagus wrapped with thinly sliced pork and coated with sesame seeds. These are baked for just 5-10 minutes and they’re really very good. One bite into the asparagus and you taste a varety of flavours. The fragrance of the roasted sesame seeds blended with the pork and the juiciness of the asparagus. Yums. I will definitely do this again, maybe with white sesame seeds.

Ingredients:
12 stalks of asparagus (regular sized ones)
12 thin pieces of pork (substitute with proscuitto if you like)
1 cup of flour
1 cup of white/black sesame seeds
1 egg, beaten

Method:

  1. Wash and dry asparagus and remove skin of bottom half if necessary. If asparagus is too long, halve them.
  2. Coat asparagus with flour.
  3. Dip it in egg and coat evenly with sesame seeds.
  4. Place it on a baking tray lined with baking paper.
  5. Bake for 10 minutes at 180°C.
  6. Serve with mayonnaise or wasabi mayonnaise.

Foil baked butter cod with mushrooms

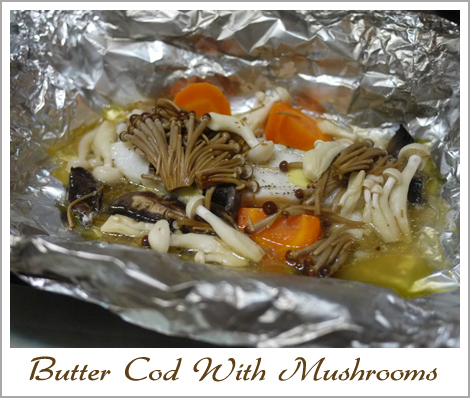
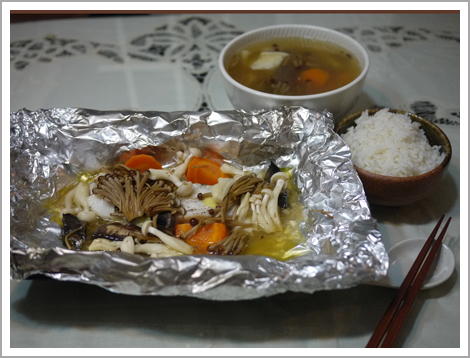
Mid week Wednesday seems to come by so quickly. Instead of the usual eating out on weekdays (since we’re both too tired to cook), I thought that I’d fix something “simple”. Home cooked food is always healthier anyway. We decided on something Japanese, seeing that we had some japanese ingredients that we hadn’t yet used up. Hubby had been craving for cod since last week and so I figured why not? We can simply merge the two ideas together: Japanese and cod. I didn’t have a recipe for this, but I vaguely remember eating something similar at Ichiban Boshi once, and so I decided to experiment.  The result?

Serves 2

Ingredients:
2 pieces of cod fish  (or buy a piece of cod steak and halve it)
2 Handfuls of Japanese mushrooms (Shimeiji, Bunashimeiji, nametaki etc)
Half a carrot, cut into chunks and partially boiled
2 tbsp of butter (room temperature)
1 tbsp mirin
salt and ground black pepper

Method:

  1. Preheat oven to 220°C.
  2. Cut two large pieces of aluminium foil and fold them into half. Lightly grease the centre of the foil with oil. Make a well in each piece.
  3. Season the cod with salt and pepper.
  4. Place cod in the centre of foil. Add mirin and top cod with a tablespoon of butter.
  5. Add mushrooms and carrots and wrap up parcel. When wrapping parcel, remember to leave some room for the parcel to expand.
  6. Place foil parcels on a baking tray and bake for 10-15 minutes (depending on size of fish)
  7. Serve hot with rice.

PS: The soup seen in the second picture is a simple dashi stock with added vegetables and tofu. The dashi stock was made from scratch by soaking kombu in water for 1.5 hours, then heating the water with kombu till it just boils. Remove kombu and add 1/2 cup of bonito flakes. Turn off the flame. After some time, strain the soup. Season to taste.